Victorian Sponge Cake


Victorian Sponge Cake

Makes: 1 Luscious 20cm cake

Victorian Sponge Cake

Ingredients:

  • 200g caster sugar
  • 200g softened butter, cubed
  • 200g self raising flour, sifted
  • 1 teaspoon baking powder
  • 4 eggs, lightly beaten at room temperature
  • 2 tablespoons milk


Method:

  • Preheat your oven to 190 degrees Celsius (170 for fan forced) it is essential that your oven is fully heated before putting your cake in otherwise it will not rise properly
  • Grease and line with non stick baking paper two x 20cm round cake tins
  • In a large bowl neat together all the ingredients with electric beaters until you have a silky smooth batter


  • THERMOCOOKING: Place all ingredients in the jug with the butterfly attachment [Speed 3, 30 seconds] scrape down the side with a spatula [Speed 3, 30 seconds]


  • Pour the batter evenly between the two prepared cake tins and smooth the mixture over with the back of a spoon
  • Bake for 20 minutes under golden and the cake springs back when gently touched
  • Allow to cool in the cake tin for 5 minutes before turning onto a wire rack to cool completely
  • Once the cakes have cooled completely fill with your choice of fillings and lightly dust the top of the cake with icing sugar


Recipe Notes:

  • Store in an airtight container below 27 degrees for a maximum of 5 days
  • This cake is freezer friendly unfilled
  • The picture shown has the cake will C4K Kitchen’s Raspberry Chia Jam and Raspberry Buttercream as a filling
  • You can cook as one full cake however will need to adjust the cooking time for an extra 5-10 minutes to allow the cake to cook through


C4K Kitchen Title Bar

Disclaimer: C4K Kitchen does not hold any responsibility for the consumer using this recipe including the storage guidelines and time frames recommended in the recipe notes.  The consumer holds all responsibilities to ensure that food hygiene and safety standards are adhered to.


Sweet Potato Donuts with Maple Glaze


Sweet Potato Donut with Maple Glaze

Makes: approximately 24 mini donuts & 12 standard donuts

Sweet Potato Donuts with Maple Glaze

Ingredients:

  • 2 cups plain flour
  • 2 teaspoons baking powder
  • 1/2 teaspoon all spice
  • 1/4 teaspoon cinnamon
  • 1/4 teaspoon nutmeg
  • 1/4 teaspoon salt
  • 1/4 cup raw or brown sugar
  • 1 cup pureed sweet potato
  • 2 eggs, lightly beaten
  • 1/4 cup milk
  • 30g butter, melted

Glaze Ingredients:

  • 2 teaspoons pure maple syrup
  • 1/2 – 3/4 cup icing sugar


Method:

  • Preheat oven to 180 degrees Celsius and grease your donut baking tray
  • Mix all dry ingredients together in a mixing bowl and mix well to ensure the spices are evenly mixed
  • Stir the eggs, milk and melted butter into the sweet potato and mix well
  • Finally mix the sweet potato mix in with the dry ingredients and combine well
  • Spoon the batter into a donut tin that has been generously sprayed with cooking spray
  • Bake for 12 minutes for mini donuts and about 17 minutes for normal donuts, they are cooked when they spring back when touched and a cake skewer comes out clean
  • To make the glaze,mix the maple syrup with sifted 1/2 icing sugar and combine very well with a fork, use the tip of the fork to squash any lumps, you may need to add a little more icing sugar to get the desired consistency
  • Dip the top of the donut into the icing to glaze and return to the cooling rack to allow the glaze to set.


Recipe Notes:

  • Store in an airtight container in the fridge for a maximum of 5 days
  • The donuts are freezer friendly without the glaze
  • For a healthy lunchbox snack these donuts are also delicious without the glaze


C4K Kitchen Title Bar 

Disclaimer: C4K Kitchen does not hold any responsibility for the consumer using this recipe including the storage guidelines and time frames recommended in the recipe notes.  The consumer holds all responsibilities to ensure that food hygiene and safety standards are adhered to.


Veggie Muffins


Veggie Muffins

Makes: 12-15

Veggie Muffins

Ingredients:

  • 1 cup SR flour
  • 1 cup wholemeal SR flour
  • 1/2 teaspoon baking powder
  • 3 cups mixed vegetables and fresh herbs (see recipe notes)
  • 1 cup grated cheese
  • 3 eggs
  • 50g butter, melted


Method:

  • Preheat oven to 180 degrees Celsius and either grease your muffin tray or line with muffin cups
  • Mix the flours, baking powder, vegetable mix and cheese and stir well in a large mixing bowl
  • Whisk in another bowl the 3 eggs with the cooled melted butter and fold through the flour veggies mix until well combined
  • Divide the mixture evenly between the prepared muffin trays
  • Bake for 25-30 minutes until golden on top and a cake skewer comes out clean.


Recipe Notes:

  • The 3 cups of vegetables and fresh herbs can be any combination that you desired either finely diced, grated or shredded as appropriate
  • Picture shown has; grated carrot, pumpkin, parsnip, apple and cauliflower stem with finely diced red onion, celery, red capsicum and tomato with finely shredded baby spinach, flat leaf parsley and basil
  • Store in an airtight container below 27 degrees for no longer than 5 days
  • This recipe is freezer friendly
  • Wrap in single serve as delicious and healthy lunchbox filler.


C4K Kitchen Title Bar


Disclaimer: C4K Kitchen does not hold any responsibility for the consumer using this recipe including the storage guidelines and time frames recommended in the recipe notes.  The consumer holds all responsibilities to ensure that food hygiene and safety standards are adhered to.


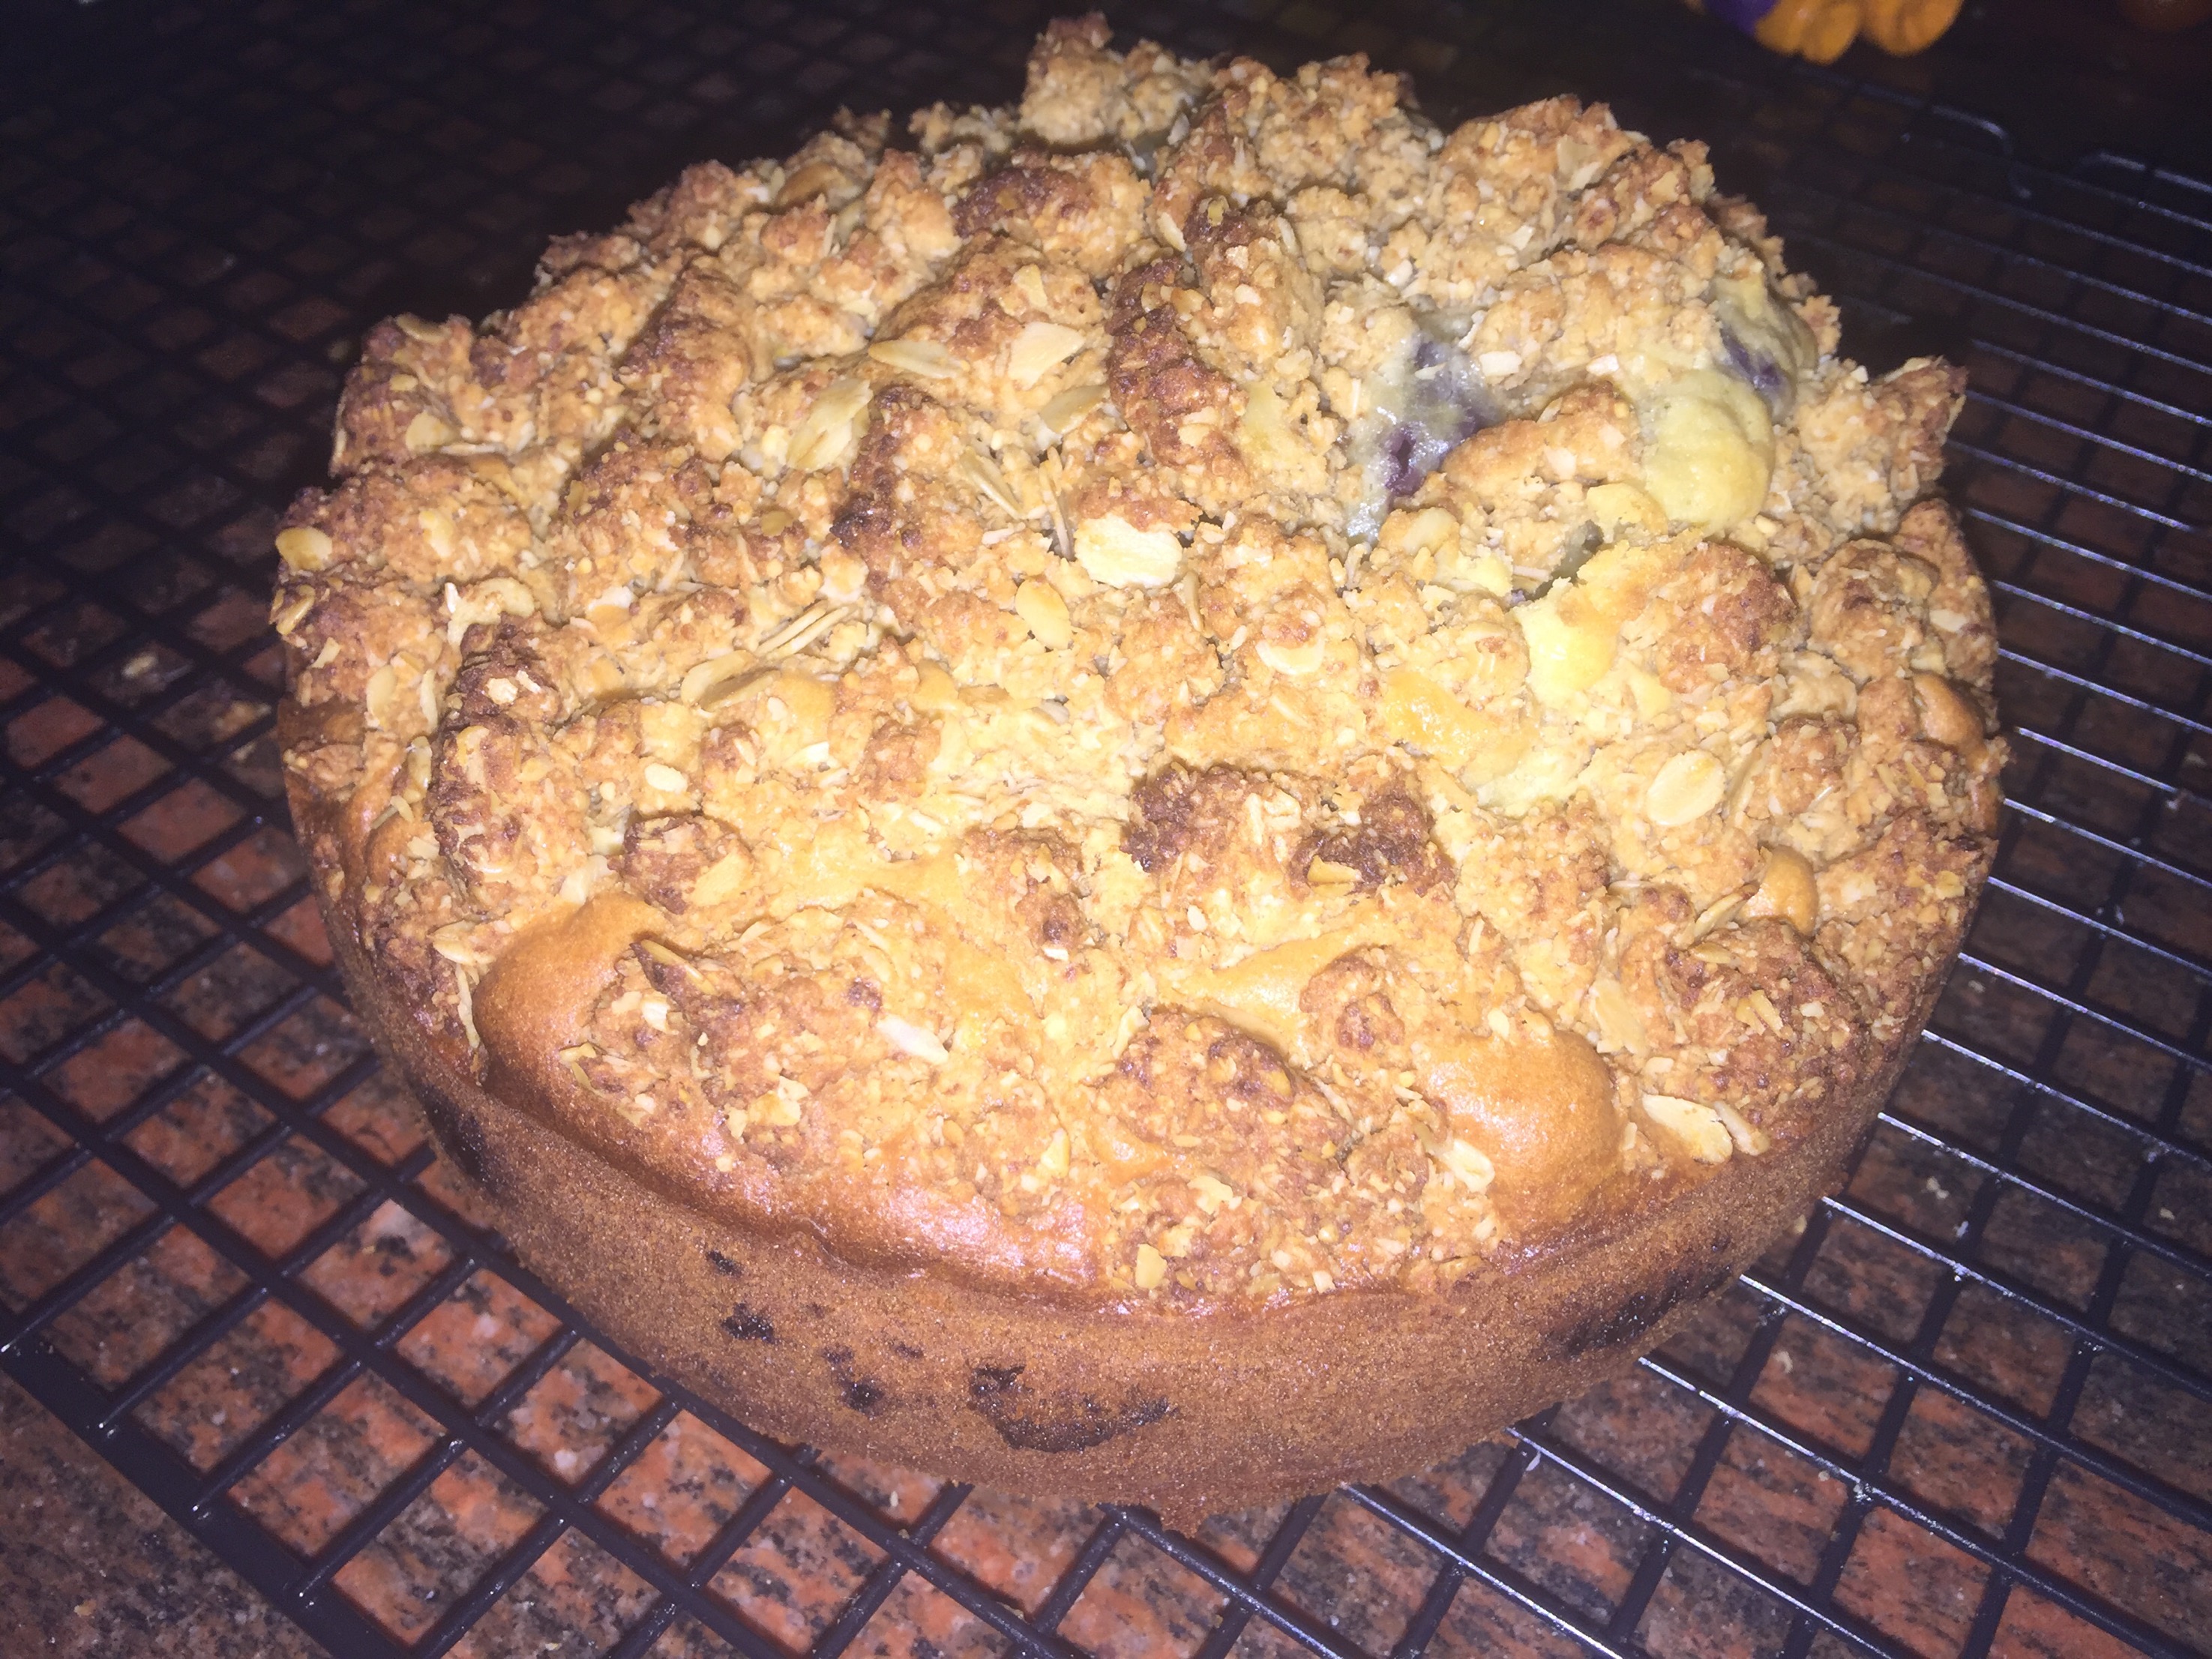
Berry Crumble Cake

Berry Crumble Cake

Makes: 1 X 18-20cm round cake

IMG_6029-0

Cake Ingredients:

  • 175g butter, softened
  • 100g caster sugar
  • 3 eggs, lightly beaten
  • 1/4 cup milk
  • 200g SR Flour
  • 70g almond meal
  • 6 strawberries, diced 
  • 125g punnet fresh blueberries 

Crumble Ingredients:  

  • 1/2 cup almond meal
  • 1/2 cup rolled oats
  • 3/4 cup chopped walnuts 
  • 1/2 cup coconut or brown sugar
  • 100g butter, room temperature cubed

Method:

  • Preheat oven to 180 degrees Celcius and prepare an 18-20cm round cake by lining and pregreasing
  • To prepare the cake place the butter and sugar in a mixing bowl and use electric beaters to cream until light and fluffy
  • Add in the eggs and milk and beat until just combined
  • Add in the flour and beat very lightly until mixed through 
  • Use a spatula to fold through the almond meal
  • Pour half of the cake batter into the prepare and then evenly spread the fresh berries over the cake batter
  • Very gently evenly spread the remaining cake batter
  • To prepare the crumble place the walnuts and rolled oats in a food process until has a crumble texture and transfer to a mixing bowl
  • Add in the sugar and almond and combine well
  • Use your fingertips to rub in the crumble mixture until well combine
  • Gently spread the mixture over the top of the batter 
  • Bake the cake for approximately 70 minute, or until a cake skewer comes out clean, covering loosing with alfoil after 30 minutes
  • Allow to cool in cake tin for at least 10 minutes before moving to a wire rack to cool completely.

Recipe Notes:

  • Store in airtight container for 3 days 
  • Cake is freezer friendly 
  • Fruit types are interchangeable 

Disclaimer: C4K Kitchen does not hold any responsibility for the consumer using this recipe including the storage guidelines and time frames recommended in the recipe notes. The consumer holds all responsibilities to ensure that food hygiene and safety standards are adhered to.



Spinach & Feta Mini Quiches


Spinach & Feta Mini Quiches

Makes: approximately 36

Spinach & Feta Cheese Mini Quiches

Ingredients:

  • 3 sheets shortcrust pastry, defrosted
  • 250g frozen spinach, defrosted
  • 200g feta cheese, diced or crumbled
  • 1 cup grated cheese
  • 3/4 cup wholemeal plain flour
  • 1 tablespoon minced garlic
  • 6 eggs, lightly beaten
  • 1/2 cup natural yoghurt


Method:

  • Preheat the oven to 180 degrees Celsius
  • Place all the ingredients except eggs and yoghurt into a large mixing bowl and mix well
  • In a separate mixing bowl crack all the eggs and add theyoghurt and salt & pepper to taste whisking lightly until all combined then pour into the filling mix and stir well until well combined
  • Use a round cookie cutter (or egg ring) to cut circles in the pastry, do not throw out un-used pastry, this will be reused.
  • To re-use the discarded pastry knead it together and roll it out to the same thickness as the original sheets and continue to cut your pastry discs
  • Spray the mini quiche tin well with rice bran oil spray, place the pastry disc into each well.
  • Add in a tablespoon of the filling mix into the well until it’s just below the pastry level. Make sure your regularly stirring the filling mix as the heavier filling will sink to the bottom of the bowl
  • Bake for 15-20 minutes until golden brown on top.


Recipe Notes:

  • Store in an airtight container in the fridge for up to 3 days
  • This recipe is freezer friendly once cooked to be consumed within 3 months


C4K Kitchen Title Bar


Disclaimer: C4K Kitchen does not hold any responsibility for the consumer using this recipe including the storage guidelines and time frames recommended in the recipe notes.  The consumer holds all responsibilities to ensure that food hygiene and safety standards are adhered to.


Spinach Mushroom & Tomato Quiche


Spinach Mushroom & Tomato Quiche

Makes: 1 large quiche

Spinach Mushroom & Tomato Quiche

Pastry Ingredients:

  • 250g plain flour
  • 125g butter, chilled and finely chopped
  • 1 egg, chilled

Filling Ingredients:

  • 6 eggs, lightly beaten
  • 300ml sour cream
  • 1/2 cup wholemeal plain flour
  • 1 tablespoons minced garlic
  • 150g baby spinach
  • 3 tomatoes, thinly sliced
  • 6 medium mushrooms, thinly sliced
  • 1 cup grated cheese


Method:

  • To prepare the pastry, process the flour and butter with a pinch of salt in the food processor until it resembles breadcrumbs.
  • Whisk the egg into 1 tablespoon of cold water then add to the food processor and blend until you get a large dough ball.
  • Turn the dough onto a clean lightly floured surface and knead to bring together then form in a disc shape, wrap in glad wrap and place in the fridge for 2 hours
  • Preheat your oven to 180 degrees Celsius and lightly grease a quiche tin
  • Roll the pastry out to approximately 3mm thick and then place the pastry in the prepared tin, gentle push the corners down
  • Trim the top of excess pastry and then line with baking paper and fill lining with baking bead.
  • Blind bake the pastry shell for 15 minutes
  • To prepare the filling, whisk together the eggs, sour cream, flour and garlic until well mixed
  • Fold through all the other ingredients until well combined
  • Pour the mixture into the pastry case, I will appear to be too much filling but the vegetables will cook down
  • Bake for 35-45 minutes until golden brown and the filling has set.


Recipe Notes:

  • Store covered in the fridge and to be consumed within 2 days
  • This recipe is freezer friendly, the cooked quiche is to be consumed within 30 days
  • For a non-vegetarian alternative you could add in some diced bacon, shredded ham or even chopped left over roast chicken
  • You can use defrosted store bought shortcrust pastry if you prefer, but it will still need to be blind baked


C4K Kitchen Title Bar


Disclaimer: C4K Kitchen does not hold any responsibility for the consumer using this recipe including the storage guidelines and time frames recommended in the recipe notes.  The consumer holds all responsibilities to ensure that food hygiene and safety standards are adhered to.



Spiced Apple Loaf / Muffins


Spiced Apple Loaf / Muffins

Makes: 1 loaf or 12 standard muffins

Spiced Apple Loaf

Ingredients:

  • 1 1/2 cups SR Flour
  • 1 teaspoon bicarb soda
  • 1 teaspoon all spice
  • 1/2 teaspoon cinnamon
  • 1/2 cup brown sugar
  • 1/2 cup vegetable oil
  • 2 eggs, lightly beaten
  • 4 or 5 large apples – peeled, cored and grated


Method:

  • Preheat oven to 180 degrees Celsius, prepare either a greased and lined loaf tin or a greased muffin tray
  • Mix the dry ingredients into a mixing bowl and combine well
  • Make a well in the middle of the dry ingredients and mix in the eggs and apples very well
  • Finally fold through the grated apple and then transfer the mix into the prepare tin or tray
  • LOAF: Bake for 40-50 minutes until golden and a cake skewer comes out clean
  • MUFFINS: Bake for 20-25 minutes until golden and a cake skewer comes out clean
  • Allow to cool slightly in the tray/tin before transferring on a wire rack to cool.


Recipe Notes:

  • To be stored in an air tight container below 27 degrees and to be consumed within 3 days
  • This recipes is freezer friendly once cooked to be consumed within 6 months
  • Pears are a delicious variation to the recipe
  • For those looking for a bit of texture it is recommended to add 1/2 cup chopped walnuts


C4K Kitchen Title Bar


Disclaimer: C4K Kitchen does not hold any responsibility for the consumer using this recipe including the storage guidelines and time frames recommended in the recipe notes.  The consumer holds all responsibilities to ensure that food hygiene and safety standards are adhered to.
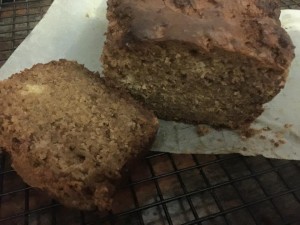


C4K Kitchen Pavlova


C4K Kitchen’s Pavlova

Serves: 8-12

C4K Kitchen Pavlova

Ingredients:

  • 8 egg whites
  • 1 cup caster sugar
  • 2 tablespoons corn flour
  • 2 teaspoons white vinegar
  • 1 teaspoon vanilla extract

Topping Ingredients:

  • 300ml full fat thickened cream
  • 1 1/4 tablespoon icing sugar
  • 1/2 teaspoon vanilla extract
  • Assorted fresh fruit


Method:

  • Preheat oven to 150 degrees Celsius and line a large baking tray within baking paper that has a 20cm circle drawn on the middle of the paper on the underside
  • Place the egg whites in a large mixing bowl and use your electric beaters to beat  until firm peaks form
  • Gradually add in the sugar, 1/4 cup at a time beating constantly until the sugar is all dissolved before adding in more until the mixture is thick and glossly
  • Add in the cornflour , vinegar and vanilla until just combined
  • Spoon the mixture onto the baking paper staying within the disc drawn on the paper and shape the mixture to be as even as possible
  • Bake in the oven for 10 minutes, then reduce the oven to 110 degrees Celsius and bake for another 1 hour or until the pavlova is crisp and dry
  • Turn the oven off  and leave the pavlova in the over with the door closed to cool completely, preferably overnight.
  • To decorate your pavlova pour your cream, icing sugar and vanilla into a mixing bowl and whip the cream until thick and fluffy
  • Gently spread the whipped cream over the cooled pavlova base and finally top with your preferred selection of fresh or preserved fruits.


Recipe Notes:

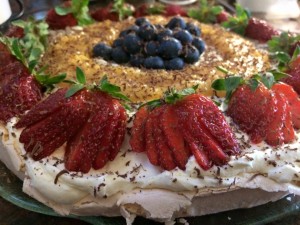
    • The picture shown has the pavlova topped with fresh strawberries, fresh blueberries, C4K Kitchen’s Lemon Curd and fresh grated dark chocolate.
    • It is recommended that one tart fruit be used to help balance out the sweetness of the base, such as lemon, lime, passionfruit etc.
    • To be stored covered in the fridge for up to 5 days
    • This recipe is not freezer friendly

C4K Kitchen Title Bar

Disclaimer: C4K Kitchen does not hold any responsibility for the consumer using this recipe including the storage guidelines and time frames recommended in the recipe notes.  The consumer holds all responsibilities to ensure that food hygiene and safety standards are adhered to.


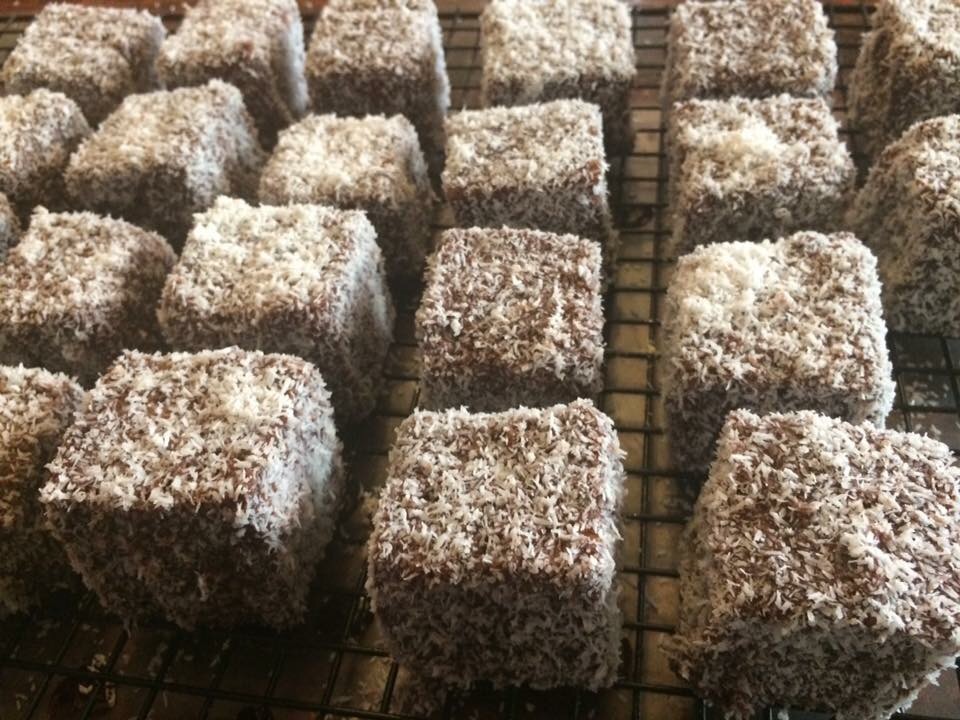
Lamingtons


Lamingtons

Makes:24


Ingredients:

  • 6 egg
  • 1/2 cup caster sugar
  • 1 1/4 cups SR flour
  • 1/4 cup corn flour
  • 80ml boiling water
  • 30g butter
  • 2 – 2 1/2 cup desicated coconut

Chocolate Sauce Ingredients:

  • 4 1/2 cups icing sugar
  • 2 tablespoons corn flour
  • 1/2 cup unsweetened cocoa powder
  • 1 tablespoon butter, softened
  • 3/4 cup full cream milk

Method:

  • Preheat your oven to 180 degrees Celsius (170 degrees for fan forced oven) and prepare a tin 20x30cm by well greasing and lining with baking paper
  • Crack all your eggs into a large mixing bowl and use your beaters to beat until light and fluffy, approximately 2 minutes
  • Add in the caster sugar and on a high speed beat the egg mix until soft peaks form in the egg mix, this will take approximately 8 minutes
  • Sift you flours together twice and set aside
  • In a small mixing bowl add the butter and boiling water and allow the butter to melt into the water
  • To prepare the cake batter sift the combine flour over the egg mix and gently fold through with a spatula
  • Add in the butter mix and again gently fold through until just combined
  • Pour the batter gently into the prepare tin and bake for 25 minutes
  • Once cooked invert onto a wire cooling rack to cool while you prepare the chocolate sauce
  • Sift the icing sugar, corn flour and cocoa into a heatproof bowl and sit this bowl over top of a simmering saucepan of water (a double boiler)
  • Add in the milk and butter until the chocolate sauce comes together and is thick enough to evenly coat the back of a spoon
  • Return to you sponge and cut into 24 equal portions
  • Prepare your preparation station by having half the coconut in a shallow pan and the other half in a container behind and have a wire rack with a silicon may underneath it
  • Pour 1/4 of the chocolate sauce into a bowl
  • Roll the sponge cube in the chocolate sauce starting with the 4 open cut sides and gently roll to coat the top and bottom sides and then place in the coconut
  • Repeat with another 5 sponge cubes, you will need to work quickly as the chocolate sauce will thicken and become difficult to use
  • Roll each of the 6 coated sponge cubes in the coconut and sprinkle extra coconut over the top of the cubes
  • Once a coated sponge cube is fully coated place that lamington onto the wire rack to set, repeat with the remainder of that 1/4 batch
  • Rinse out your chocolate bowl (or get another bowl) and slightly reheat the chocolate sauce again to make the sauce more fluid and repeat the coating process with another 6 sponge cubes.
  • Repeat this process until you have 24 Lamingtons
  • Allow to set for a minimum of 2 hours before eating.

Recipe Notes:

  • Store Lamingtons in an airtight container below 27 degrees Celsius and consume within 1 week.
  • To serve as a dessert, slice a lamington in half horizontally and sandwich the halves together with raspberry jam and whipped cream.
  • To make lamington fingers cut your sponge into finger shapes as opposed to cubes.
  • Freezer friendly to be consumed within 3 months.

C4K Kitchen Title Bar

Disclaimer: C4K Kitchen does not hold any responsibility for the consumer using this recipe including the storage guidelines and time frames recommended in the recipe notes.  The consumer holds all responsibilities to ensure that food hygiene and safety standards are adhered to.


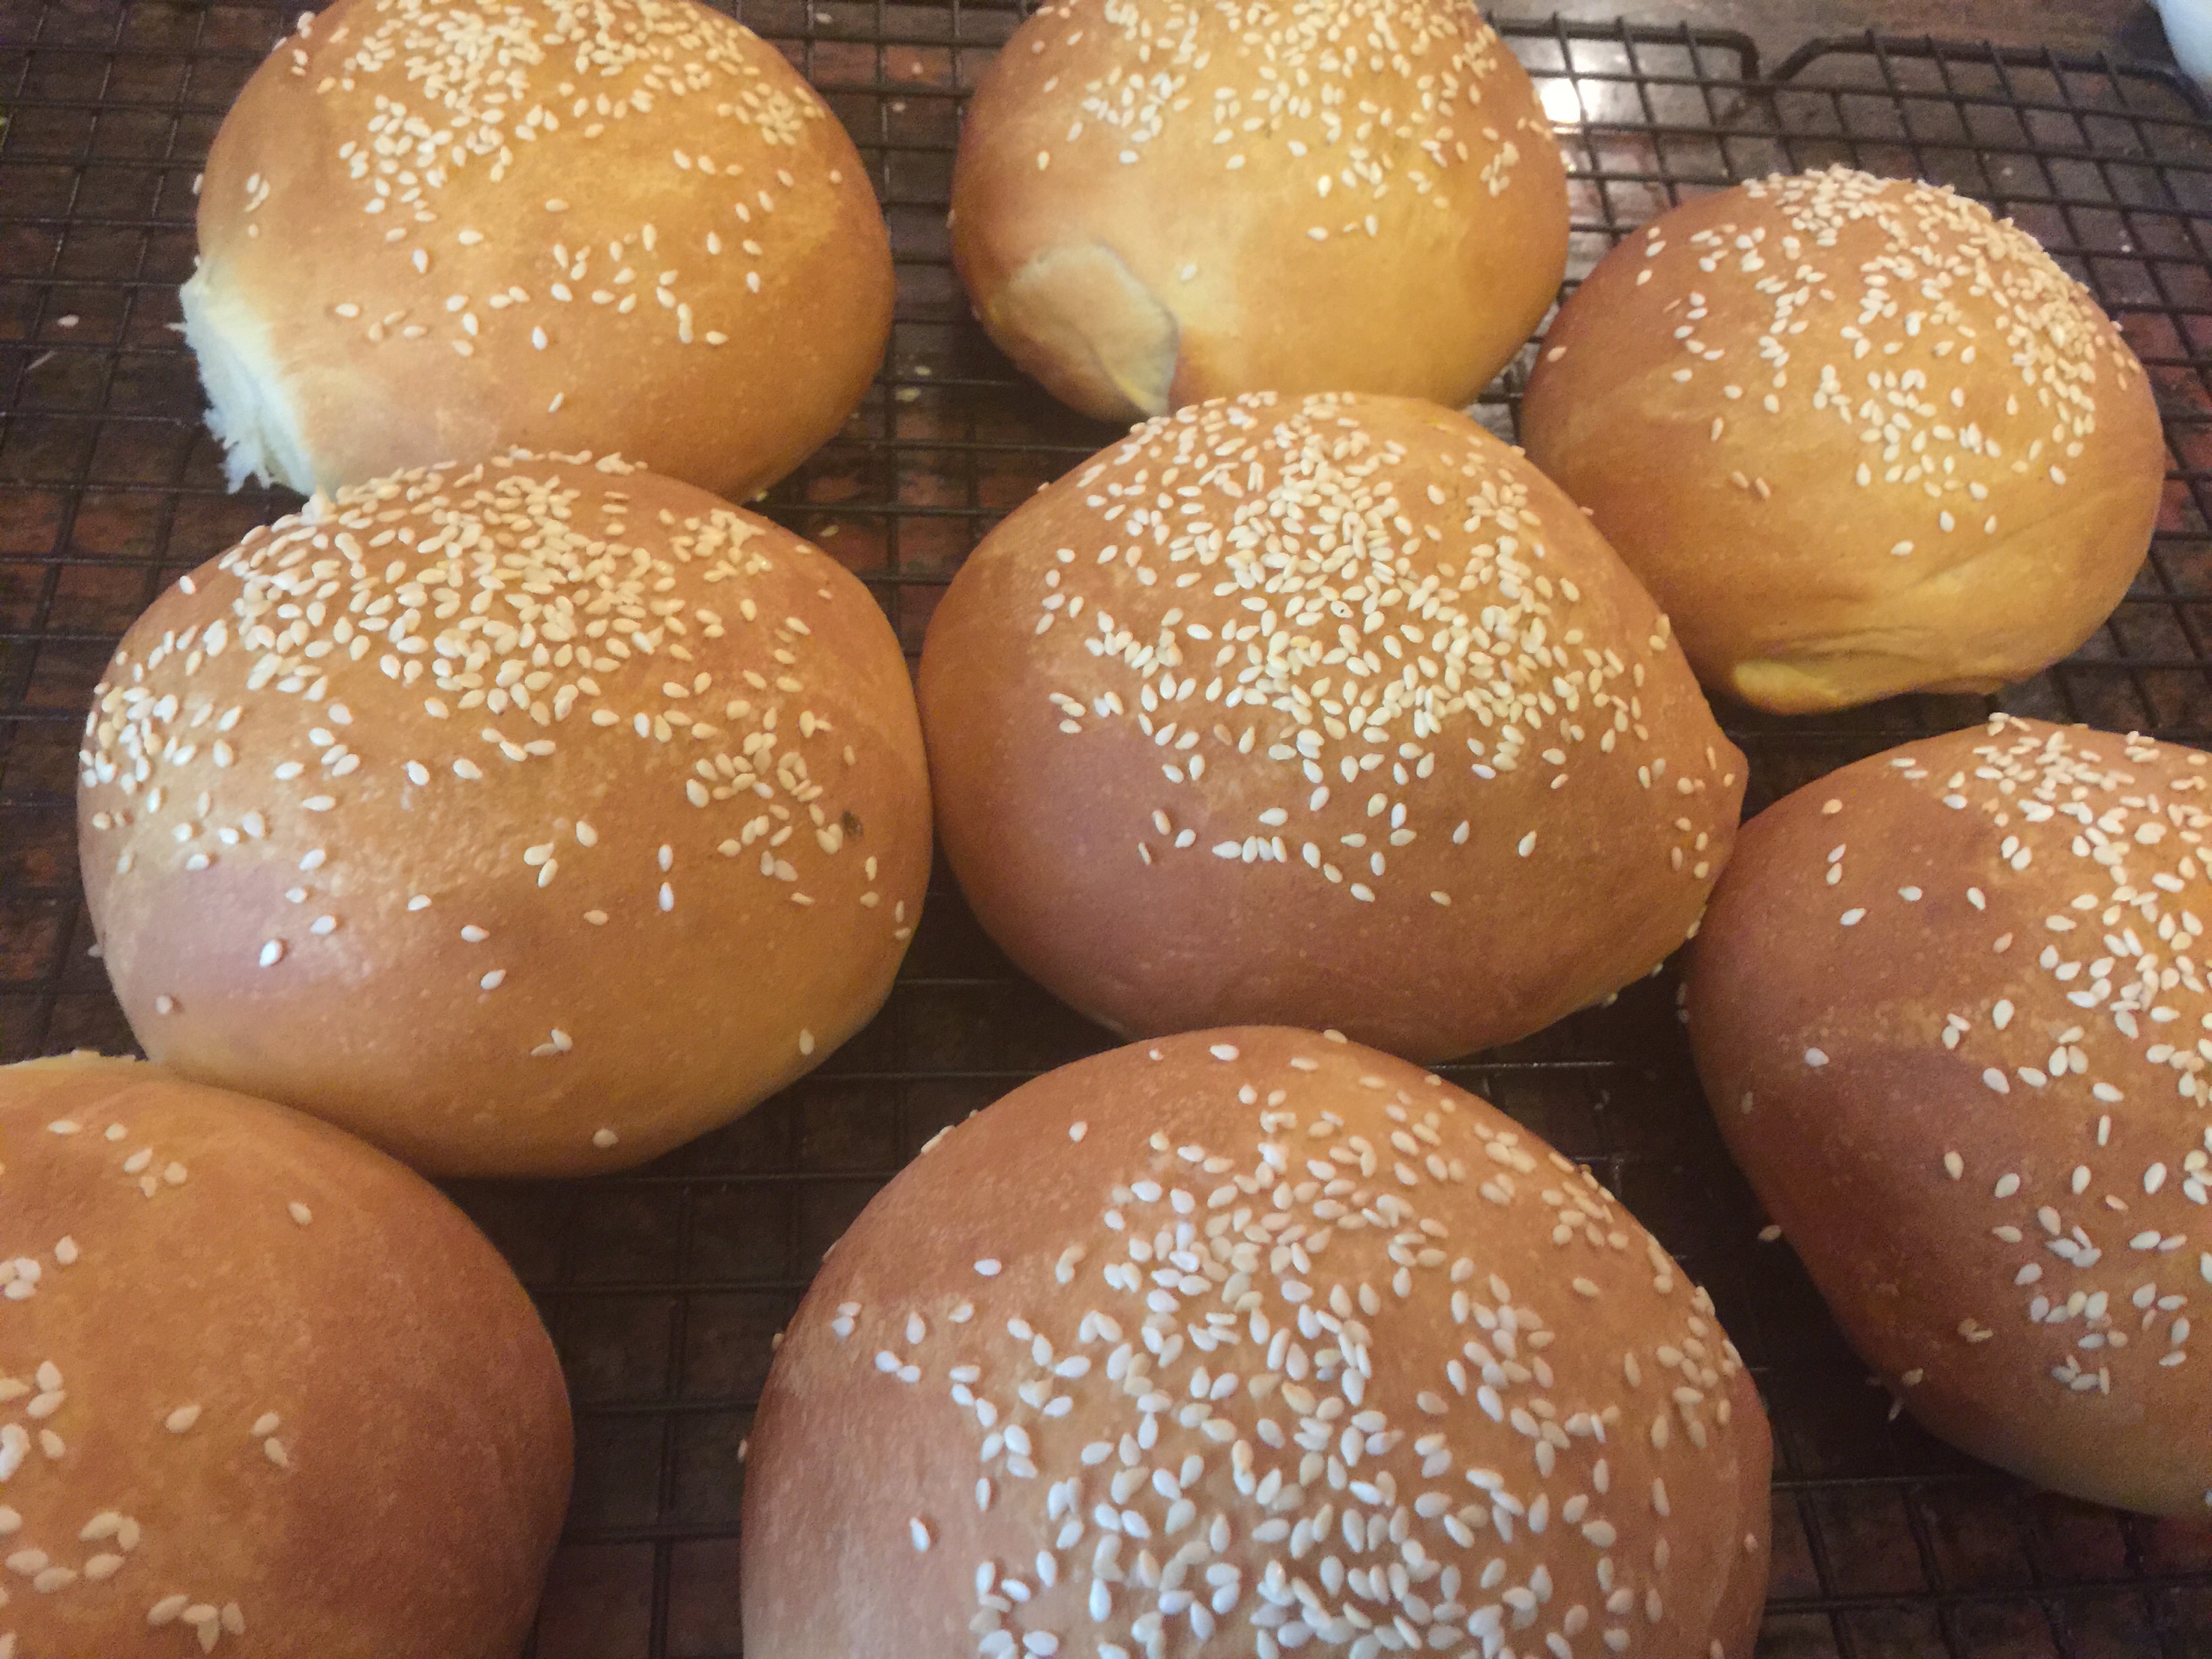
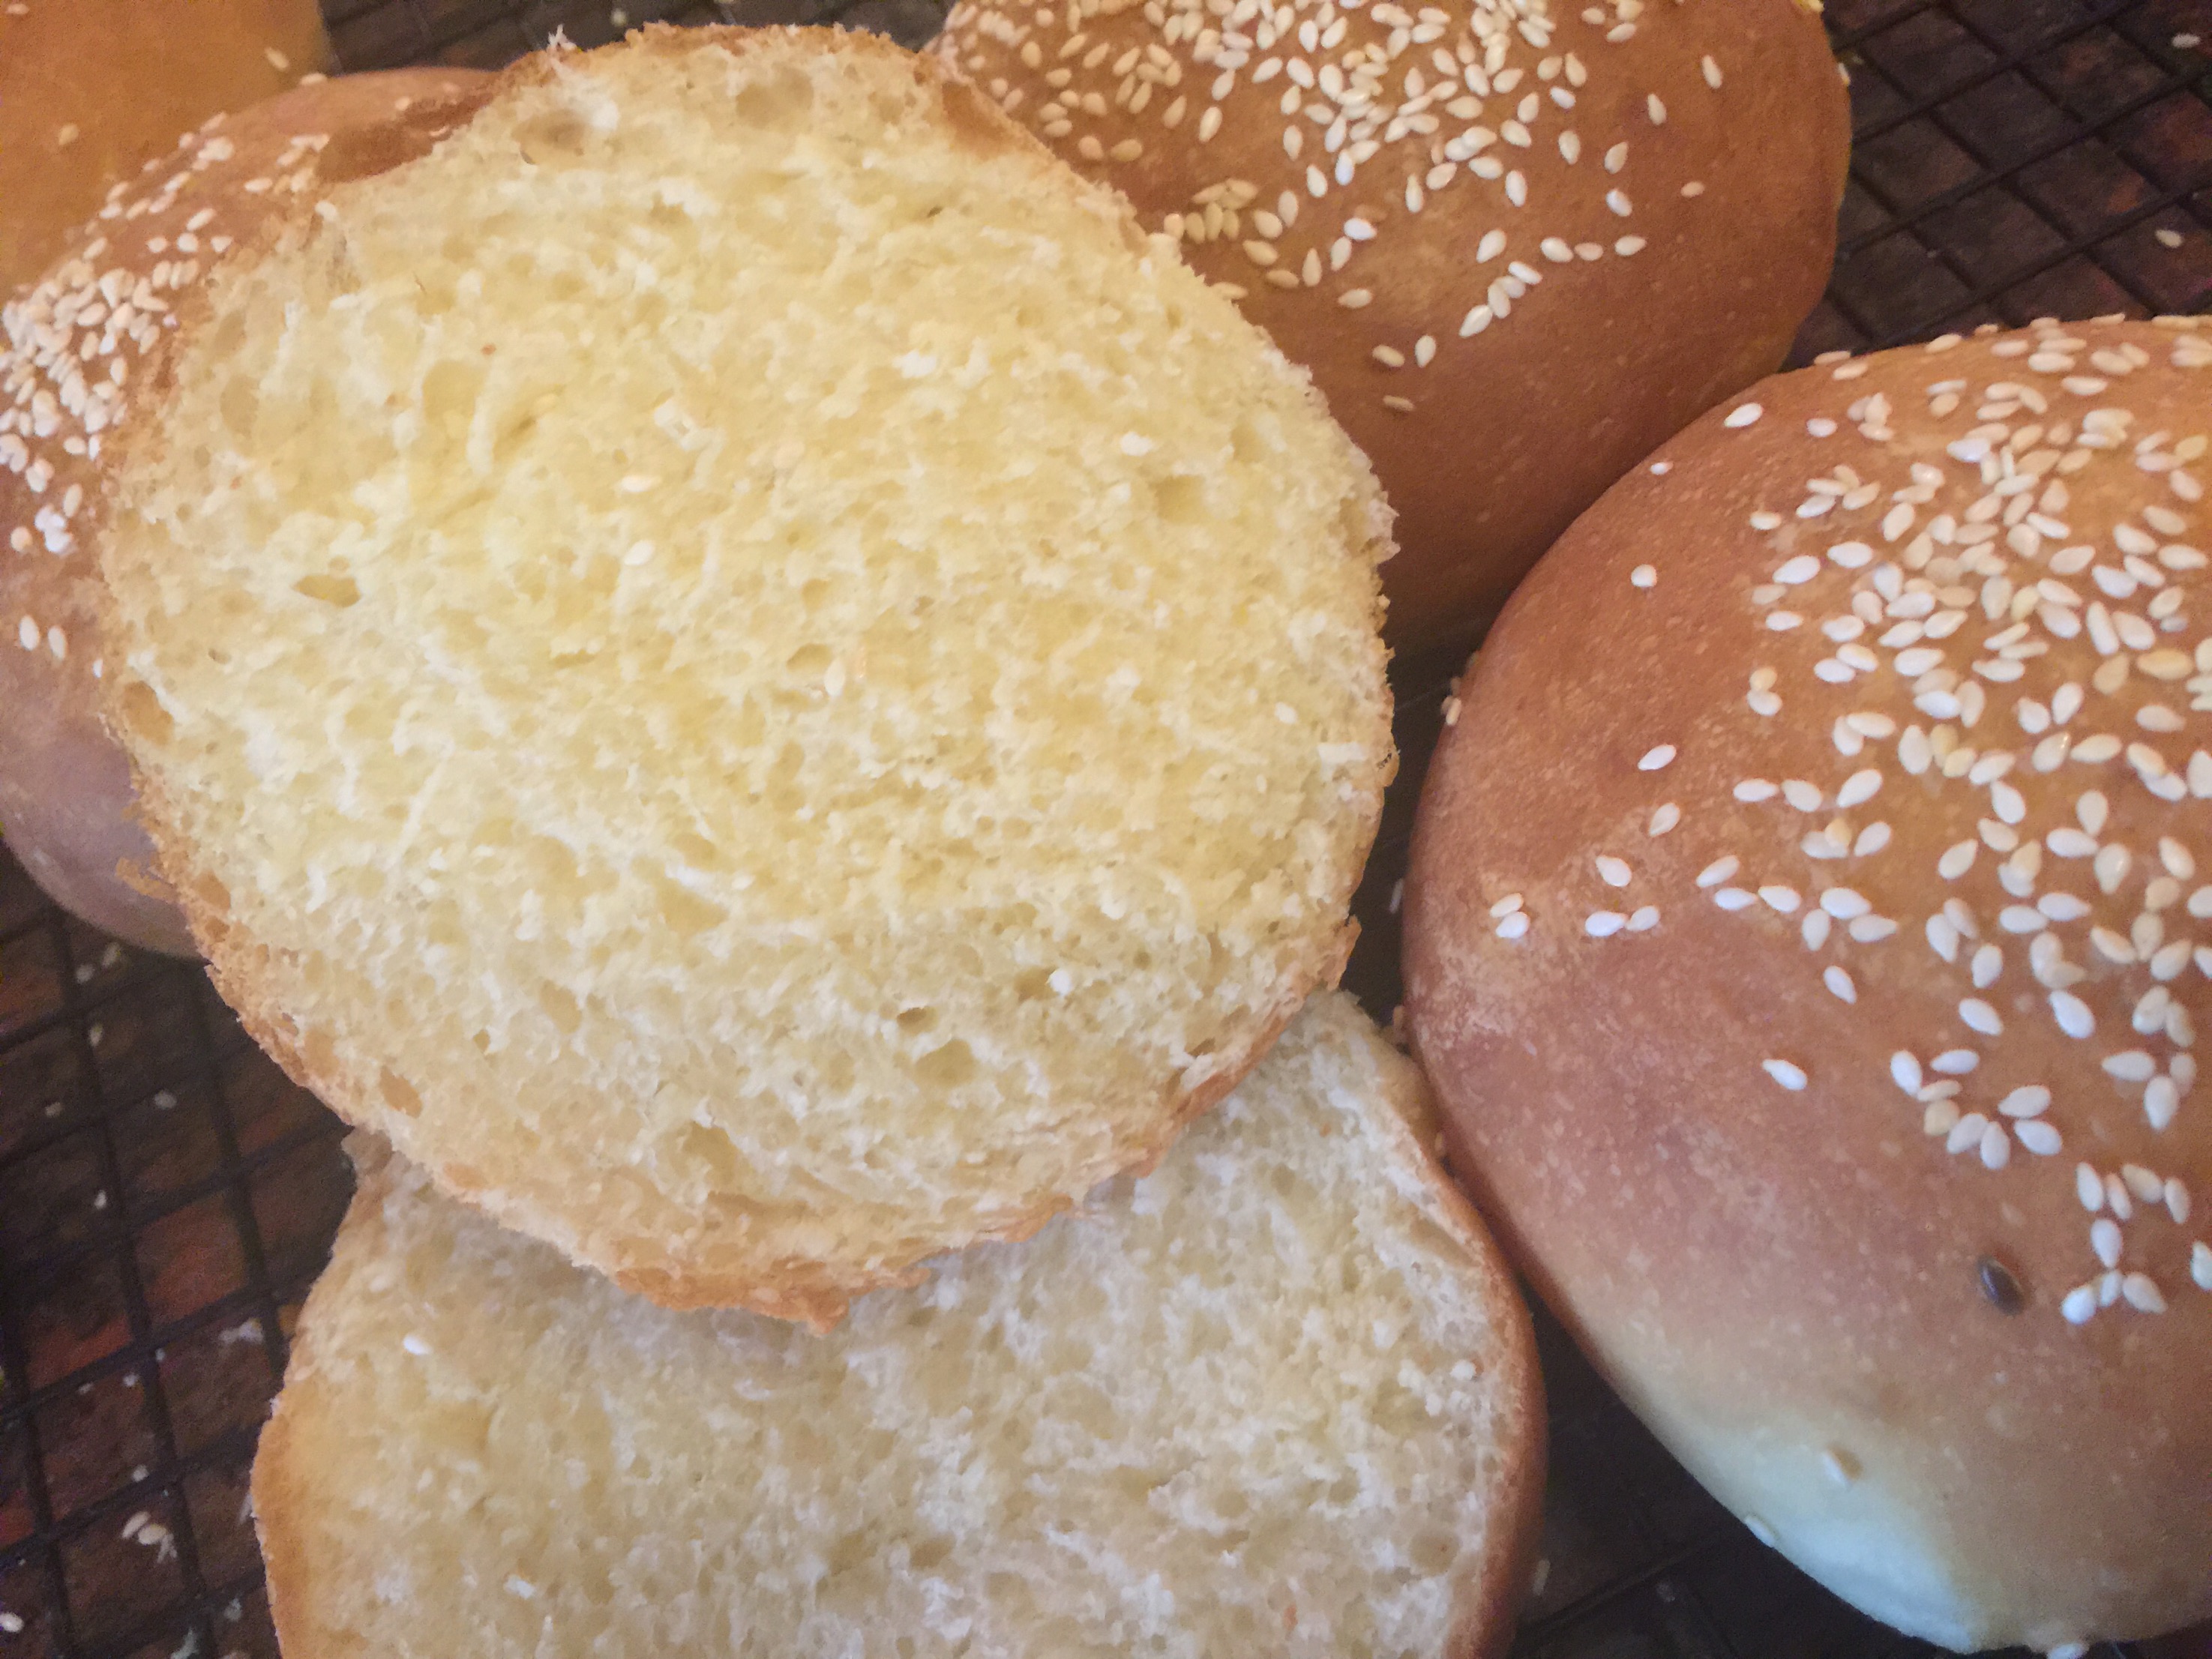
Hamburger Rolls


Hamburger Rolls

Makes: 8

IMG_5736
Ingredients:

  • 1 cup warm water
  • 1 tablespoon dry yeast
  • 1 tablespoon sugar
  • 3 1/2 cups bread flour
  • 1 tablespoon bread improver
  • 50g butter, melted
  • 1 egg, lightly whisked
  • Pinch salt
  • 1/4 cup olive oil
  • 1 tablespoon sesame seeds (optional)

Manual Dough Method:

  • Place the warm water, yeast and sugar in a small mixing bowl and whisk together
  • Allow to sit for up to 10 minutes to allow the yeast to activate, it will be activated when it’s creates a foamy surface
  • In a large mixing bowl add in the flour, bread improver and the salt and created a well in the centre, pour in the yeast mix, butter and egg into the well and use your hands with your fingers spread to resemble a mixer and use your fingers to stir all the ingredients together until all combined and a soft slightly sticky dough is formed
  • Pour 1 tablespoon of oil onto a dry clean surface and place the dough into the spread oil
  • Use your hands to knead the dough. The best kneading action is to use the heel of your hands to push the dough forward and then roll in back onto itself and repeat.
  • Knead for approximately 8-10 minutes to allow time for the gluten to activate.
  • Refer to the below “Proof and Bake Method” to finish making your rolls.

Thermo Cooking Dough Method:

  • Place water, yeast and sugar in the jug [Speed 3, 37 degrees, 15 seconds]
  • Allow the jug to sit for 10 minutes to activate the yeast
  • Add in flour, bread improver, butter, eggs and salt [Speed 3, 30 Seconds], [Speed 6, 10 Seconds] & [Speed 1, 10 Minutes]
  • Refer to the below “Proof and Bake Method” to finish making your rolls.

Proof and Bake Method:

  • Place about 1 teaspoon of olive oil into a clean and dry mixing bowl (glass or metal is best but plastic is ok too) and spread across the bottom
  • Place your dough into the mixing bowl and turn a few times until coated in oil and a nice smooth bowl
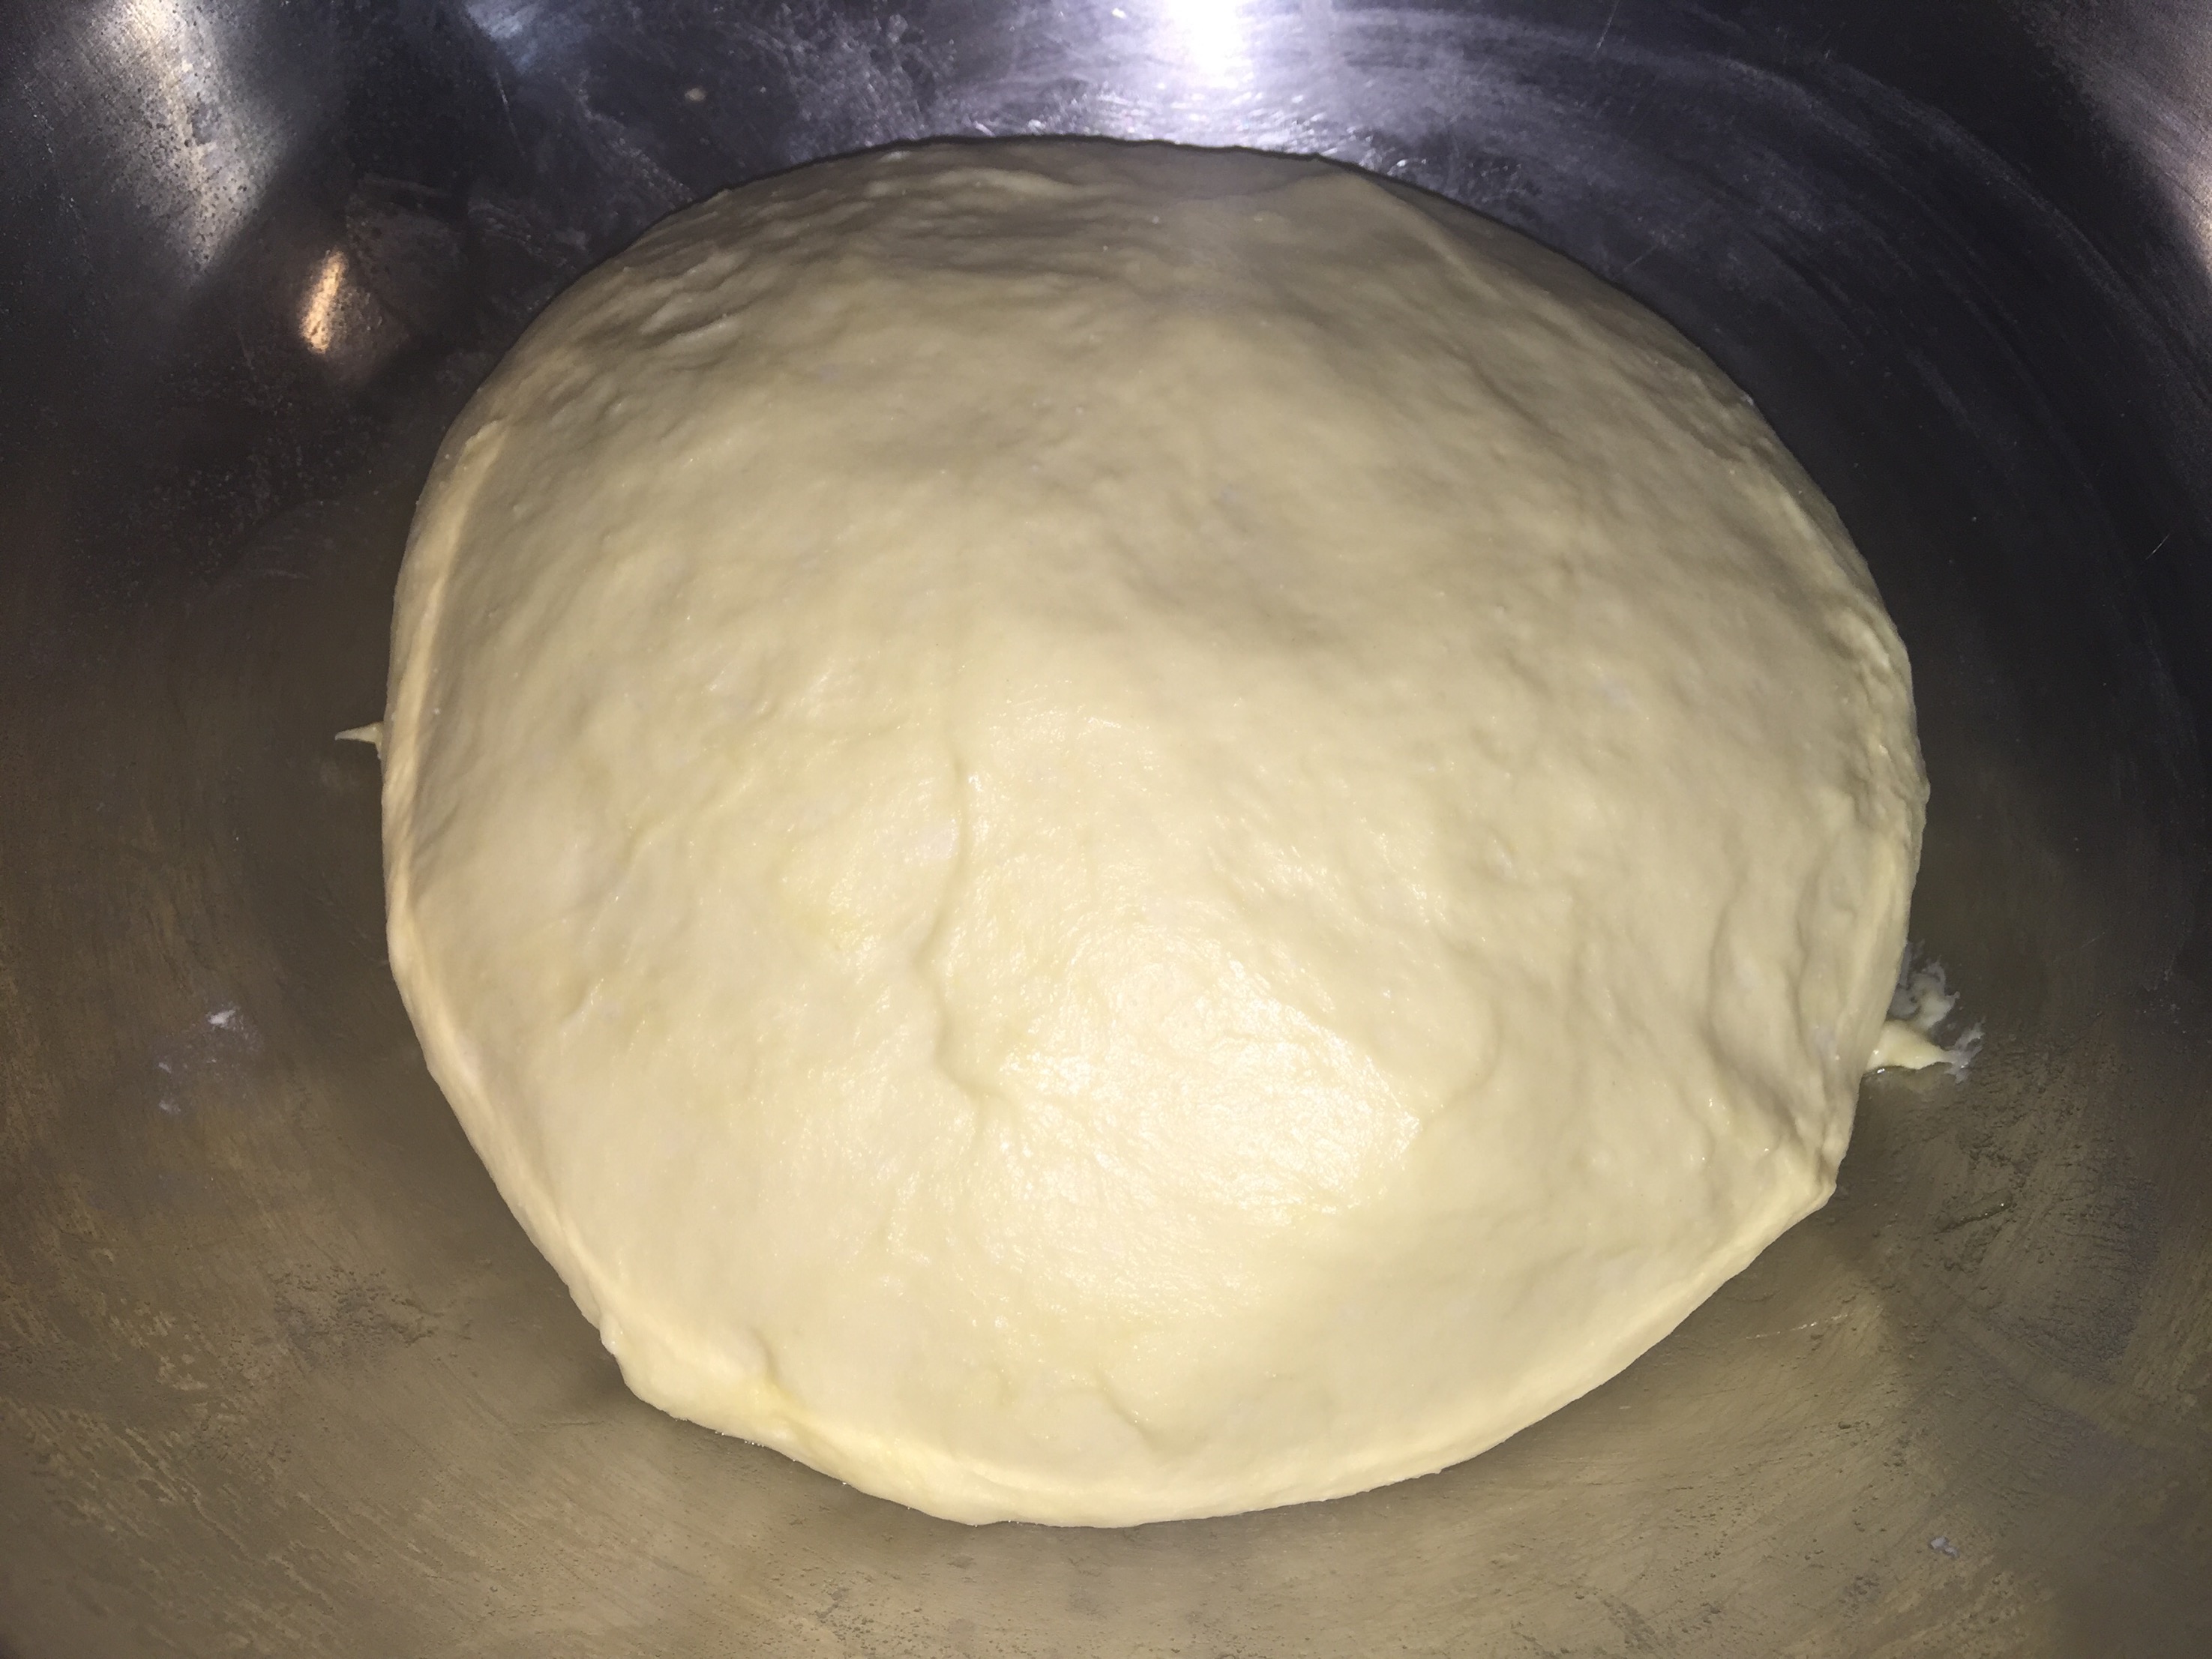
  • Cover securely with glad wrap and place in a warm place to proof until doubled in size, approximately 60 minutes
  • It should look like this once the first proof is complete.
  •   
  • Place tablespoon of oil on a clean dry bench (or use the previously oiled bench) and turn the dough out onto the surface punch a couple times to pop the air bubbles and knead lightly for 1 minute
  • Divide the dough into 8 equal portions
  • Line 2 baking trays with baking paper
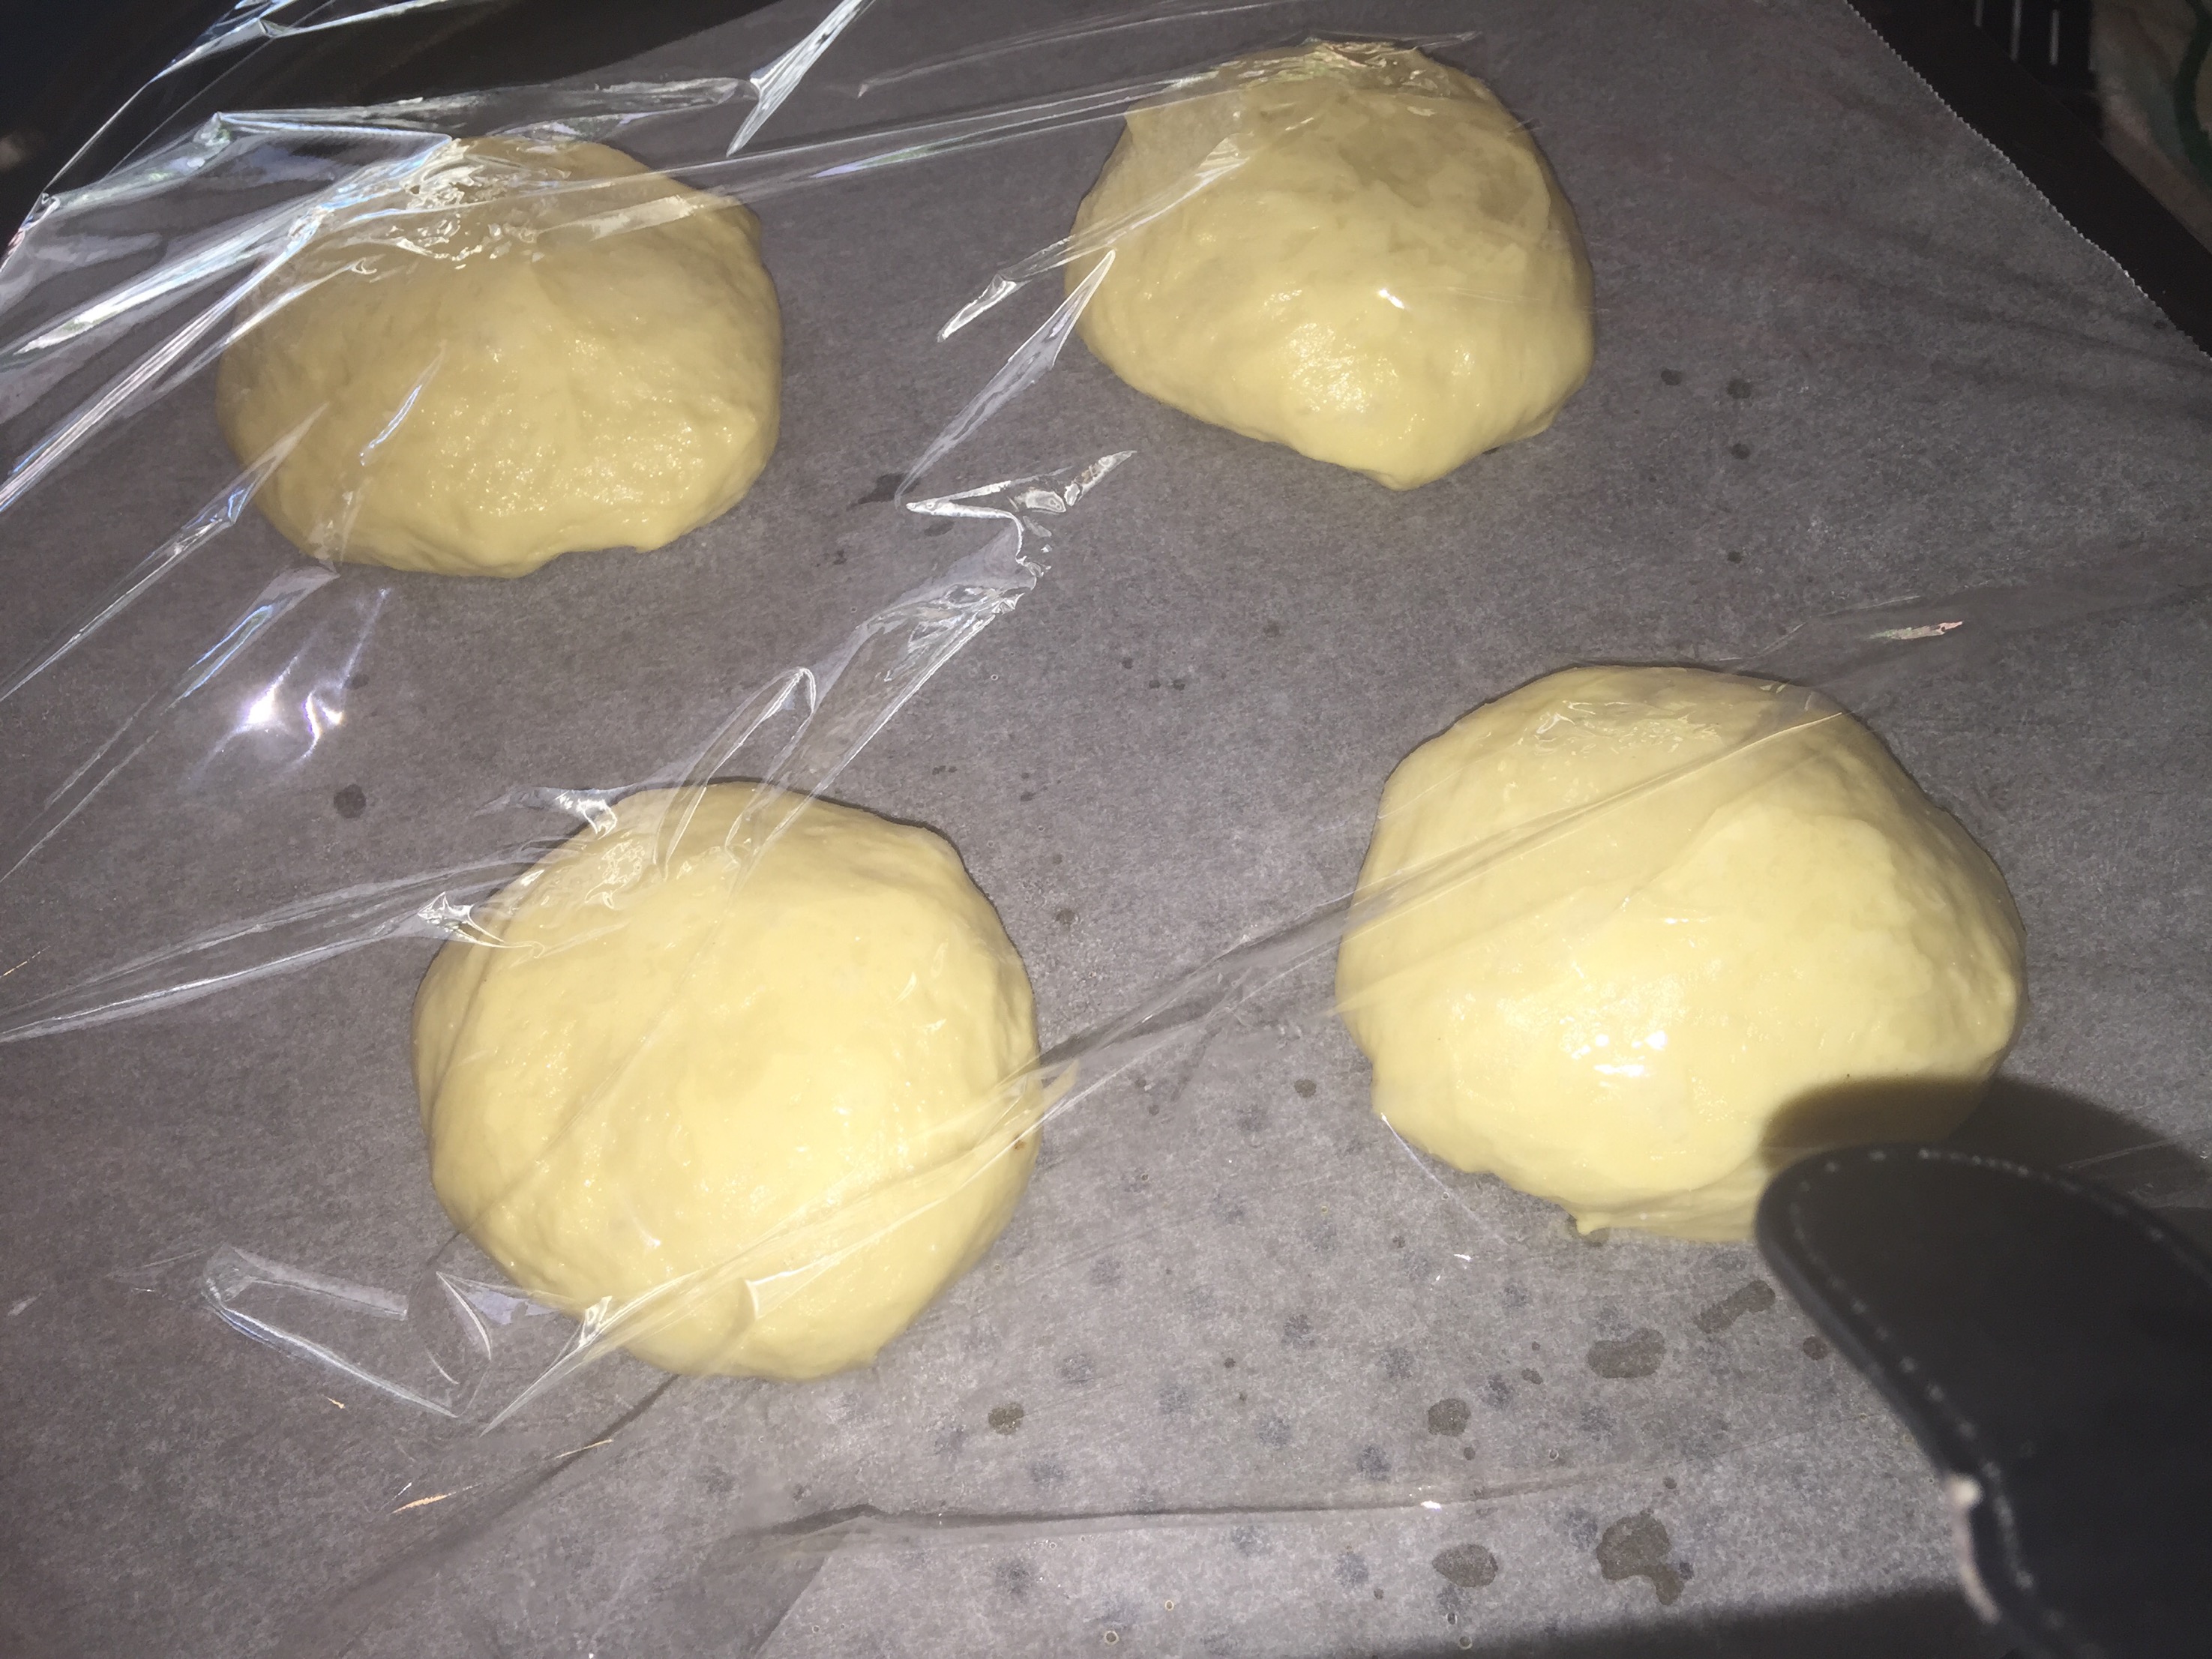
  • Grab one portion of the dough and roll in your hands into a small ball, as you are making a hamburger bun you want the dough to be more disc shaped, you do this stretching and pulling the dough and pulling the fold underneath moving in a circular motion to get a round disc shape.
  • Place on the baking tray and repeat with the other 7 portions of dough, when placing the rolls down make sure there is approximately 5-6cm between them, like seen below
  •  
  • Loosely cover the rolls with glad wrap and place in a warm spot to proof for the final time until doubled in size, approximately another 60 minutes.
  • Half way through the last proof preheat the oven to 190 degrees Celsius
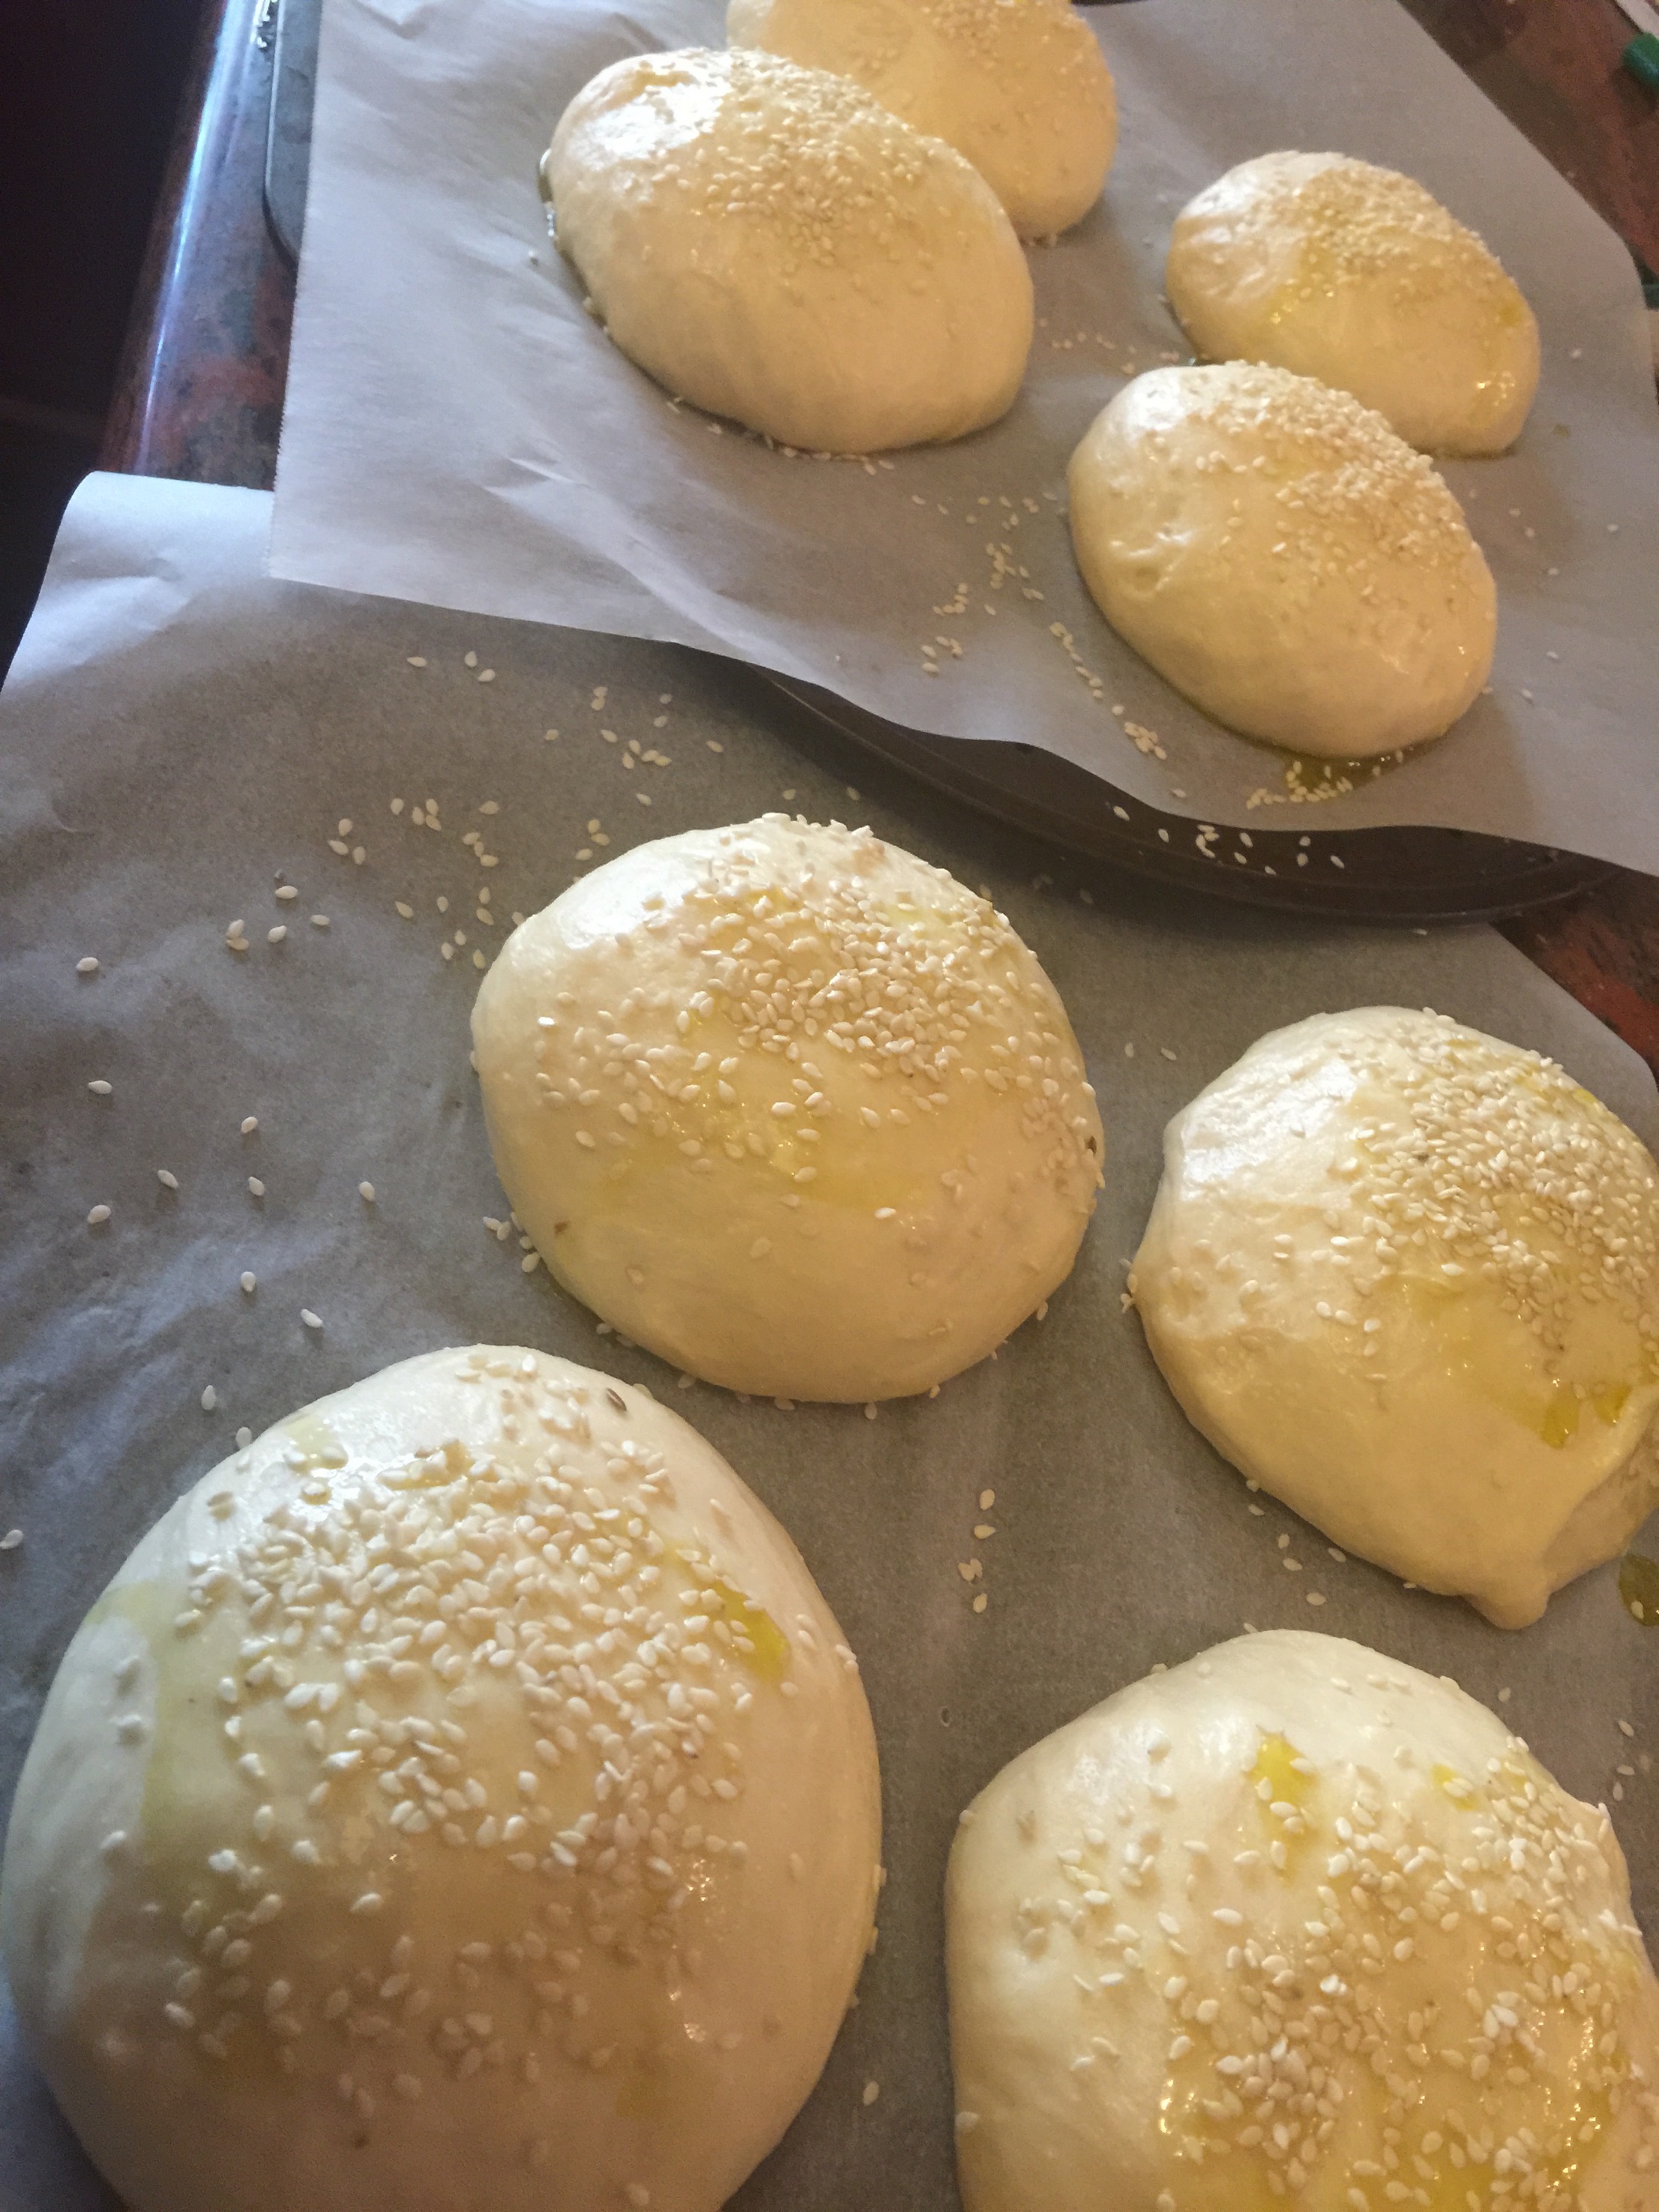
  • When you are ready to bake the rolls gently brush the tops with some olive oil and sprinkle with sesame seeds as seen below
  •   
  • Bake  for 15-20 minutes until golden brown and you knock on the base and it sounds hollow
  • Place on a wire rack to cool…..if you can resist that is 🙂
  •  


C4K Kitchen Title Bar

Disclaimer: C4K Kitchen does not hold any responsibility for the consumer using this recipe including the storage guidelines and time frames recommended in the recipe notes.  The consumer holds all responsibilities to ensure that food hygiene and safety standards are adhered to.