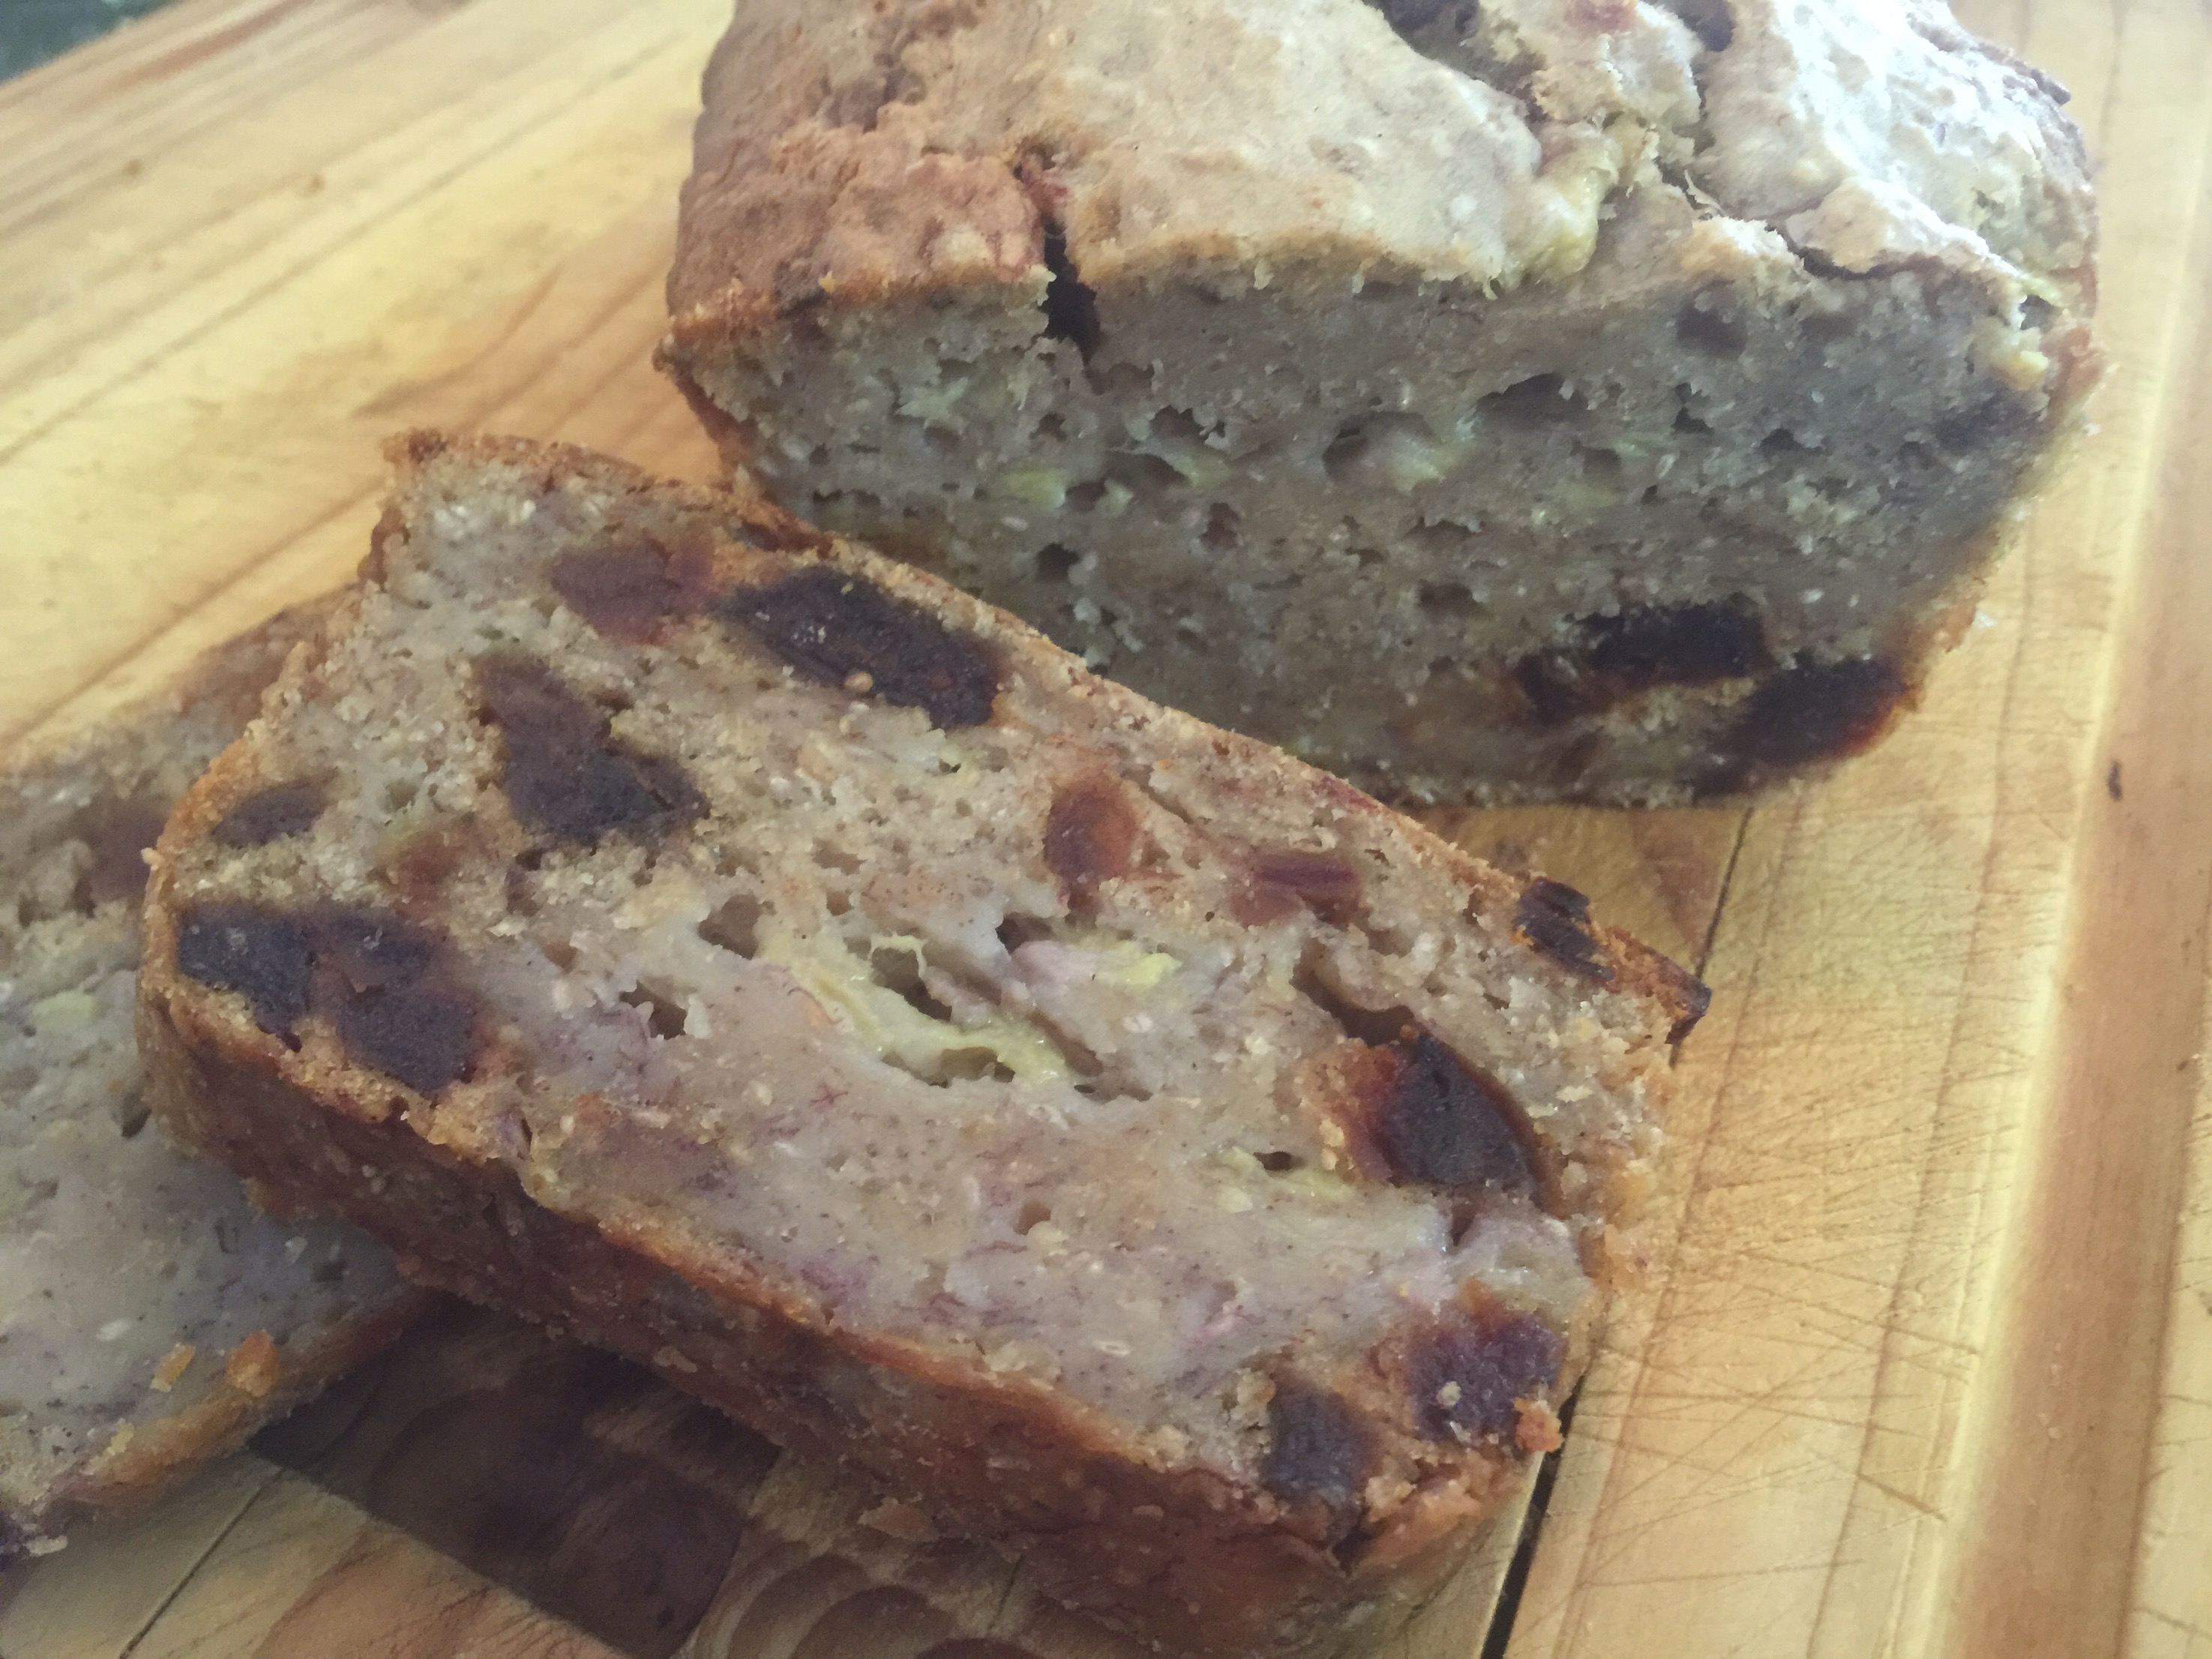
Dairy Free Egg Free Banana & Date Loaf
Dairy Free Egg Free Banana & Date Loaf
Makes: 1 loaf cake
Ingredients:
- 200ml warm water
- 2 tablespoons chia seeds
- 1 cups plain flour
- 3/4 cup wholemeal plain flour
- 1/2 cup pitted dates, chopped
- 1 teaspoon baking powder
- 1 teaspoon cinnamon
- 1/2 teaspoon nutmeg
- Pinch salt
- 1/2 cup coconut oil
- 1/4 cup honey
- 1 teaspoon vanilla extract
- 4 over ripe mashed bananas
Method:
- Soak the chia seeds in the water for 15 minutes
- Preheat your oven to 170 degrees Celsius and prepare a loaf tin by greasing and lining with baking paper
- Mix the flours, dates, baking powder, cinnamon, nutmeg and salt in a mixing bowl until well combined and the dates are coated in dry mixture
- In a second bowl mix together the water/chia mixture with the coconut oil, mashed banana, honey and the vanilla and stir well until you have a smooth consistency and well combined
- Gradually add in the flour mixture in 1/2 cup at a time folding in with a spatula and add more when fully combined
- Pour the batter into the prepared tin and bake for 55-60 minutes until golden brown and a cake skewer comes out clean when inserted into the thickest part of the cake
- Cool in the cake tin for 10 minutes before transferring to a wire cooling rack
Recipe Notes:
- Store in an airtight container below 27 degrees for a maximum of 5 days
- This recipe is freezer friendly to be consumed within a period of 6 months
- This is a great recipe to freeze in individual slices to place in a lunchbox
Disclaimer: C4K Kitchen does not hold any responsibility for the consumer using this recipe including the storage guidelines and time frames recommended in the recipe notes. The consumer holds all responsibilities to ensure that food hygiene and safety standards are adhered to.