VIP Uglies

VIP Uglies (Vegetables in Polenta Uglies)

Makes: approximately 30

img_4925

Ingredients:

  • 3/4 cup polenta
  • 3 3/4 cups water
  • 2 stock cubes (vegetable or chicken)
  • 1 large carrot, grated
  • 1 zucchini, grated
  • 2 large florets cauliflower, grated
  • 100g pumpkin, grated
  • 2 bacon rashers, diced (optional)
  • Salt & pepper to taste


Method:

  • Place the polenta, water and stock cubes into a small saucepan and over a medium heat bring to the boil
  • Reduce the heat and simmer for 20 minutes using a whisk to stir well every couple minutes
  • Remove from the heat and allow to cool
  • Preheat the oven for 180 degrees and line two baking trays with baking paper
  • Prepare the vegetables and then mix the vegetables through until well combined
  • Dollop a tablespoon of the mixture on the prepared baking tray
  • Bake in the preheated oven for about 20 minutes until golden brown
  • Allow to cool completely until transferring to a wire rack


Recipe Notes:

  • Store in an airtight container in the fridge for the maximum of 5 days
  • This recipe is freezer friendly to be consumed within 6 months.

C4K Kitchen Title Bar

Disclaimer: C4K Kitchen does not hold any responsibility for the consumer using this recipe including the storage guidelines and time frames recommended in the recipe notes.  The consumer holds all responsibilities to ensure that food hygiene and safety standards are adhered to.


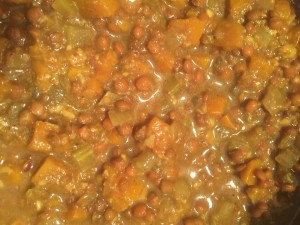

Dahl

Dahl

Serves: 4

Dahl

Ingredients:

  • 1 x 400g can lentils, rinsed and drained
  • 1 tablespoon butter
  • 1 onion, finely diced
  • 1 celery stalk, finely diced
  • 4 cloves garlic, finely diced
  • 1 tablespoon fresh grated ginger
  • 1 tablespoon ground coriander
  • 1 tablespoon ground cumin
  • 1 tablespoon turmeric
  • 1 tablespoon garam masala
  • 1/2 teaspoon ground chilli
  • 200g pumpkin, diced
  • 3 cups vegetable or chicken stock


Method:

  • Melt the butter over a medium heat in a heavy based saucepan
  • Add in the onion, celery and garlic to the saucepan and saute for about 2-3 minutes until the onion starts to soften
  • Add in the fresh ginger, pumpkin and all remaining spices and fry off the spices for about 3-5 minutes until aromatic
  • Add in the lentil and stock, then bring to the boil
  • Reduce the heat to a slow steady simmer and simmer for 60 minutes
  • Serve with steamed rice and 2ID naan bread
  • Dahl with Rice


Recipe Notes:

  • Store covered in the fridge for the maximum of 3 days
  • This recipe is freezer friendly to be consumed within a maximum of 6 months

C4K Kitchen Title Bar

Disclaimer: C4K Kitchen does not hold any responsibility for the consumer using this recipe including the storage guidelines and time frames recommended in the recipe notes.  The consumer holds all responsibilities to ensure that food hygiene and safety standards are adhered to.


Gluten Free Dairy Free Ham & Cheese Scrolls


Gluten Free Dairy Free Ham & Cheese Scrolls

Makes: 15-18

DF GF Ham & Cheese Scrolls

Ingredients:

  • 2 teaspoons yeast
  • 2 teaspoons caster sugar
  • 1 cup warm water
  • 1 1/2 cups gluten free SR flour
  • 1 1/2 cups gluten free plain flour
  • 1 tablespoon psyllium husk
  • 2 tablespoons minced garlic
  • 200g shredded ham
  • 12 sliced of vegan cheese


Method:

  • Add the yeast and sugar to the warm water and stir well, allow to sit for 10 minutes to activate the yeast until it is foamy on the surface
  • In a large mixing bowl combine the 2 flours and the psyllium husk and mix well
  • Make a well in the centre of the dry ingredients and pour in the activated yeast and all of the liquid into the well
  • Using a butter knife to fold the dry flour into the centre of the mixing bowl where the liquid is and continue to mix until you have a dough that has just come together
  • Turn the mixture out onto a dry clean bench and knead the dough for about 10 minutes once the dough is smooth and has come together
  • Place the dough in a lightly oiled bowl and cover with alfoil and allow to sit for 90-120 minutes
  • Remove the alfoil and punch out the air pockets in the dough
  • Turn the dough out onto a dry lightly floured and clean surface and roll the dough into a rectangle roughly 20 x 35cm
  • Spread the minced garlic evenly over the rolled out dough followed by evenly sprinkling the shredded ham and top with the cheese
  • Roll the dough into a log shape until well sealed
  • Slice the dough into about 1 – 1 1/2cm thick scrolls and lay them flat (with the scroll facing upwards) onto a baking tray that has been lined with baking paper
  • Loosely cover the scrolls with glad wrap and place is a dark dry place to allow to pro for 30-60 minutes
  • Preheat the oven to 180 degrees Celsius
  • Once the scrolls have finished proofing bake for 20-25 minutes  until golden
  • Allow to cool on a wire rack completely before bagging to keep or freeze


Recipe Note:

  • Store in an airtight container below 27 degrees for a maximu
  • This recipe is freezer friendly to be consumed within 6 months

C4K Kitchen Title Bar

Disclaimer: C4K Kitchen does not hold any responsibility for the consumer using this recipe including the storage guidelines and time frames recommended in the recipe notes.  The consumer holds all responsibilities to ensure that food hygiene and safety standards are adhered to.
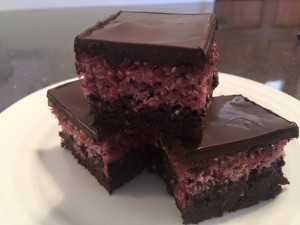


Mushroom Ragu with Creamy Polenta

Mushroom Ragu with Creamy Polenta

Serves: 4

Mushroom Ragu with Creamy Polenta

Ingredients:

  • 2 tablespoons butter
  • 1 onion, finely diced
  • 1 celery stalk, finely diced
  • 4 cloves garlic, finely diced
  • 600g mixed mushrooms
  • 1/2 cup dry white wine
  • 2 cups beef stock
  • 1 tablespoon Vegemite or Worcestershire sauce
  • 1 teaspoon paprika
  • 1/3 cup cream
  • 2 tablespoons of arrowroot or cornflour
  • 1 cup polenta
  • 4 cups chicken stock
  • 1 cup milk
  • ½ cup Parmesan cheese


Method:

  • Melt the butter in the base of a large saucepan, that has a well sealing lid, over a medium heat
  • Add in the onion, celery and garlic and sauté for approximately 3-5 minutes until the onion starts to soften
  • Add in all of the sliced mixed mushrooms and stir until they are well coated in the butter, add the wine in and then place the lid on the saucepan and cook for approximately 10 minutes on a medium-low heat to allow the mushrooms to steam in the coated butter
  • Add the stock,  Vegemite and paprika into the sauce and bring to the boil
  • Reduce the heat to a gentle simmer, replace the lid on the saucepan and simmer for 45 minutes, stirring occasionally
  • When the Mushroom Ragu has about 15 minutes left to simmer it is best to start your polenta so they are finished at the same time
  • Place the 4 cups of cold water and the polenta into a large saucepan and place over a medium heat and use a whisk to stir continually until it comes to a steady simmer
  • Reduce the heat to a medium-low heat and place the lid on the saucepan and allow the polenta to simmer for 25 minutes, it is a misconception that polenta needs to be continuously stirred for the entire cooking time, you just need to stir every 5 minutes or so to ensure it doesn’t stick on the bottom.
  • While the polenta is cooking you will need to finish off the Ragu by creating a flour paste out of the flour and cream and then mix the paste through the mushroom mixture until evenly distributed
  • Continue to simmer the Mushroom Ragu under a low heat with the lid off until the polenta is cooked and ready to serve, this will allow the flour to cook out and the ragu to thicken
  • To finish your polenta remove from the heat then add in the milk and the cheese stirring to ensure it is well combined, replace the lid on the saucepan and sit for 5 minutes, give the polenta another good stir then serve immediately topped with your Mushroom Ragu.


Recipe Notes:

  • Store covered in the fridge for a maximum of 3 days. However the polenta is best served fresh
  • Any left over polenta, it is recommend to spread this out onto a baking paper lined tray to about 1/2cm thick and allow to set and use for polenta chips or C4K Kitchen’s Polenta Star Pizzas
  • The Mushroom Ragu is freezer friendly to be consumed within 6 months
  • The Mushroom Ragu is also delicious served over a steak or a  baked potato instead of the polenta
  • The polenta used in the recipe was Sienna’s Fine Grain Polenta
    http://shop.sienafoods.com.au/product/48875-siena-1kg-12-polenta-fine
  • The mushroom mix used in the photo was 150g oyster mushrooms, 100g shitake mushrooms, 150g brown mushrooms, 300g field/button mushrooms.


C4K Kitchen Title Bar

Disclaimer: C4K Kitchen does not hold any responsibility for the consumer using this recipe including the storage guidelines and time frames recommended in the recipe notes.  The consumer holds all responsibilities to ensure that food hygiene and safety standards are adhered to.


Cherry Ripe Brownies


Cherry Ripe Brownie

Makes: 24 squares

Cherry Ripe Brownie

Brownie Ingredients:

  • 3 eggs, beaten
  • 1/2 cup maple syrup
  • 1/4 cup milk
  • 1/3 cup butter, melted
  • 1/2 teaspoon baking soda
  • 1 teaspoon apple cider vinegar
  • 1/3 cup coconut flour
  • 3 tablespoons cacao powder

Filling Ingredients:

  • 300g pitted cherries, drained (fresh, frozen or canned)
  • 100g shredded coconut
  • 60g chia seeds
  • 90g coconut oil, melted
  • 2 tablespoons maple syrup

Topping Ingredients:

  • 200g dark chocolate
  • 1 tablespoon coconut oil


Method:

  • Preheat the oven to 180 degrees and prepare either a brownie tin (18 x 25cm) or a 20cm square tin by greasing and lining with baking paper with an overhang on 2 opposite sides to allow the slice to be easily lifted out once set
  • Whisk together the eggs, maple syrup, milk, butter, baking soda and the vinegar until well combined
  • Mix through the cacao and coconut flour until smooth and well combined
  • Pour the batter evenly into the prepared tin
  • Bake for 25-30 minutes or until the centre is set
  • Remove from the oven, leave the brownie in the tin and sit for at least 15 minutes before preparing the filling.
  • To prepare the filling, place all the ingredients into a food processor and pulse until combined and textured with some small lumps of cherries.
  • Spread the mixture evenly over the brownie base and place in the freezer while you prepare the topping.
  • To prepare the topping, place the dark chocolate and coconut oil in an small heatproof bowl and sit over a saucepan of simmering water stirring with a butter knife until melted
  • Spread the topping evenly over the cherry filling and place on a flat surface in the fridge for a minimum of 3 hours, but preferably overnight to allow to set.


Recipe Notes:

  • To increase the vibrancy of the middle layer you can add in a small amount of red food colouring.
  • To slice use a sharp blade knife dipping the blade into a jar of boiling water between each slice to easily slide the knife through the slice
  • Store in an airtight container in the fridge for a maximum of 7 days (if it lasts that long)
  • The brownie base is freezer friendly on its on but it is not suitable for freezing as a complete slice
  • To make the brownie base dairy free you can replace the milk with coconut milk and the butter with nuttalex or coconut oil

C4K Kitchen Title Bar

Disclaimer: C4K Kitchen does not hold any responsibility for the consumer using this recipe including the storage guidelines and time frames recommended in the recipe notes.  The consumer holds all responsibilities to ensure that food hygiene and safety standards are adhered to.


Satay Chicken Burgers


Satay Chicken Burgers

Makes: 8

Satay Chicken Burgers

Ingredients:

  • 500g chicken mince
  • 3 spring onion, finely diced
  • 2 tablespoons freshly shredded coriander (optional)
  • 1/2 cup ground rice
  • 3 tablespoons smooth peanut butter
  • 1 tablespoon curry powder
  • 1 teaspoon ground coriander
  • 1 teaspoon ground cumin
  • 1 teaspoon turmeric
  • 1 teaspoon garlic salt


Method:

  • Place all ingredients into a mixing bowl and use damp hands to massage the mixture ensuring it is very well combined.
  • Divide the well combined burger mix into 8 portions and roll into golf balls
  • Heat 1-2 tablespoons of rice bran oil in a heavy based frying pan over a medium-high heat, evenly place 4 of the balls in the frying pan and then press down to flatten to about 2cm thick, cook for approximately 4-5 minutes until golden brown, flip the burger and repeat on the other side
  • Remove the burgers and place on some kitchen paper to drain any excess oil why you cook the remaining burgers.


Recipe Notes:

  • Store covered in the fridge for a maximum of 2 days
  • This recipe is freezer friendly


Disclaimer: C4K Kitchen does not hold any responsibility for the consumer using this recipe including the storage guidelines and time frames recommended in the recipe notes.  The consumer holds all responsibilities to ensure that food hygiene and safety standards are adhered to.
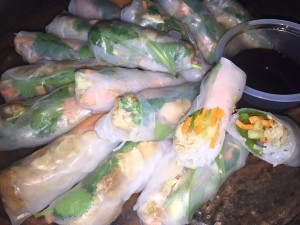


Cabbage Rolls


Cabbage Rolls

Serves: 6

Cabbage Rolls

Ingredients:

  • 1 whole head cabbage
  • 300g beef mince
  • 300g pork mince
  • 1 cup cooked brown rice
  • 1 carrot, grated or finely diced
  • 1 onion, finely diced
  • 1 celery stalk, finely diced or grated
  • 1 zucchini, finely diced or grated
  • 2 tablespoons Worcestershire sauce
  • 1 egg
  • 1 tablespoon minced garlic
  • 1 portion of C4K Kitchen’s Mumma’s Magic Sauce (approximately 700-800ml)
  • 1 cup chicken or beef stock
  • 1 tablespoon pure corn flour


Method:

  • Fill a stock pot pot with water and bring to the boil, place in the entire cabbage very gently into the boiling water until the outside leaves fall off
  • Once you have collected about 16 leaves place them on some kitchen paper and remove the remaining cabbage and set aside for another use
  • In a mixing bowl place in the mince meats, rice, carrot, onion, celery, zucchini, Worcestershire, egg and garlic, use your hands to combine the mixture evenly
  • Place about 3 tablespoons of mixture about centered 2cm from the top of one of the cabbage leaves, fold the 2cm over the mixture, pinch and fold in the sides and then roll up the remaining cabbage leaf ensuring the meat mixture is fully enclosed
  • NOTE: If the cabbage leaf has a thick core through the middle of the leaf you may want to consider cutting the thickest part out and starting the roll by placing the meat on the cut section
  • Complete with the remaining mixture and cabbage leaves
  • Place the cabbage rolls in the base of your slow cooker and then evenly pour the MMS and stock over the cabbage rolls
  • Cook on LOW for 6-8 hours or HIGH for 3-4 hours
  • 15 minutes before serving gently remove the cabbage rolls and place on a serving platter and turn your slow cooker up to HIGH
  • Mix 1 tablespoon of pure cornflour into 2 tablespoon water into a paste, use a whisk to stir in a small portion of the paste into the tomato sauce mixture in the base of the slow cooker, allow to cook for 5 minutes and see if the sauce is your desired thickness, if not add a little bit more cornflour paste, if it is allow the sauce to cook for another 10 minutes to cook out the flour
  • Serve your cabbage rolls with a healthy amount of the MMS sauce poured over the top.


Recipe Notes:


C4K Kitchen Title Bar

Disclaimer: C4K Kitchen does not hold any responsibility for the consumer using this recipe including the storage guidelines and time frames recommended in the recipe notes.  The consumer holds all responsibilities to ensure that food hygiene and safety standards are adhered to.
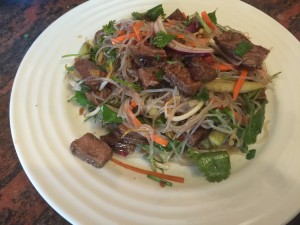


Chicken Cold Rolls


Chicken Cold Rolls

Makes: 24

Chicken Cold Rolls

Ingredients:

  • 2 chicken breast
  • 1 tablespoon minced garlic
  • 1 teaspoon onion powder
  • 1 teaspoon celery salt
  • 1 cup chicken stock
  • 1 teaspoon sesame oil
  • 1 teaspoon soy sauce
  • 1/2 teaspoon fish sauce
  • 50g dried vermicelli rice noodles
  • 24 x 16cm rice paper discs
  • 1 carrot, finely julienne
  • 1 cucumber, finely julienne
  • 1/2 cup bean sprouts
  • 1 cup shredded fresh coriander, stems included

Dipping Sauce Ingredients:

  • 2 tablespoons sweet chilli sauce
  • 2 tablespoons soy sauce
  • 1 tablespoon fish sauce
  • 1 tablespoon lemon juice
  • 1 tablespoon honey
  • 1 teaspoon rice wine vinegar (optional)

Method:

  • Place the chicken, minced garlic, onion powder, celery salt and chicken stock in the slow cooker and cook the chicken on LOW for 3-4 hours or HIGH for 2 hours
  • When the chicken is cooked through and tender use 2 forks to shred the chicken
  • Pour the chicken and the juices into a mixing bowl, add in the sesame oil, soy sauce and fish sauce to the chicken and stir until well combined, set aside while you prepare the remaining fillings
  • Place your vermicelli rice noodles in a heat proof bowl and cover with boiling water and allow to sit for 15 minutes until soft and translucent, drain and set aside to cool
  • Finely julienne your carrots and cucumber and get your bean sprouts and coriander ready
  • To set up your rolling station have a clean and wet tea towel folded in half directly in front of you, you will need a shallow container that is big enough to fit the entire rice paper disc in flat filled with about 3cm of water and all the fillings within arms reach
  • Soak your first rice paper disc in the water for 30 seconds and then gently place on the wet tea towel immediately flattening out all edges, place your next rice paper disc in the soaking water while you fill the one you are working with
  • Place a generous pinch of the vermicelli noodle about 2cm in from one end and then top with about 1 tablespoon of the shredded chicken, 4-6 julienne pieces of carrot and cucumber, a couple of bean sprouts then top with a generous amount of coriander ensuring leaves are at both ends of the filling
  • Gently grab the 2cm piece and fold it over the fillings trying to pull it all in to encase it tightly and then 1/4 roll the fillings
  • Pinch in both the sides on fold the sides in slightly angled inwards to ensure you get a smooth and even roll
  • Continue to roll the cold roll until you have fully rolled
  • Place in an air tight container and continue the rolling process until you have run out of ingredients
  • When placing the cold rolls in the container ensure there is a gap between each cold roll of approximately 1/2cm as if you place them next to each other they will tear when taking them out of the container.  If you need to do another layer of cold rolls on top place a piece of baking paper between the layers.
  • To make the dipping sauce, place the ingredients into a small mixing bowl and stir until well combined.

Recipe Notes:

  • To be stored in an airtight container as described above for a maximum of 3 days
  • This recipe is not freezer friendly
  • Instead of SC pulling your chicken you can replace with left over roast chicken or even store bought rotisserie chicken.

C4K Kitchen Title Bar


Disclaimer: C4K Kitchen does not hold any responsibility for the consumer using this recipe including the storage guidelines and time frames recommended in the recipe notes.  The consumer holds all responsibilities to ensure that food hygiene and safety standards are adhered to.
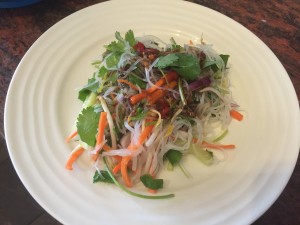


Thai Beef Salad


Thai Beef Salad

Serves: 4 mains

Thai Beef Salad

Ingredients:

  • 100-120g dried vermicelli noodles
  • 4 x 100-150g sirloin steaks (or another quality cut of meat)
  • 1 teaspoon garlic salt
  • 1 large carrots, finely julienne
  • 1 continental cucumber, finely julienne
  • 1 red onion, thinly sliced
  • 1 cup bean shoots
  • 1 cup fresh shredded coriander, stems included
  • 1/2 cup fresh roughly shredded mint
  • 1 portion of C4K Kitchen’s Thai Chilli Salad Dressing

Method:

  • Place the vermicelli noodles in a mixing bowl and cover with boiling water for approximately 15 minutes or until they are translucent
  • While your noodles are soaking heat a heavy based frying pan and when warm place in your steaks, sprinkle the garlic salt evenly between the steak.
  • Cook the steaks for approximately 3 minutes each side (for medium rare) or adjust the cooking time to how you like your steak cooked then remove from the frying pan set aside to rest
  • Drain the noodles and set aside to cool
  • Prepare your vegetables as described and add into the mixing bowl
  • Thinly slice the steak and add into the salad
  • Add in the fresh herbs and use your hands to mix the salad well ensuring the noodles are evenly spread out
  • Dress the salad just before serving ensuring the salad is well coated.

Recipe Notes:

  • Store covered in the fridge for a maximum of 3 days
  • This is not a freezer friendly recipe

C4K Kitchen Title Bar

Disclaimer: C4K Kitchen does not hold any responsibility for the consumer using this recipe including the storage guidelines and time frames recommended in the recipe notes.  The consumer holds all responsibilities to ensure that food hygiene and safety standards are adhered to.


Rice Noodle Salad


Rice Noodle Salad

Serves: 4 mains or 8-10 sides

Thai Noodle Salad

Ingredients:

  • 100-120g dried vermicelli noodles
  • 1 large carrots, finely julienne
  • 1 continental cucumber, finely julienne
  • 1 red onion, thinly sliced
  • 1 cup bean shoots
  • 1 cup fresh shredded coriander, stems included
  • 1/2 cup fresh roughly shredded mint


Method:

  • Place the vermicelli noodles in a mixing bowl and cover with boiling water for approximately 15 minutes or until they are translucent
  • Drain the noodles and set aside to cool
  • Prepare your vegetables as described and add into the mixing bowl
  • Add in the fresh herbs and use your hands to mix the salad well ensuring the noodles are evenly spread out.
  • Serve with your preferred dressing


Recipe Notes:


C4K Kitchen Title Bar


Disclaimer: C4K Kitchen does not hold any responsibility for the consumer using this recipe including the storage guidelines and time frames recommended in the recipe notes.  The consumer holds all responsibilities to ensure that food hygiene and safety standards are adhered to.