Berry Crumble Cake

Berry Crumble Cake

Makes: 1 X 18-20cm round cake
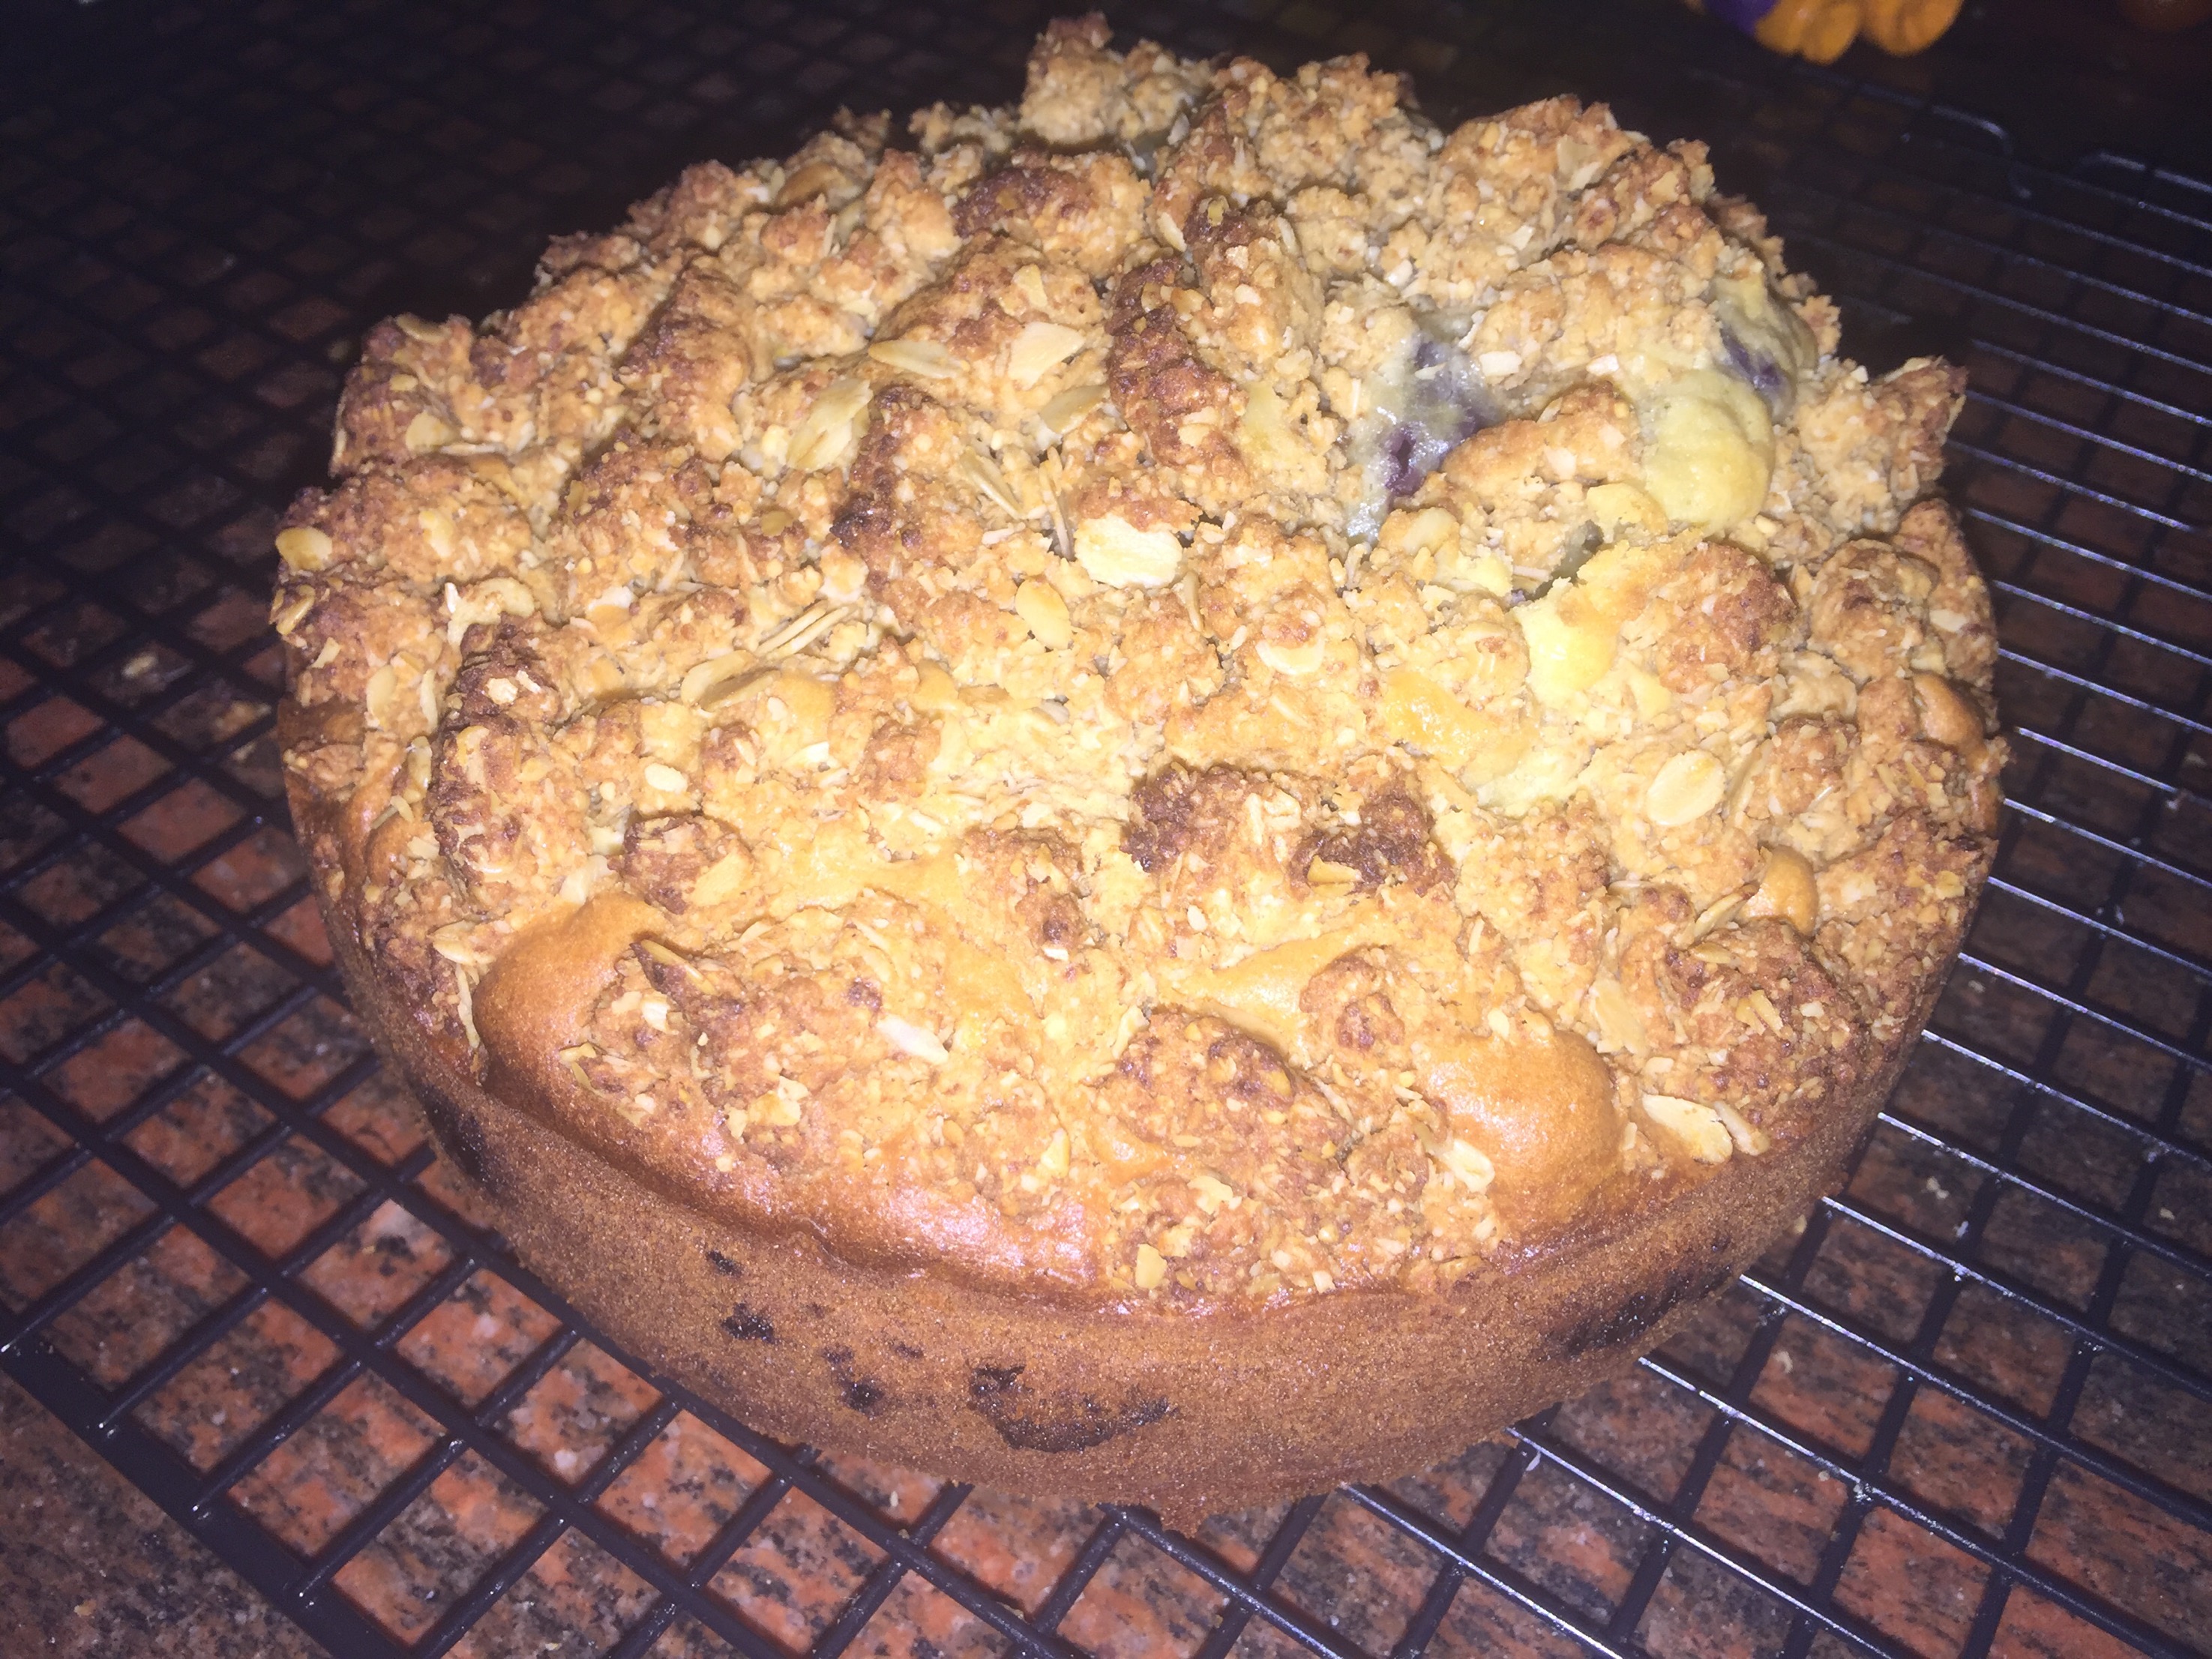
IMG_6029-0

Cake Ingredients:

  • 175g butter, softened
  • 100g caster sugar
  • 3 eggs, lightly beaten
  • 1/4 cup milk
  • 200g SR Flour
  • 70g almond meal
  • 6 strawberries, diced 
  • 125g punnet fresh blueberries 

Crumble Ingredients:  

  • 1/2 cup almond meal
  • 1/2 cup rolled oats
  • 3/4 cup chopped walnuts 
  • 1/2 cup coconut or brown sugar
  • 100g butter, room temperature cubed

Method:

  • Preheat oven to 180 degrees Celcius and prepare an 18-20cm round cake by lining and pregreasing
  • To prepare the cake place the butter and sugar in a mixing bowl and use electric beaters to cream until light and fluffy
  • Add in the eggs and milk and beat until just combined
  • Add in the flour and beat very lightly until mixed through 
  • Use a spatula to fold through the almond meal
  • Pour half of the cake batter into the prepare and then evenly spread the fresh berries over the cake batter
  • Very gently evenly spread the remaining cake batter
  • To prepare the crumble place the walnuts and rolled oats in a food process until has a crumble texture and transfer to a mixing bowl
  • Add in the sugar and almond and combine well
  • Use your fingertips to rub in the crumble mixture until well combine
  • Gently spread the mixture over the top of the batter 
  • Bake the cake for approximately 70 minute, or until a cake skewer comes out clean, covering loosing with alfoil after 30 minutes
  • Allow to cool in cake tin for at least 10 minutes before moving to a wire rack to cool completely.

Recipe Notes:

  • Store in airtight container for 3 days 
  • Cake is freezer friendly 
  • Fruit types are interchangeable 

Disclaimer: C4K Kitchen does not hold any responsibility for the consumer using this recipe including the storage guidelines and time frames recommended in the recipe notes. The consumer holds all responsibilities to ensure that food hygiene and safety standards are adhered to.


Falafel 


Falafel

Makes: approximately 16

Falafel
Ingredients:

  • 1 small onion
  • 2 cloves garlic
  • 1 X 400g can chick peas, drained & rinsed
  • 1 teaspoon ground cumin
  • 1 teaspoon ground coriander
  • 1/2 teaspoon turmeric
  • 1/2 cup whole meal plain flour
  • 2/3 cup fresh parsley
  • 1/3 cup fresh coriander
  • 1 tablespoon tahini
  • 1 egg

Method:

  • Place all ingredients in a food processor and blend until smooth
  • Thermo cooking [Speed 10, 6 Seconds] scrape sides with a spatula [Speed 6, 10 seconds] scrape sides with a spatula [Speed 6, 10 Seconds]
  • Use floured hands to rolls into tablespoon sized balls until all the mixture is used
  • Place the falafels covered in the fridge for a minimum of 30 minutes but preferably overnight
  • To cook heat a small amount of oil in a heavy based saucepan over medium heat
  • Cook the falafels for approximately 10 minutes rotating regularly until browned evenly and cooked through.
  • Place on kitchen paper to remove excess oil then serve.

Recipe Notes:

  • Store covered in the fridge to be used within 3 days
  • This recipe is freezer friendly, to be consumed within 6 months

C4K Kitchen Title Bar
Disclaimer: C4K Kitchen does not hold any responsibility for the consumer using this recipe including the storage guidelines and time frames recommended in the recipe notes. The consumer holds all responsibilities to ensure that food hygiene and safety standards are adhered to.


Spinach & Feta Mini Quiches


Spinach & Feta Mini Quiches

Makes: approximately 36

Spinach & Feta Cheese Mini Quiches

Ingredients:

  • 3 sheets shortcrust pastry, defrosted
  • 250g frozen spinach, defrosted
  • 200g feta cheese, diced or crumbled
  • 1 cup grated cheese
  • 3/4 cup wholemeal plain flour
  • 1 tablespoon minced garlic
  • 6 eggs, lightly beaten
  • 1/2 cup natural yoghurt


Method:

  • Preheat the oven to 180 degrees Celsius
  • Place all the ingredients except eggs and yoghurt into a large mixing bowl and mix well
  • In a separate mixing bowl crack all the eggs and add theyoghurt and salt & pepper to taste whisking lightly until all combined then pour into the filling mix and stir well until well combined
  • Use a round cookie cutter (or egg ring) to cut circles in the pastry, do not throw out un-used pastry, this will be reused.
  • To re-use the discarded pastry knead it together and roll it out to the same thickness as the original sheets and continue to cut your pastry discs
  • Spray the mini quiche tin well with rice bran oil spray, place the pastry disc into each well.
  • Add in a tablespoon of the filling mix into the well until it’s just below the pastry level. Make sure your regularly stirring the filling mix as the heavier filling will sink to the bottom of the bowl
  • Bake for 15-20 minutes until golden brown on top.


Recipe Notes:

  • Store in an airtight container in the fridge for up to 3 days
  • This recipe is freezer friendly once cooked to be consumed within 3 months


C4K Kitchen Title Bar


Disclaimer: C4K Kitchen does not hold any responsibility for the consumer using this recipe including the storage guidelines and time frames recommended in the recipe notes.  The consumer holds all responsibilities to ensure that food hygiene and safety standards are adhered to.


Spinach & Feta Cob Loaf


Spinach & Feta Cob Loaf

Spinach & Feta Cob Loaf

Ingredients:

  • 1 round cob loaf
  • 250g cream cheese
  • 300g sour cream
  • 250g feta cheese, diced or crumbled
  • 250g frozen spinach, defrosted
  • 1 tablespoon minced garlic
  • 1 cup grated cheese
  • 1/2 cup grated parmesan cheese


Method:

  • Preheat your oven to 180 degrees Celsius
  • Cut the top section off your cob loaf and remove all the stuffing from the loaf, do not throw it away as you can serve loaf with the bread filling. Replace the cob loaf lid and place the entire loaf in the oven for 10-15 minutes
  • Place all other ingredients into a large mixing bowl and mix well, place in the microwave for 3 minutes on high
  • Remove from the microwave and mix well, if the ingredients have not yet combined well put back in the microwave for another 60 seconds, repeat this process until the dip filling is well combined, warm and bubbly
  • Remove the loaf from the oven and place on a serving platter, fill the centre of the loaf with the dip mixture, replace the lid and scatter the extracted inside around the outside of the loaf ready to serve.


Recipe Notes:

  • Best served fresh
  • Is not suitable for freezing

C4K Kitchen Title Bar


Disclaimer: C4K Kitchen does not hold any responsibility for the consumer using this recipe including the storage guidelines and time frames recommended in the recipe notes.  The consumer holds all responsibilities to ensure that food hygiene and safety standards are adhered to.


C4K Kitchen Pavlova


C4K Kitchen’s Pavlova

Serves: 8-12

C4K Kitchen Pavlova

Ingredients:

  • 8 egg whites
  • 1 cup caster sugar
  • 2 tablespoons corn flour
  • 2 teaspoons white vinegar
  • 1 teaspoon vanilla extract

Topping Ingredients:

  • 300ml full fat thickened cream
  • 1 1/4 tablespoon icing sugar
  • 1/2 teaspoon vanilla extract
  • Assorted fresh fruit


Method:

  • Preheat oven to 150 degrees Celsius and line a large baking tray within baking paper that has a 20cm circle drawn on the middle of the paper on the underside
  • Place the egg whites in a large mixing bowl and use your electric beaters to beat  until firm peaks form
  • Gradually add in the sugar, 1/4 cup at a time beating constantly until the sugar is all dissolved before adding in more until the mixture is thick and glossly
  • Add in the cornflour , vinegar and vanilla until just combined
  • Spoon the mixture onto the baking paper staying within the disc drawn on the paper and shape the mixture to be as even as possible
  • Bake in the oven for 10 minutes, then reduce the oven to 110 degrees Celsius and bake for another 1 hour or until the pavlova is crisp and dry
  • Turn the oven off  and leave the pavlova in the over with the door closed to cool completely, preferably overnight.
  • To decorate your pavlova pour your cream, icing sugar and vanilla into a mixing bowl and whip the cream until thick and fluffy
  • Gently spread the whipped cream over the cooled pavlova base and finally top with your preferred selection of fresh or preserved fruits.


Recipe Notes:

    • The picture shown has the pavlova topped with fresh strawberries, fresh blueberries, C4K Kitchen’s Lemon Curd and fresh grated dark chocolate.
    • It is recommended that one tart fruit be used to help balance out the sweetness of the base, such as lemon, lime, passionfruit etc.
    • To be stored covered in the fridge for up to 5 days
    • This recipe is not freezer friendly

C4K Kitchen Title Bar

Disclaimer: C4K Kitchen does not hold any responsibility for the consumer using this recipe including the storage guidelines and time frames recommended in the recipe notes.  The consumer holds all responsibilities to ensure that food hygiene and safety standards are adhered to.


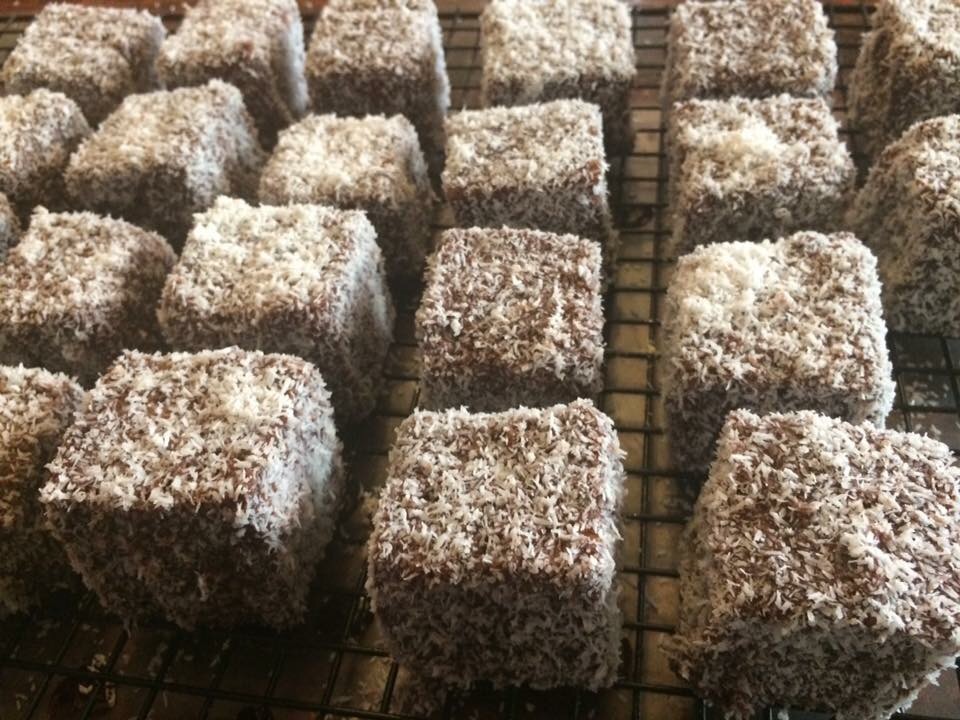
Lamingtons


Lamingtons

Makes:24


Ingredients:

  • 6 egg
  • 1/2 cup caster sugar
  • 1 1/4 cups SR flour
  • 1/4 cup corn flour
  • 80ml boiling water
  • 30g butter
  • 2 – 2 1/2 cup desicated coconut

Chocolate Sauce Ingredients:

  • 4 1/2 cups icing sugar
  • 2 tablespoons corn flour
  • 1/2 cup unsweetened cocoa powder
  • 1 tablespoon butter, softened
  • 3/4 cup full cream milk

Method:

  • Preheat your oven to 180 degrees Celsius (170 degrees for fan forced oven) and prepare a tin 20x30cm by well greasing and lining with baking paper
  • Crack all your eggs into a large mixing bowl and use your beaters to beat until light and fluffy, approximately 2 minutes
  • Add in the caster sugar and on a high speed beat the egg mix until soft peaks form in the egg mix, this will take approximately 8 minutes
  • Sift you flours together twice and set aside
  • In a small mixing bowl add the butter and boiling water and allow the butter to melt into the water
  • To prepare the cake batter sift the combine flour over the egg mix and gently fold through with a spatula
  • Add in the butter mix and again gently fold through until just combined
  • Pour the batter gently into the prepare tin and bake for 25 minutes
  • Once cooked invert onto a wire cooling rack to cool while you prepare the chocolate sauce
  • Sift the icing sugar, corn flour and cocoa into a heatproof bowl and sit this bowl over top of a simmering saucepan of water (a double boiler)
  • Add in the milk and butter until the chocolate sauce comes together and is thick enough to evenly coat the back of a spoon
  • Return to you sponge and cut into 24 equal portions
  • Prepare your preparation station by having half the coconut in a shallow pan and the other half in a container behind and have a wire rack with a silicon may underneath it
  • Pour 1/4 of the chocolate sauce into a bowl
  • Roll the sponge cube in the chocolate sauce starting with the 4 open cut sides and gently roll to coat the top and bottom sides and then place in the coconut
  • Repeat with another 5 sponge cubes, you will need to work quickly as the chocolate sauce will thicken and become difficult to use
  • Roll each of the 6 coated sponge cubes in the coconut and sprinkle extra coconut over the top of the cubes
  • Once a coated sponge cube is fully coated place that lamington onto the wire rack to set, repeat with the remainder of that 1/4 batch
  • Rinse out your chocolate bowl (or get another bowl) and slightly reheat the chocolate sauce again to make the sauce more fluid and repeat the coating process with another 6 sponge cubes.
  • Repeat this process until you have 24 Lamingtons
  • Allow to set for a minimum of 2 hours before eating.

Recipe Notes:

  • Store Lamingtons in an airtight container below 27 degrees Celsius and consume within 1 week.
  • To serve as a dessert, slice a lamington in half horizontally and sandwich the halves together with raspberry jam and whipped cream.
  • To make lamington fingers cut your sponge into finger shapes as opposed to cubes.
  • Freezer friendly to be consumed within 3 months.

C4K Kitchen Title Bar

Disclaimer: C4K Kitchen does not hold any responsibility for the consumer using this recipe including the storage guidelines and time frames recommended in the recipe notes.  The consumer holds all responsibilities to ensure that food hygiene and safety standards are adhered to.


Quinoa Crackers


Quinoa Crackers

Makes: approximately 48

IMG_0185-0

Ingredients:

  • 1/2 cup arrowroot flour
  • 3/4 cup wholemeal plain flour
  • 1/2 cup quinoa
  • 1/2 cup water
  • 1/4 cup olive oil
  • 1 tablespoon chia seeds
  • 1 tablespoon sesame seeds
  • 1/2 teaspoon salt
  • Big pinch of sugar

Method:

  • Preheat oven to 180 degrees Celsius (170 degrees Celsius for fan forced oven) and line two baking sheets with baking paper
  • Combine all dry ingredients and mix well and create a well in the middle
  • Pour the oil and water into the well and use a butter knife to mix the ingredients together until you have a nice soft dough
  • Turn the dough onto a clean lightly floured bench and knee until it’s a smooth ball
  • Halve the dough
  • Place the first half into one of the lines baking tray, place another piece of baking paper over the top and roll the dough out to the size of the tray or until it’s about 1-2mm thick
  • Use a pizza cutter or a sharp knife to cut the rolled dough into the desired shaped and size of the crackers you are after
  • Repeat with the second portion of dough
  • Bake for 15-25 minutes or until golden, cooking time will vary with the thickness of the cracker.

Recipe Notes:

  • Store in an air tight container in the pantry for up to a week
  • The dough is freezer friendly however the cooked crackers are not freezer friendly
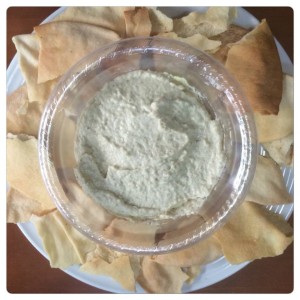
  • Delicious served with any of the C4K Kitchen dips as shown below with the C4K Kitchen’s Mushroom Paste

C4K Kitchen Title Bar

Disclaimer: C4K Kitchen does not hold any responsibility for the consumer using this recipe including the storage guidelines and time frames recommended in the recipe notes. The consumer holds all responsibilities to ensure that food hygiene and safety standards are adhered to.


Salt and Pepper Tofu


Salt and Pepper Tofu

Serves: 4

Salt & Pepper Tofu

Ingredients:

  • 250g block of firm tofu
  • 1/2 cup plain flour
  • 1 teaspoon salt
  • 1 teaspoon ground white pepper
  • 1 teaspoon Chinese five spice
  • 1/4 teaspoon ground chilli powder


Method:

  • Cut the block of tofu into equal sized pieces
  • Place all the remaining ingredients mixing bowl and mix well to combine
  • Place about 1/3 of the tofu pieces into the bowl, very gently toss the ingredients in the mixing bowl ensuring all the tofu pieces are well coated in the seasoning.
  • Heat about 1cm of vegetable oil in a heavy based frying pan to very hot
  • Remove the tofu from the bowl shaking off any excess flour and place into the hot oil making sure you don’t over crowd the pan leaving room between each piece of tofu
  • Cook for 2-3 minutes until golden and then turn over cooking for another 2-3 minutes then remove from the frying and place on some paper towel to absorb excess oil
  • Repeat the coating and cooking process with the remaining tofu pieces
  • Serve with your choice of dipping sauce.


Recipe Notes:

  • Store covered in the fridge for the maximum of 2 days however best served frish
  • This recipe is not freezer friendly

C4K Kitchen Title Bar

Disclaimer: C4K Kitchen does not hold any responsibility for the consumer using this recipe including the storage guidelines and time frames recommended in the recipe notes.  The consumer holds all responsibilities to ensure that food hygiene and safety standards are adhered to.


Salt and Pepper Squid


Salt and Pepper Squid

Serves: 4

Salt & Pepper Squid

Ingredients:

  • 2 large or 3 small squid tubes
  • 1/2 cup plain flour
  • 1 teaspoon salt
  • 1 teaspoon ground white pepper
  • 1 teaspoon Chinese five spice
  • 1/4 teaspoon ground chilli powder

Method:

  • Rinse the squid tubes in lightly salted water and then pat dry with some paper towel
  • Cut the squid into the desired shape or rings from the tube
  • Place all the remaining ingredients in a zip lock bag or a Tupperware container with a secure lid, seal and shake well to combine
  • Place about 1/3 of the squid pieces into the bag/container, securely seal and shake very well to ensure all the pieces are well coated in the seasoning.
  • Heat about 1cm of vegetable oil in a heavy based frying pan to very hot
  • Remove the squid from the bag/container shaking off any excess flour and place into the hot oil making sure you don’t over crowd the pan leaving room between each piece of squid
  • Cook for 1-2 minutes until golden and then turn over cooking for another 1-2 minutes then remove from the frying and place on some paper towel to absorb excess oil
  • Repeat the coating and cooking process with the remaining squid pieces
  • Serve with your choice of dipping sauce.


Recipe Notes:

  • Stored covered in the fridge for the maximum of 2 days, however best served fresh
  • This recipe is not freezer friendly

C4K Kitchen Title Bar

Disclaimer: C4K Kitchen does not hold any responsibility for the consumer using this recipe including the storage guidelines and time frames recommended in the recipe notes.  The consumer holds all responsibilities to ensure that food hygiene and safety standards are adhered to.


Roast Eggplant Dip


Roast Eggplant Dip

Roast Eggplant Dip

Ingredients:

  • 1 large or 2 small eggplants
  • 1 tablespoon tahini
  • 2 teaspoons extra virgin olive oil
  • 1 teaspoon fresh lemon juice
  • Salt & pepper, to taste


Method:

  • Preheat the oven to 180 degree, spray the eggplant(s) liberally with rice brand oil cooking spray and pierce the skin with a fork about 6 times evenly over the eggplant(s) surface and place them directly on the oven rack
  • Roast for about 20 minutes, then turn the eggplant(s) over then roast for another 20 minutes
  • Remove from the oven, allow to cool slightly then put in a plastic zip lock bag then set aside for 15 minutes
  • Peel of all the skin from the eggplant(s) and diced the roasted flesh
  • Place the roasted flesh and all other ingredients in a food processor or thermo cooking device, blitz until silky smooth [Speed 6, 10 seconds]
  • Keep in the fridge until you are ready to serve.


Recipe Notes:

  • Store in an airtight container in the fridge for a maximum of 7 days
  • This recipe is not freezer friendly

C4K Kitchen Title Bar

Disclaimer: C4K Kitchen does not hold any responsibility for the consumer using this recipe including the storage guidelines and time frames recommended in the recipe notes.  The consumer holds all responsibilities to ensure that food hygiene and safety standards are adhered to.