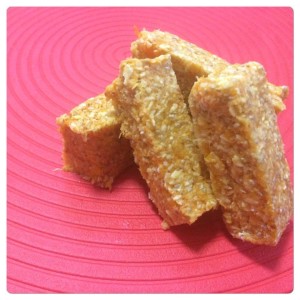
Easy Cheese Crackers


Easy Cheese Crackers

Makes: approximately 36

Easy Cheese Crackers

Ingredients:

  • 1 cup wholemeal plain flour
  • 75g cold butter, cubed
  • 1 1/2 cup grated cheese


Method:

  • Preheat oven to 180 degrees Celsius and line 2 tray with baking paper
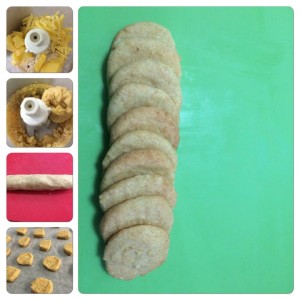
  • Combine all three ingredients in a food processor, thermo cooking unit and blend, continue to do this until the mixture will eventually turn into one big ball chasing itself around the bowl
  • Roll the ball into a log about 5cm round
  • Roll in glad wrap and put into the freezer for 5-10 minutes to make It firmer and easier to cut
  • With a sharp knife slice ¾ cm thick slices of the log and place each one flat on an ungreased baking sheet. After each slice rotate the log to ensure it best maintains a round shape
  • Gentle indent the top of each cracker by pressing down with a fork or cookie press
  • Bake for 8 – 14 minutes or until golden brown, the thicker the crackers the longer it will take


Recipe Notes:

  • Store in an airtight container below 27 degrees for the maximum of 5 days
  • The uncooked logs are freezer friendly to be consumed within 3 months


Disclaimer: C4K Kitchen does not hold any responsibility for the consumer using this recipe including the storage guidelines and time frames recommended in the recipe notes.  The consumer holds all responsibilities to ensure that food hygiene and safety standards are adhered to.


Cheesy Cauliflower Slice


Cheesy Cauliflower Slice
Makes: approximately 24 squares

Cheesy Cauliflower Slice

Ingredients:

  • 1 medium cauliflower, cut into florets
  • 1 cup grated cheese
  • 1/2 cup grated parmesan cheese
  • 1 large eggs
  • 1 teaspoon mixed herbs
  • 1 teaspoon minced garlic


Method:

  • Preheat oven to 220 degree Celsius, grease and line a baking tray with baking paper
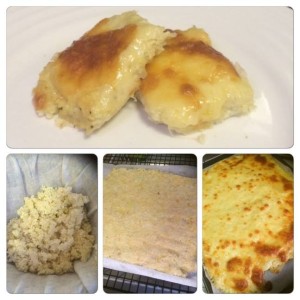
  • Place the cauliflower florets into a food processor or thermo cooking unit (Speed 6 for 8 seconds) and blend to a bread crumb like texture, once complete transfer the cauliflower meal into a sieve lined with a fresh linen/muslin cloth
  • Place the sieve on top of a saucepan with some water, bring the water to a boil then cover to steam the cauliflower for 5 minutes
  • Press cauliflower with a large spoon to push out liquid then pick up the cloth and ring out the ends to remove as much excess liquid as possible
  • Combine the cauliflower, half of both the cheeses, the egg and herbs into a bowl and mix well
  • Spread onto baking tray and use your hand to shape into an even-thickness rectangle. Sprinkle remaining half of both cheeses on top
  • Put in the oven for 20-30 minutes or until the cheese is melted and the sliced cooked through
  • Use a pizza cutter to slice while it is still hot as once the cheese sets it’s more difficult to cut
  • Allow to cool lightly on the baking tray for 10 minute before transferring to the separate squares to a cooling rack.


Recipe Notes:

  • Soak the muslin cloth immediately otherwise can be quite pungent when it dries.
  • Store in an airtight container in the fridge for a maximum of 3 days
  • This recipe is freezer friendly

 C4K Kitchen Title Bar

Disclaimer: C4K Kitchen does not hold any responsibility for the consumer using this recipe including the storage guidelines and time frames recommended in the recipe notes.  The consumer holds all responsibilities to ensure that food hygiene and safety standards are adhered to.


Cheesy Broccoli & Cauliflower Bread Pie


Cheesy Broccoli & Cauliflower Bread Pies
Makes: 9

Cheesy Broccoli & Cauliflower Bread Pies


Ingredients:

  • 9 slices of bread, crusts removed
  • 50g unsalted butter
  • 3 heaped tablespoons plain flour
  • 1 teaspoon minced garlic
  • 300ml milk
  • 1/2 cup grated cheese
  • 1/2 cup broccoli florets, fresh or frozen
  • 1/2 cup cauliflower florets, fresh or frozen


Method:

  • Preheat the oven to 180 degrees Celsius
  • Add the butter and garlic into a small saucepan and melt over medium—high heat until the butter is melted and then whisk in the flour to form a rue (with a “pastey” type texture) and cook for about 3 minutes to cook out the flour continuing to whisk
  • Gradually add in the milk continually whisking to ensure no lumps form once you have a nice thick cheese sauce add in the grated cheese and the broccoli and cauliflower that has either been grated, finely diced or blitzed in a food processor/thermo cooking device (Speed 6 for 8 seconds) until it has a rice like texture
  • Grease a 9 holes in a 12 hole muffin tin
  • Remove the crusts from the bread and use a rolling pin both directions on the bread to flatten slightly, fit the bread into one of the muffin tray holes and fill with the cheesy mixture, repeat with the remaining slices of bread and the mixture
  • Bake for 15 minutes or until golden on top and allow to cook as the filling will be very hot.


Recipe Notes:

  • Store in an airtight container in the fridge for a maximum of 3 days
  • This recipe is freezer friendly.


C4K Kitchen Title Bar 

Disclaimer: C4K Kitchen does not hold any responsibility for the consumer using this recipe including the storage guidelines and time frames recommended in the recipe notes.  The consumer holds all responsibilities to ensure that food hygiene and safety standards are adhered to.


Caulifredo Sauce


Caulifredo Sauce
Serves: 4-6


Ingredients:

  • 1 medium-large head of cauliflower
  • 1 tablespoon minced garlic
  • 2 tablespoons olive oil
  • 1 teaspoon garlic or onion salt
  • 300ml cream


Method:

  • Preheat oven to 180 degrees Celsius
  • Cut the head of cauliflower into florets about 4-5cm and spread out in a roasting dish
  • Whisk together the oil, garlic and salt until well combined and spread evenly over the cauliflower
  • Roast the cauliflower for 25-30 minutes
  • Pour all the cauliflower into a saucepan and cover with the cream, bring the cream to a boil and then reduce to a gentle simmer for 15 minutes or until the cauliflower is cooked through and very soft
  • Blend until smooth.


Thermo Cooking

  • Preheat oven to 180 degrees Celsius
  • Cut the head of cauliflower into florets about 4-5cm and spread out in a roasting dish
  • Whisk together the oil, garlic and salt until well combined and spread evenly over the cauliflower
  • Roast the cauliflower for 25-30 minutes
  • Pour all the cauliflower into your thermo bowl and cover with cream (Speed 1; 100 degrees; 15 minutes)
  • Allow to cool for approximately 5 minutes prior to processing
  • Blend until smooth (Speed 10 – 6 seconds, scrape down the side of the bowl with a spatula, Speed 6 – 10 seconds)


Recipe Notes:

  • Serve over your favourite pasta, as shown in the picture with linguine pasta
  • Serve over some grilled chicken or fish as a delicious sauce
  • Use as a delicious alternative to white sauce/cheese sauce in recipes like lasagne
  • To make this recipe DAIRY FREE replace the cream with either chicken stock, r vegetable stock or coconut cream
  • Store in an airtight container for a maximum of 3 days
  • This recipe is freezer friendly to be consumed within 3 months


 C4K Kitchen Title Bar

Disclaimer: C4K Kitchen does not hold any responsibility for the consumer using this recipe including the storage guidelines and time frames recommended in the recipe notes.  The consumer holds all responsibilities to ensure that food hygiene and safety standards are adhered to.


Cauli-Quinoa Chicken Nuggets


Cauli-Quinoa Chicken Nuggets
Makes: 36-48

Cauli Quinoa Chicken Nuggets

Ingredients:

  • 1/2 small head of cauliflower or 1/4 of large head of cauliflower
  • 1/2 cup uncooked quinoa
  • 2 chicken breasts
  • 1/2 teaspoon onion salt
  • 2 teaspoons minced garlic
  • 1 large egg
  • Salt & Pepper to taste
  • 3/4 cup plain flour
  • 2 eggs, lightly beaten
  • 1/2 cup milk
  • 3/4 cup panko breadcrumbs
  • 3/4 cup normal breadcrumbs


Method:

  • Cut up the cauliflower including the stem into about 3cm portions and either steam or boil until about 1/2 cooked and is softened, drain and place in the food processor and process until it has a breadcrumb like texture and place in a large mixing bowl
  • Simmer the quinoa in 1 cup of water for 10 minutes and remove from the heat and allow to sit in the saucepan while you are preparing the remainder of the nuggets mixture
  • Cut the chicken breast up into about 2cm cubes and place into the food processor or thermo cooking device and process until it had a mince like texture and place in the mixing bowl with the cauliflower
  • Add the onion salt, mince garlic and 1 large egg into the mixing bowl and last add in the entire contents of the saucepan containing the quinoa
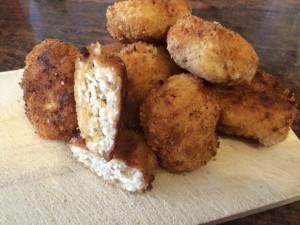
  • Combine the nugget mixture very well with your hands until you have a well combined meaty batter, shape spoonful of the mixture into nugget shapes and place on some greaseproof paper while you repeat until all the chicken mixture is used
  • Get 3 small mixing bowls in the first one place the flour and season with the salt & pepper to your liking, in the second bowl crack the two eggs and add in the milk whisking gently until you have a smooth egg wash and in the last bowl combine the two types of breadcrumbs and mix well
  • Gently take your prepared nuggets shaped mix and roll in the seasoned flour, then dip in the egg wash until fully coated and lastly roll in the breadcrumbs until well coated, repeat this process with all of the prepared nuggets
  • Heat a small amount of rice bran oil in the bottom of a heavy based frying pan and in small batches cook the nuggets, do not overcrowd the frying pan or they will not cook evenly, cook for approximately 4-5 minutes on each side until golden brown and cooked through
  • Remove the cooked nuggets and place on some paper towel to drain any excess oil while you continue to cook the remaining nuggets.

Recipe Notes:

  • Store covered in the fridge for a maximum of 2 days
  • This recipe us freezer friendly to be consumer in 3 months


 C4K Kitchen Title Bar

Disclaimer: C4K Kitchen does not hold any responsibility for the consumer using this recipe including the storage guidelines and time frames recommended in the recipe notes.  The consumer holds all responsibilities to ensure that food hygiene and safety standards are adhered to.


C4K Up & GO GO GO


C4K Up & GO GO GO
Serves: 2

C4K Up & Go Go Go

Ingredients:

  • 2 weetbix biscuits
  • 200ml full cream milk
  • 100ml full cream milk
  • 100ml natural yoghurt
  • 1 banana, sliced
  • 1 tablespoon maple syrup or honey


Method:

  • Crush 2 Weetbix in a bowl and cover with 200ml of milk and soak overnight in the fridge.
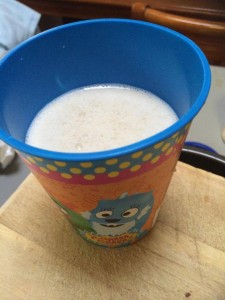
  • When ready to make your C4K Up & Go Go Go place the soaked weetbix with all other ingredients in your blender, bullet mixer or thermo cooking device.
  • Blend until smooth, you can use additional milk to get the preferred consistency of smoothie if needed.


Recipe Notes:

  • Store in a sealed container in the fridge for a maximum of 2 days, but best served fresh
  • This recipes is not suitable for the freezer

 C4K Kitchen Title Bar

Disclaimer: C4K Kitchen does not hold any responsibility for the consumer using this recipe including the storage guidelines and time frames recommended in the recipe notes.  The consumer holds all responsibilities to ensure that food hygiene and safety standards are adhered to.


C4K Mini Sweet Treat Balls (Mini Bliss Balls)


C4K Mini Sweet Treat Balls

C4k Mini Sweet Treat Balls

Apple Pie Balls

Ingredients:

  • 1/2 cup dried apple rings, well packed
  • 1/2 cup pitted dates
  • 1/4 cup toasted muesli
  • 1/2 teaspoon all spice


Apricot & Coconut Balls

Ingredients:

  • 3/4 cup dried apricots
  • 3/4 cup desiccated coconut


Dark Chocolate Balls

Ingredients:

  • 1/2 cup pitted dates
  • 1/2 cup sultanas
  • 100b 70% dark chocolate
  • 1 weetbix biscuit


Method for all:

  • Place all ingredients into your Thermo cooking device or Food Processor and blend under the mixture is ground well.
  • Remove the mix from the bowl and grab portions of the mixture and roll into the desired ball size.
  • For larger size balls you may need to finish the ball by rolling in coconut to they aren’t so sticky.


Recipe Notes:

  • The small bags seen in the picture were purchased in a pack of 100 from eBay
  • Store in an airtight tight container below 27 degrees
  • This recipe is freezer friendly to be consumed within 6 months

C4K Kitchen Title Bar 

Disclaimer: C4K Kitchen does not hold any responsibility for the consumer using this recipe including the storage guidelines and time frames recommended in the recipe notes.  The consumer holds all responsibilities to ensure that food hygiene and safety standards are adhered to.


C4K Apricot Fruit Bars


C4K Apricot Fruit Bars
Makes: approximately 24 bars

C4K Apricot Fruit Bars

Ingredients:

  • 200g dried apricots
  • 1 cup orange juice or apricot nectar
  • 1 1/2 cup rolled oats
  • 1 1/2 cup desiccated coconut
  • 1/4 cup flaxseed
  • 1/4 cup chia seeds
  • 1/4 cup coconut oil or butter, melted


Method:

  • Place the dried apricots in a bowl and cover with the orange juice and soak overnight.
  • Drain the juice from the apricots and place the soaked apricots and 1 tablespoon of the soaking juices into a food processor and process until smooth. Do not discard the remaining juice as it may be required.
  • Add the oats to the food processor and continue to blend until smooth, repeat with all ingredients one by one.
  • Add any small portions of the soaking juice as required to bring the mixture together if it is too dry.
  • Once complete spread the mixture into a glad wrap lined brownie tin and refrigerate overnight.
  • Cut into fruit bars or fruit squares.


Thermo Cooking Method:

  • Place the dried apricots in a bowl and cover with the orange juice and soak overnight.
  • Drain the juice from the apricots and place the soaked apricots and 1 tablespoon of the soaking juices into your thermo bowl. Do not discard the remaining juice as it may be required.
  • Add all the remaining ingredients into the thermo bowl and blend on Speed 6 for 30 second.
  • Scrape down the side of the thermo bowl with a spatula and add small portions of the soaking juice as required to bring the mixture together if it is too dry.
  • Blend on Speed 10 for 5 seconds.
  • Once complete spread the mixture into a glad wrap lined brownie tin and refrigerate overnight.
  • Cut into fruit bars or fruit squares.


Recipe Notes:

  • Store in an airtight container below 27 degrees for the maximum of 7 days
  • This recipe is freezer friendly.

C4K Kitchen Title Bar

Disclaimer: C4K Kitchen does not hold any responsibility for the consumer using this recipe including the storage guidelines and time frames recommended in the recipe notes.  The consumer holds all responsibilities to ensure that food hygiene and safety standards are adhered to.


Mumma’s Magic Sauce (MMS)


Mumma’s Magic Sauce
Mumma’s Magic Sauce which is also fondly referred to as MMS is a great staple sauce to have in your fridge and freezer at home instead of using store bought jar sauces and has the hidden addition of lots of hidden vegetables in the sauce that even the fussiest eater will never see.
Makes: 8 portions of 750-800ml per portion
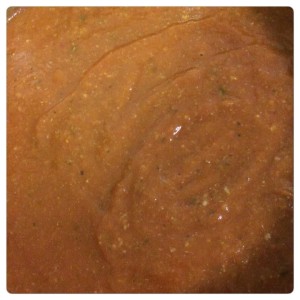
Mumma's Magic Sauce (MMS)

Ingredients:

  • 680ml bottle Tomato Passata (or tomato puree)
  • 2 x 400ml cans whole peeled tomatoes
  • 1 x 400ml can whole peeled cherry tomatoes
  • 4 celery stalks
  • 1 leek
  • 2 onions
  • 4 carrots
  • 250g pumpkin
  • 250g sweet potato
  • 1/2 head cauliflower
  • 1/2 head broccoli
  • 2 zucchinis
  • 1 red capsicum
  • 2 tablespoons minced garlic or 6 garlic cloves
  • 1 tablespoon mixed herbs
  • 2 bay leaves
  • 2 tablespoons chicken or vegetable stock powder

Method:

  • Prepare all vegetables as required and cut roughly into about 3cm chunks.
  • Place them into a large stock or soup pot and cover with the passata and canned tomatoes.
  • Add in the garlic, herbs and stock powder than top up with enough water to just covered the vegetables.
  • Bring the pot to the boil, then place the lid on the pot and reduce the heat to low and simmer for 60-90 minutes.
  • To cook in the slow cooker cook on LOW for 6-8 hours or HIGH for 3-4 hours.
  • Remove the Bay leaves, allow the sauce to cool slightly then use a stick blender to process the sauce until
  • you have a smooth consistency


Thermo Cooking Mumma’s Magic Sauce
Makes: 3 portions of 750-800ml

Ingredients:

  • 680ml bottle Tomato passata (or tomato puree)
  • 200g carrots
  • 200g zucchini
  • 200g cauliflower
  • 1 red capsicum
  • 1 onion
  • 1/2 leek
  • 2 celery stalks
  • 1 teaspoon celery salt
  • 1 teaspoon chicken stock
  • 1 tablespoon minced garlic (or 2 garlic cloves)
  • 2 teaspoons mixed herbs

Method:

  • Add in one vegetable at a time pulsing a couple time to chop the vegetables, repeat until all vegetables are chopped
  • Add in the tomato passata and all remaining ingredients
  • Cook on Speed 1, 100 degrees for 10 minutes
  • Cook on Speed 2, 90 degrees for 15 minutes
  • Allow to cool for 10 minutes (this step is essential otherwise you will be cleaning up a BIG mess)
  • Blend on Speed 6 for 30 seconds, use a spatula to wipe down the sides of the thermo bowl
  • Blend on Speed 10 for 7 seconds

Recipe Notes

To use fresh tomatoes instead of bottled and canned tomatoes use the following quantities:

  • 680ml bottle tomato passata you need 1.5kg of fresh tomatoes
  • 400ml can whole peeled tomatoes you need 800g of fresh tomatoes
  • 400ml can whole peeled cherry tomatoes you need one punnet of cherry tomatoes
  • You will need to taste as the sauce can be bitter depending on the ripeness of the tomatoes, to overcome the bitterness you can add in 2 grated apples to help sweeten the sauce
  • Too peel the fresh tomatoes, use a sharp knife to gentle score the skin of the tomato with a cross and plunge the tomato gently into a large pot of boiling water for 2 minutes.  Remove from the boiling water and place into a bowl of cold water then peel.

C4K Kitchen Title Bar

Disclaimer: C4K Kitchen does not hold any responsibility for the consumer using this recipe including the storage guidelines and time frames recommended in the recipe notes.  The consumer holds all responsibilities to ensure that food hygiene and safety standards are adhered to.