Broccoli and Feta Tortas

Broccoli and Feta Tortas

Makes: 12

Ingredients:

  • 6 eggs
  • 1 cup smooth ricotta
  • 200g danish feta, roughly crumbled
  • 200g broccoli stem, grated
  • 1 small onion, finely diced
  • 1/2 celery stalk, finely diced
  • 1/2 cup grated Parmesan
  • 1/2 cup grated mozzarella cheese
  • 2 garlic cloves, crushed

Method:

  • Preheat the oven to 180 degrees Celsius and prepare 12 silicon muffin cups but lightly spraying
    Place the eggs and ricotta in a large mixing bowl and whisk until thick and creamy like a custard
    Add in the remaining ingredients and stir through until well combined
    Spoon the mixture evenly between the 12 muffin cups
    Bake for 35 minutes or until golden and cooked through, they will be cooked through when firm on the edges with a gently wobble in the middle
    Remove and allow to cool in the trays for 10 minutes before removed to cool on a wire rack completely.

Nutritional Value per Tortas:

  • Calories: 175
  • Total fat: 7g
  • Total carbohydrates: 2.7g
  • Sugar: 0.5g
  • Protein: 11.7g

Recipe Notes:

  • Store in an air tight container in the fridge for a maximum of 3 days
  • This recipe is freezer friendly to be consumed within 6 months.

Disclaimer: C4K Kitchen does not hold any responsibility for the consumer using this recipe including the storage guidelines and time frames recommended in the recipe notes. The consumer holds all responsibilities to ensure that food hygiene and safety standards are adhered to.


Sugar free Lemon Cake

Sugar Free Lemon Cake

Cake ingredients:

  • 6 egg whites
  • 150g butter
  • 1 cup xylitol
  • 2 cup plain flour
  • 4 teaspoons baking powder
  • 1 teaspoon salt
  • 1 cup milk
  • 1/4 cup lemon juice

Curd ingredients:

  • 6 egg yolks
  • 1/2 cup xylitol
  • 1/2 cup lemon juice
  • 80g butter

Method:

  • Preheat the oven to 180 degrees Celsius and prepare 3 x 20cm round cake tins by greasing very well and lining the base with baking paper
  • Place the egg whites in a mixing bowl and beat with electric beaters until there is stiff white peaks, set aside
  • In a large mixing bowl place the butter and xylitol creaming with the eclectic beaters for approximately 3 minutes until white and fluffy
  • Add in the flour, baking powder, salt, milk and lemon juice beating until smooth
  • Using a spatula fold in 1/2 of the egg whites until just combined, repeat with the remaining egg whites
  • Spoon the mixture evenly across the three prepared cake tins and bake for 20 mins or until golden and a cake skewer comes out clean
  • Turn the cakes onto a wire rack to cool completely before finishing the cake
  • To prepare the curd place the egg yolks, xylitol and lemon juice in a blender and process for 60 seconds until thick, smooth and slightly foamy
  • Add the mixture into a heavy based non stick sauce pan with the butter
  • Continually whisk the mixture over a steady low heat for 5-10 minutes until the curd is thick enough to coat the back of a spoon
  • Transfer the curd into a heat proof container with a lid and place in the fridge to completely cool before using
  • To construct the cake place a thick layer of curd between cakes so you have 2 layers of curd and 3 layers of cake, place in the fridge to set for minimum of an hour before serving
  • Serving suggestions are whipped cream or passionfruit pulp (as seen in the picture).

Nutritional value per piece:

  • Calories: 179
  • Total fat: 11.5g
  • Total carbohydrates: 15g
  • Sugar: 1g
  • Protein: 4.3g

Notes: NV does not include the passionfruit pulp in the picture.

Recipes Notes:

  • Xylitol can be replaced with your low calorie sweetener of choice.
  • Xylitol used in the recipe was from https://www.naturallysweet.com.au/ use the coupon code WHMP15 for a 15% discount
  • Keep the cake store in an air tight container in the fridge for up to 5 days
  • The cooked cakes unconstructed are freezer friendly but for best results serve fresh.
  • Disclaimer: C4K Kitchen does not hold any responsibility for the consumer using this recipe including the storage guidelines and time frames recommended in the recipe notes. The consumer holds all responsibilities to ensure that food hygiene and safety standards are adhered to.


    Breakfast Ham Cups

    Breakfast Ham Cups

    Makes: 15

    Ingredients:

    • 15 round thin slices of ham
    • 8 eggs
    • 1/4 cup natural yoghurt (or cream)
    • 1/2 cup grated cheese
    • 1 small onion, finely diced
    • 1 broccoli stem, grated (approximately 80g)
    • 1 & 1/2 tomatoes, diced
    • 4 mushrooms, diced
    • 4 asparagus spears, thinly sliced
    • 2 garlic cloves, finely diced

    Method:

    • Preheat an oven to 180 degrees Celsius and prepare a silicon muffin tray by gently spraying each well
    • Add the eggs, yogurt and cheese to a mixing bowl gently whisking until well combined
    • Add all onion, tomato, mushroom, asparagus and garlic into the egg mixture and mix until well combined
    • Take a slice of ham and line a muffin tray well with the ham and spoon in the egg mixture until just under level with the muffin tray
    • Repeat with the ham slices and mixture until all used
    • Bake for 20-25 minutes until golden and the egg mixture is set, this is indicated by being slightly firm to touch but with a gentle jiggle in the centre.
    • Allow to cool for 10 minutes in the tray before moving to a wire rack to cool completely.

    Nutrition value per ham cup:

    • Calories: 89
    • Total fat: 4.8g
    • Tots carbs: 2.5g
    • Sugars: 0.8g
    • Protein: 8.7g

    Recipes notes:

    • Store in an air tight container in the fridge for a maximum of 3 days
    • This recipe is freezer friendly to be consumed within 6 months
    • Serve hot or cold

    Disclaimer: C4K Kitchen does not hold any responsibility for the consumer using this recipe including the storage guidelines and time frames recommended in the recipe notes. The consumer holds all responsibilities to ensure that food hygiene and safety standards are adhered to.


    Beef Stroganoff (Adaptation)

    Beef Stroganoff (Adaptation)

    Serves: 8 portions with a small side

    Method:

    • 1 large onion, thinly sliced
    • 1 celery stalk, diced
    • 2 garlic cloves, finely diced
    • 500g lean beef, sliced
    • 220g button mushrooms, thinly sliced
    • 40g butter
    • 2 tablespoons plain flour
    • 1/2 packet French onion soup mix
    • 2 beef stock cubes
    • 1 tablespoon Worcestershire sauce
    • 1 1/2 teaspoons paprika
    • Salt
    • 2 cups water
    • 1/4 cup natural high protein yoghurt

    Method:

    • Sauté the garlic, onion and celery in a non stick saucepan with some cooking spray, approximately 2 minutes
    • Add the beef and half of the sliced mushrooms until the beef is sealed
    • Add the the butter and stir until melted
    • Mix well, then add the flour, soup mix, stock cubes, paprika, Worcestershire sauce and salt stirring so the beef is well coated
    • Gradually add the water 1/2 cup at a time stirring well so the stroganoff is smooth and creamy
    • Simmer covered on a low temperature for 15 minutes
    • Remove from the heat, add the yoghurt stirring through until well mixed.
    • Serve and enjoy.

    Nutritional value per portion:

    • Calories: 174
    • Total fats: 10.3g
    • Total carbohydrates: 4.8g
    • Sugars: 1g
    • Protein: 14g

    Recipes Notes:

    • Store covered in the fridge for a maximum of 3 days
    • This recipe is freezer friendly to be consumed within 6 months
    • Recipe provides 8 portions with a small side of 6 portions if serving without a side.

    Disclaimer: C4K Kitchen does not hold any responsibility for the consumer using this recipe including the storage guidelines and time frames recommended in the recipe notes. The consumer holds all responsibilities to ensure that food hygiene and safety standards are adhered to.


    Banana PB Muffins (Gluten Free)

    Banana PB Muffins (Gluten Free)

    Makes: 12

    Ingredients:

    • 2 large overripe bananas
    • 1 cup organic smooth peanut butter
    • 4 eggs
    • 1/4 cup high protein milk
    • 1/4 cup coconut flour
    • 1/4 cup stevia
    • 2 teaspoons baking powder
    • Pinch salt

    Method:

    • Preheat the oven to 180 degrees Celsius and prepare 12 muffin cups by lining with a cupcake liner, lightly spraying the inside with cooking spray
    • Roughly break up the banana and use a fork to roughly mash
    • Add the peanut butter, eggs and milk and use the fork to mix well ensuring the peanut butter is well combined
    • Add the coconut flour, stevia, baking powder and salt and fold through with a spatula until just combined
    • Allow the mixture to air for 5 minutes and then quickly fold again before spooning the mixture evenly between the 12 Muffin cases
    • Bake for 25-30 minutes until golden and a cake skewer comes out clear
    • Allow to cool in the muffin tray for 10 minutes before transferring to a wire rack to cool completely.

    Nutritional Value per Muffin:

    • Calories: 187
    • Total fats: 12.8g
    • Total Carbohydrates: 11.1g
    • Sugar: 4.3g
    • Protein: 8.3g

    Recipe Notes:

    • Store in an airtight container in the fridge for a maximum of 5 days
    • This recipe is freezer friendly to be consumed within 6 months.

    Disclaimer: C4K Kitchen does not hold any responsibility for the consumer using this recipe including the storage guidelines and time frames recommended in the recipe notes. The consumer holds all responsibilities to ensure that food hygiene and safety standards are adhered to.


    Zucchini & Corn Muffins

    Zucchini & Corn Muffins

    Makes: 18

    Ingredients:

    • 2 large zucchini, grated
    • 1 cup frozen or fresh corn kernels
    • 150g lean bacon pieces
    • 140g grated cheese
    • 1 teaspoon celery salt
    • 2 garlic cloves, finely grated
    • 1 & 1/2 cups SR Flour
    • 1 cup high protein milk
    • 4 eggs
    • 3 tablespoons melted butter

    Method:

    • Preheat the oven to 180 degrees Celsius and prepare 18 silicon muffin cups by lightly spraying with cooking spray
    • In a large mixing bowl combine the zucchini, corn, bacon, cheese, salt and garlic
    • Add in the flour and stir until all ingredients are evenly coated in the flour
    • Whisk together the eggs, milk and melted butter
    • Pour the wet mixture into the dry mixture and fold through with a spatula until just combined
    • Spoon the batter evenly between the prepared muffin cups and bake for 25 minutes or until a cake skewer comes out clean
    • Allow to cool in the muffin tray for 10 minutes before transferring to a wire rack to cool completely.

    Nutritional Value per Muffin:

    • Calories: 126
    • Total fat: 7g
    • Total carbohydrates: 8.6g
    • Sugar: 2g
    • Protein: 7g

    Recipe Notes:

    • Store in an air tight container in the fridge for a maximum of 5 days
    • This recipe is freezer friendly to be consumed within 6 months
    • Delicious served warm or room temperature
    • White SR flour can be substituted for SR Wholemeal flour.

    Disclaimer: C4K Kitchen does not hold any responsibility for the consumer using this recipe including the storage guidelines and time frames recommended in the recipe notes.  The consumer holds all responsibilities to ensure that food hygiene and safety standards are adhered to.


    WHMP: 1 August 2018

    WARNING AND DISCLAIMER: This post contains excess skin and medical photos. If you do not like less than aesthetically pleasing photos then this blog entry isn’t for you today.

    So I finished my last blog post as I head off to the hospital for the big chop chop.

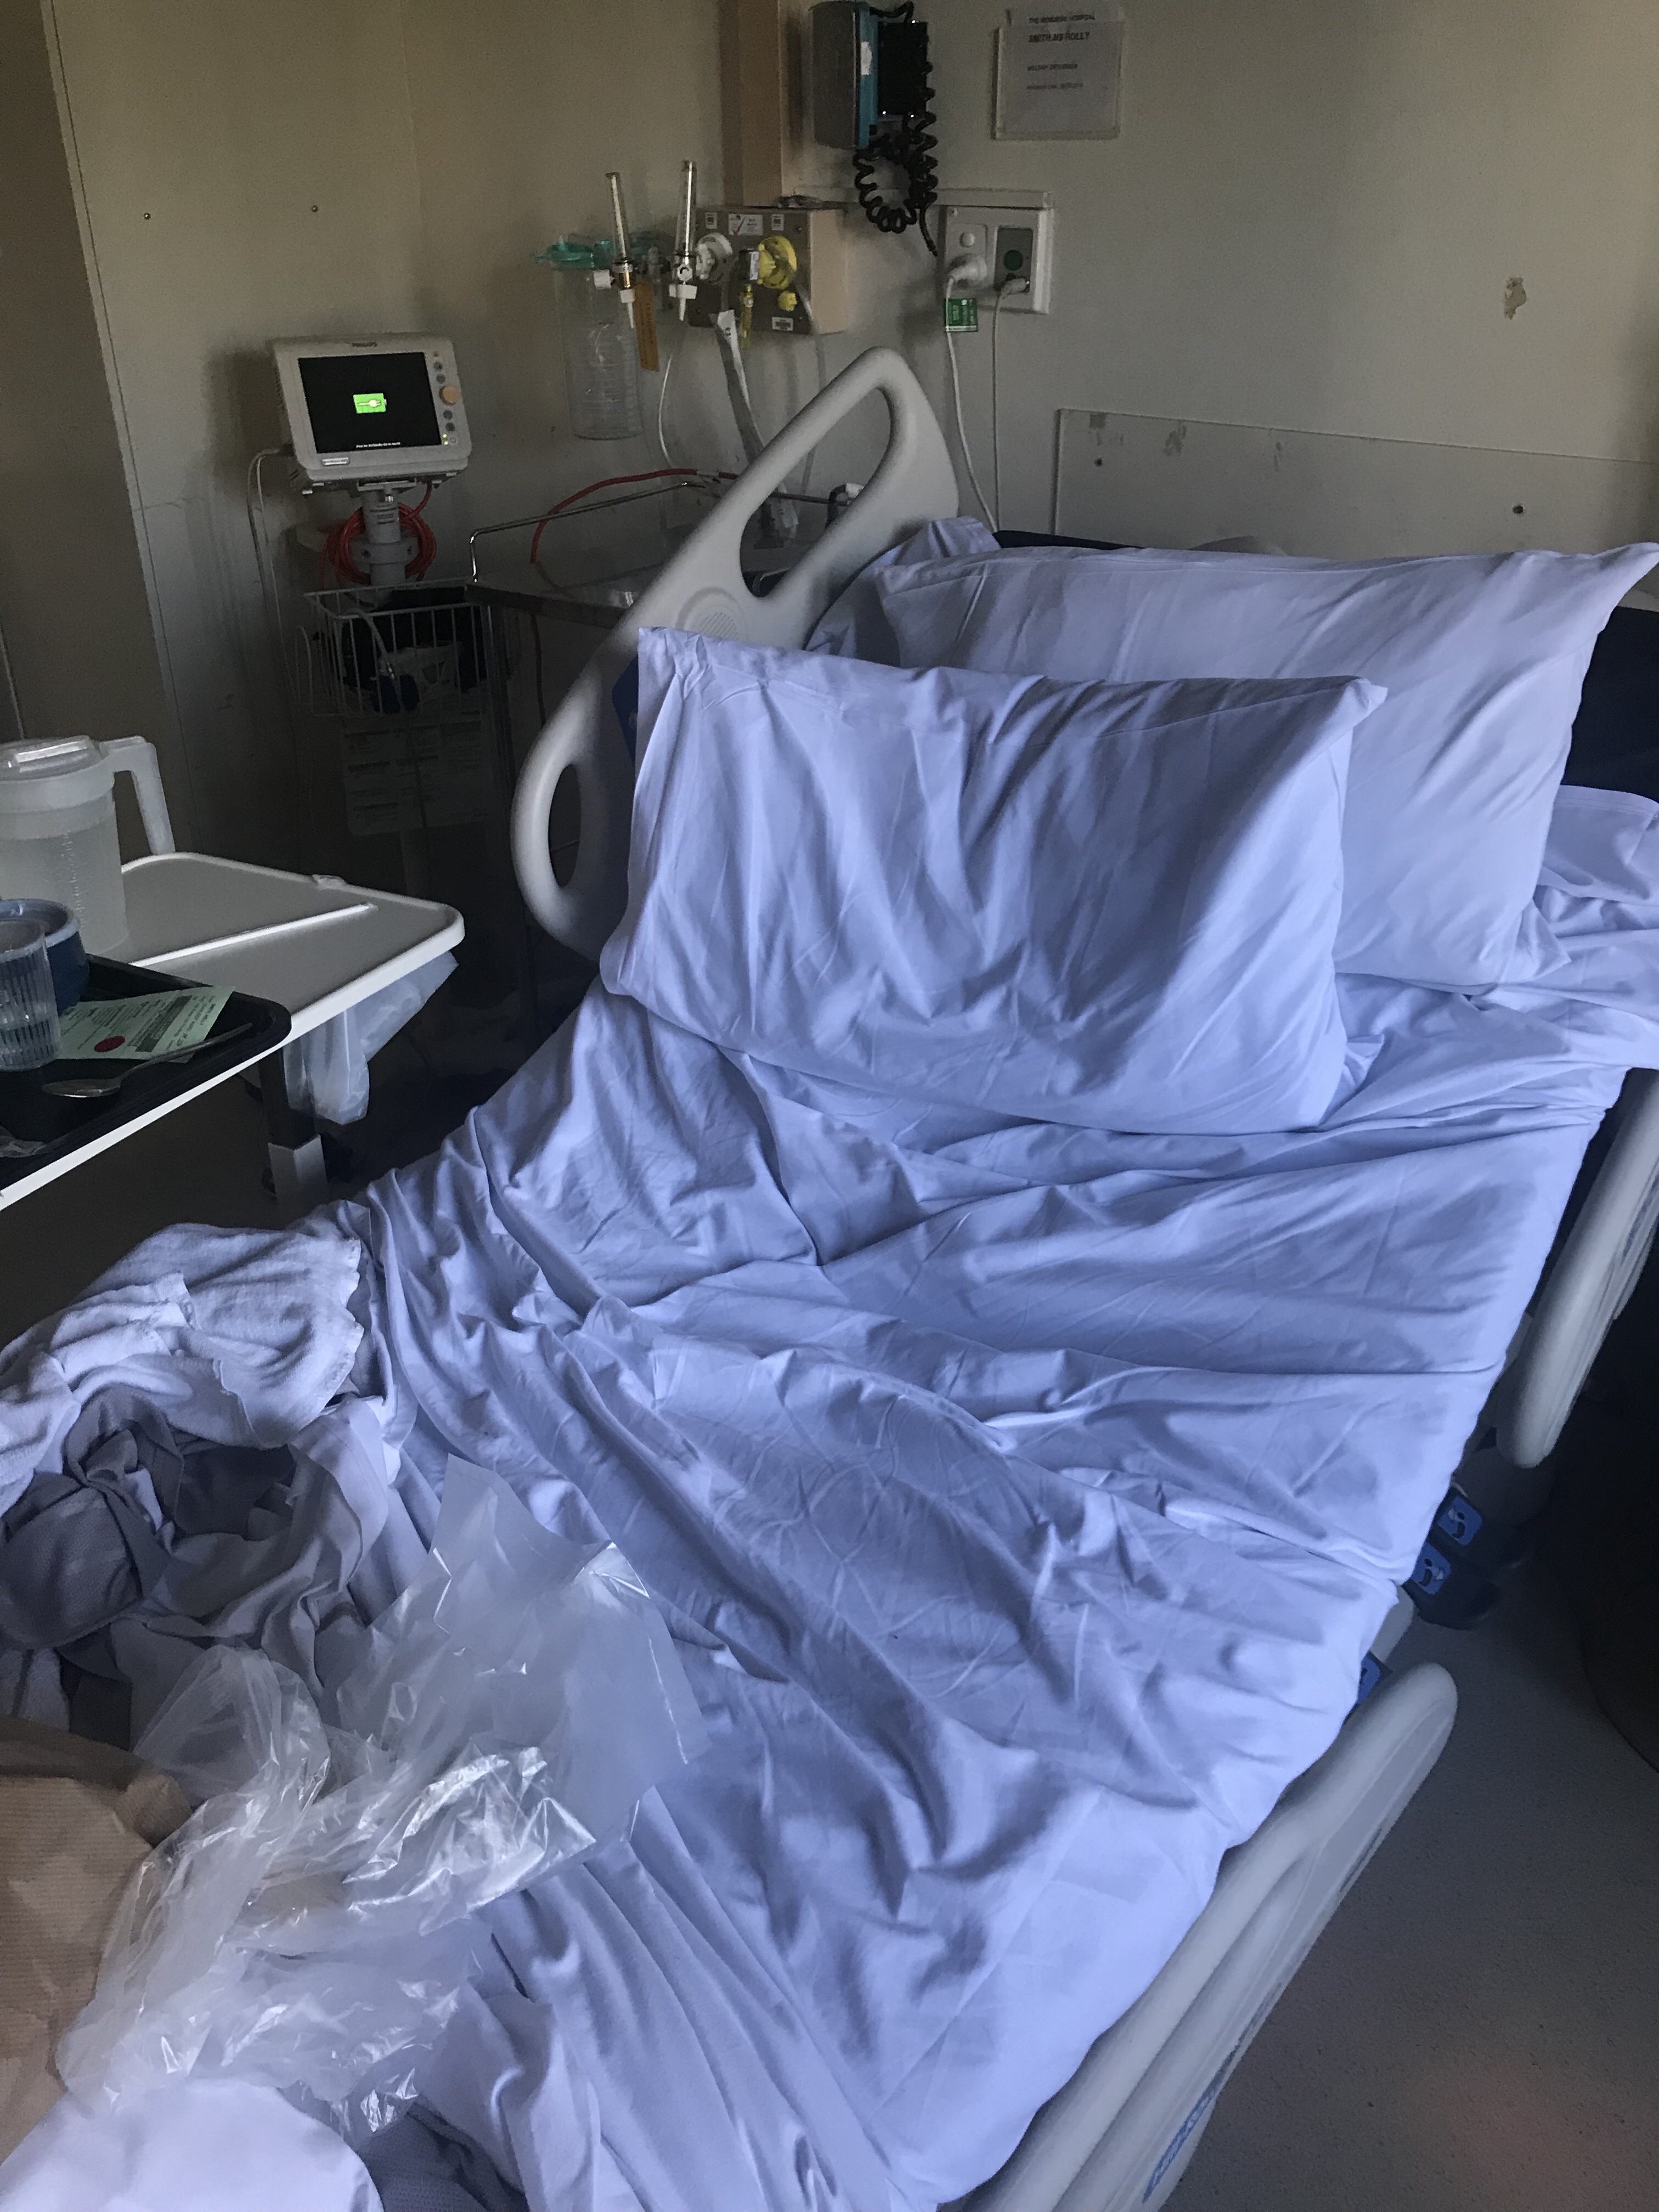
    I got there at 1pm to be “checked in” and head up to my room. It wasn’t the ritz but it was a single room and comfortable with all the facilities I need to receive hygienic quality health care….and that’s what I was there for not a holiday at the Hilton.

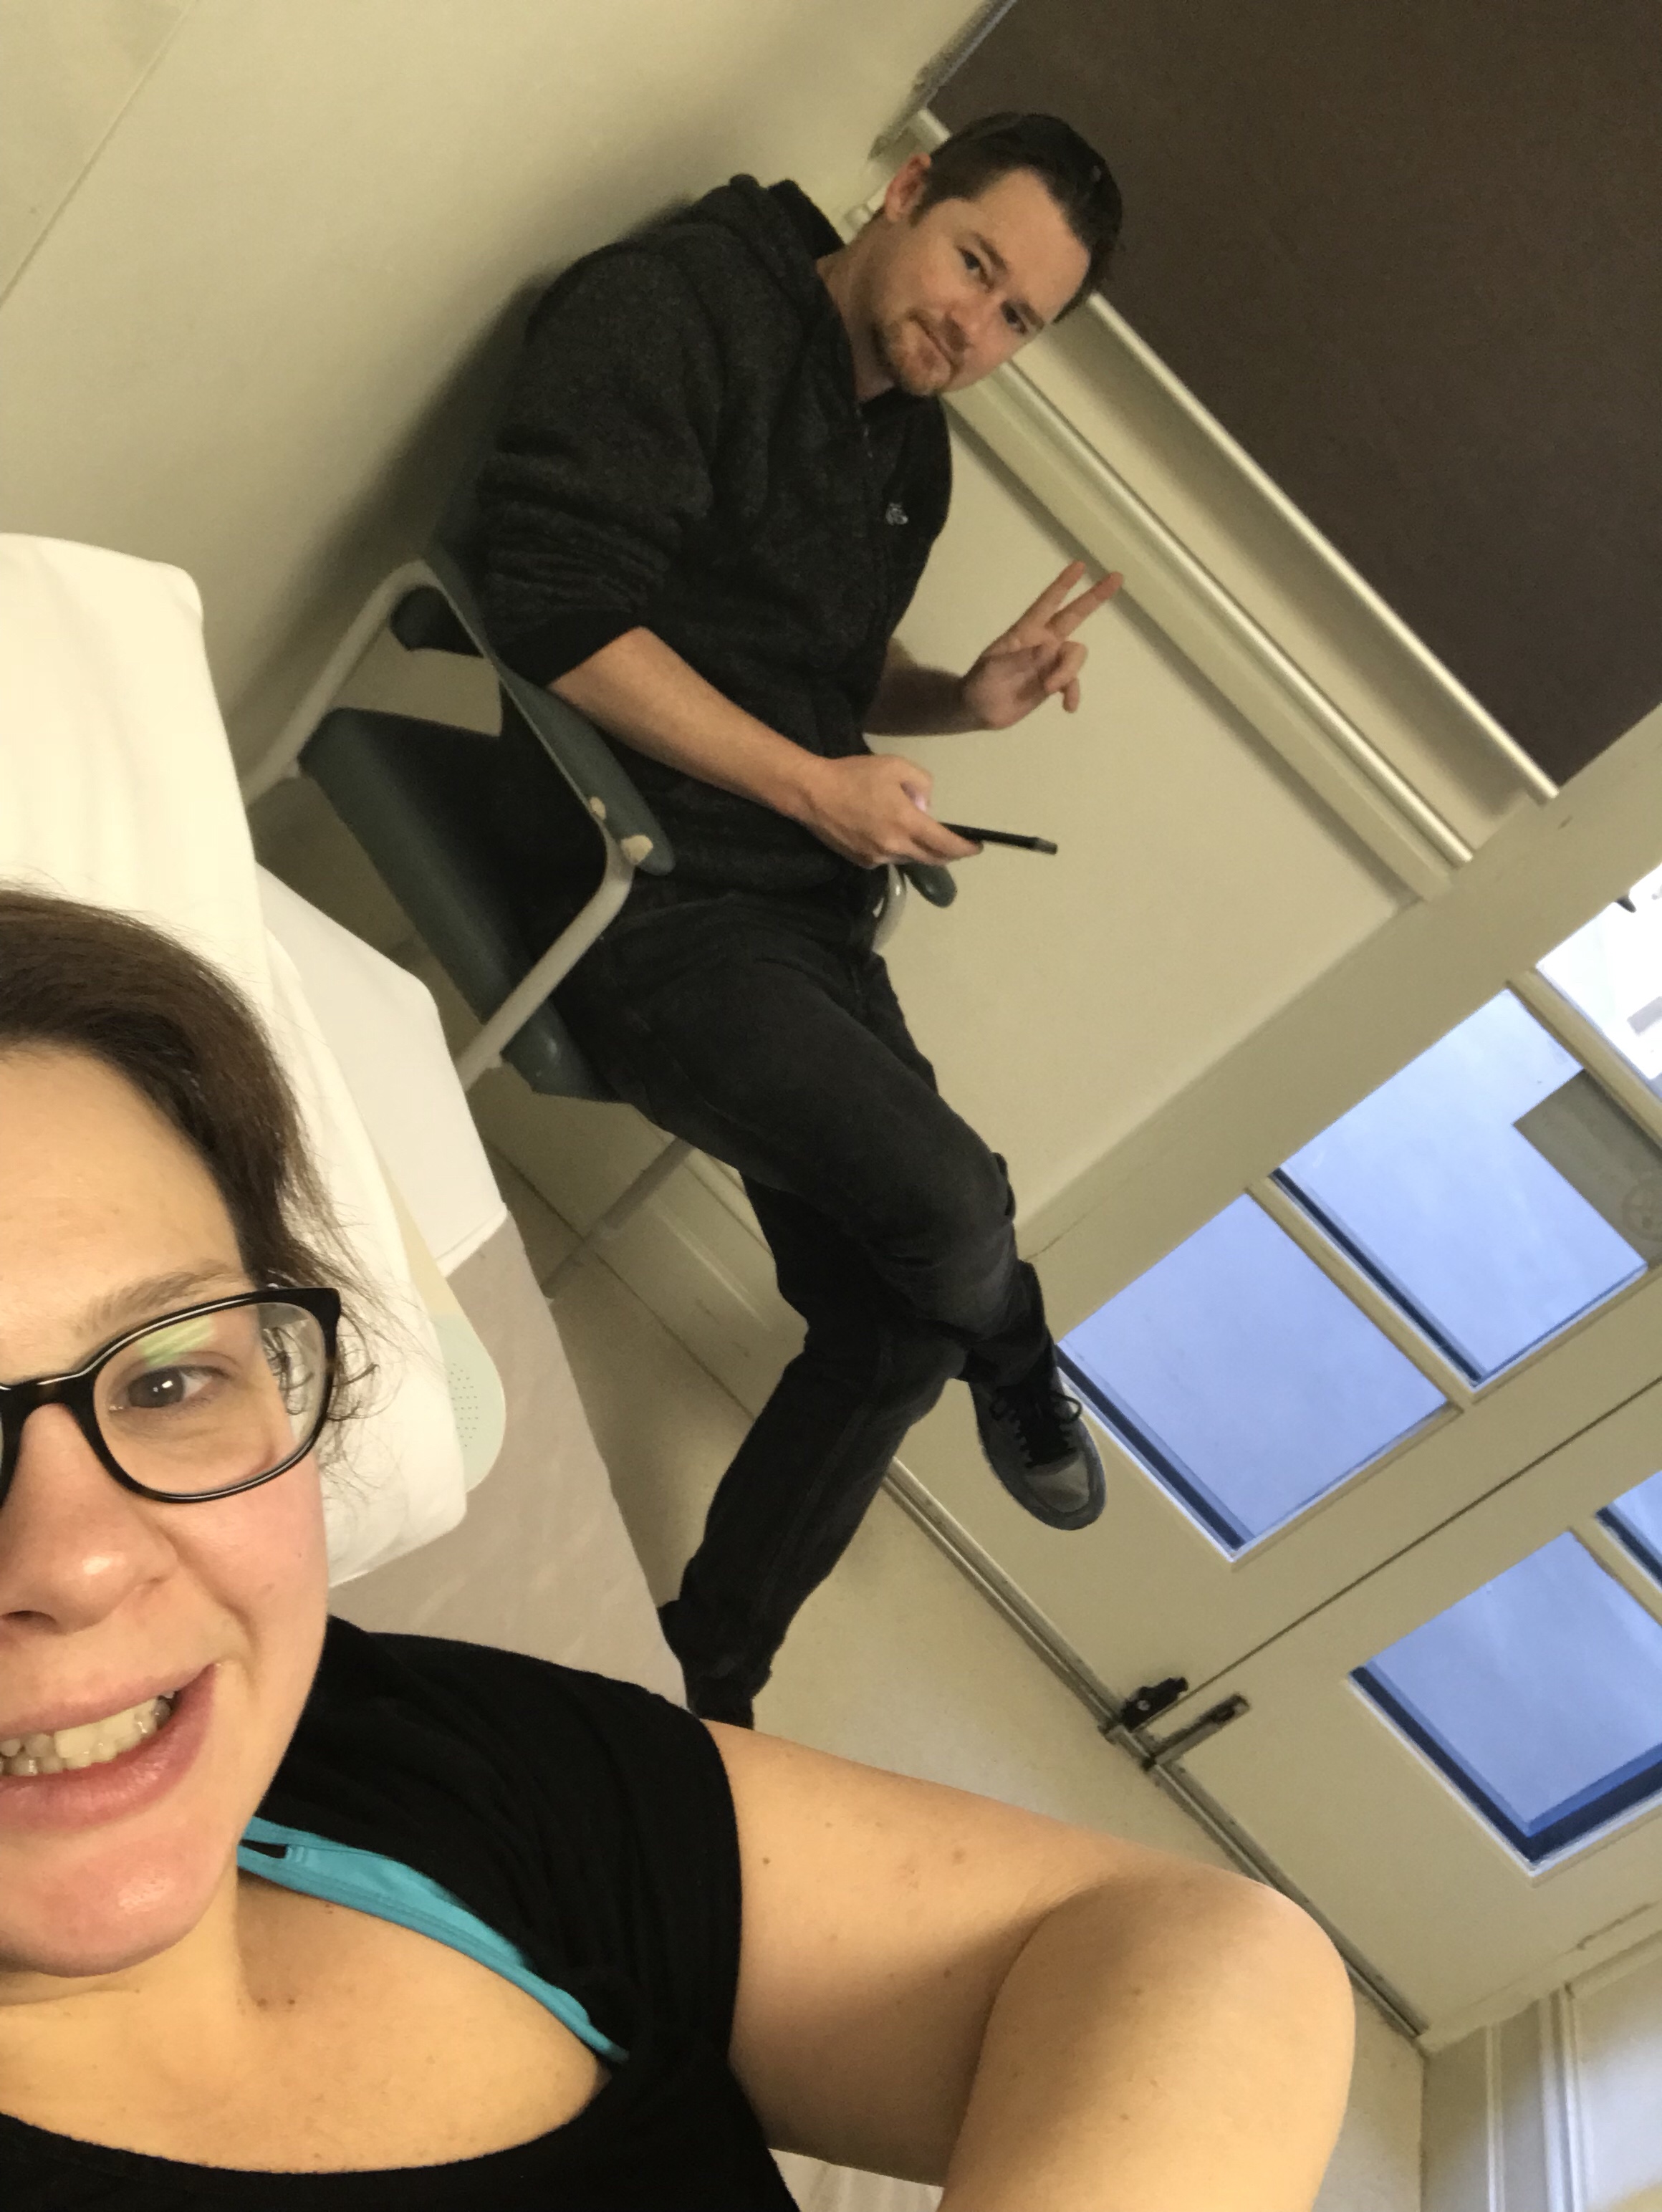
    And that long nervous wait began!! I was third on the list so Jamie and I just had to sit around and wait until I got my 10 minute warning to gown up, put on my TEDs and get ready to head off to theatre.

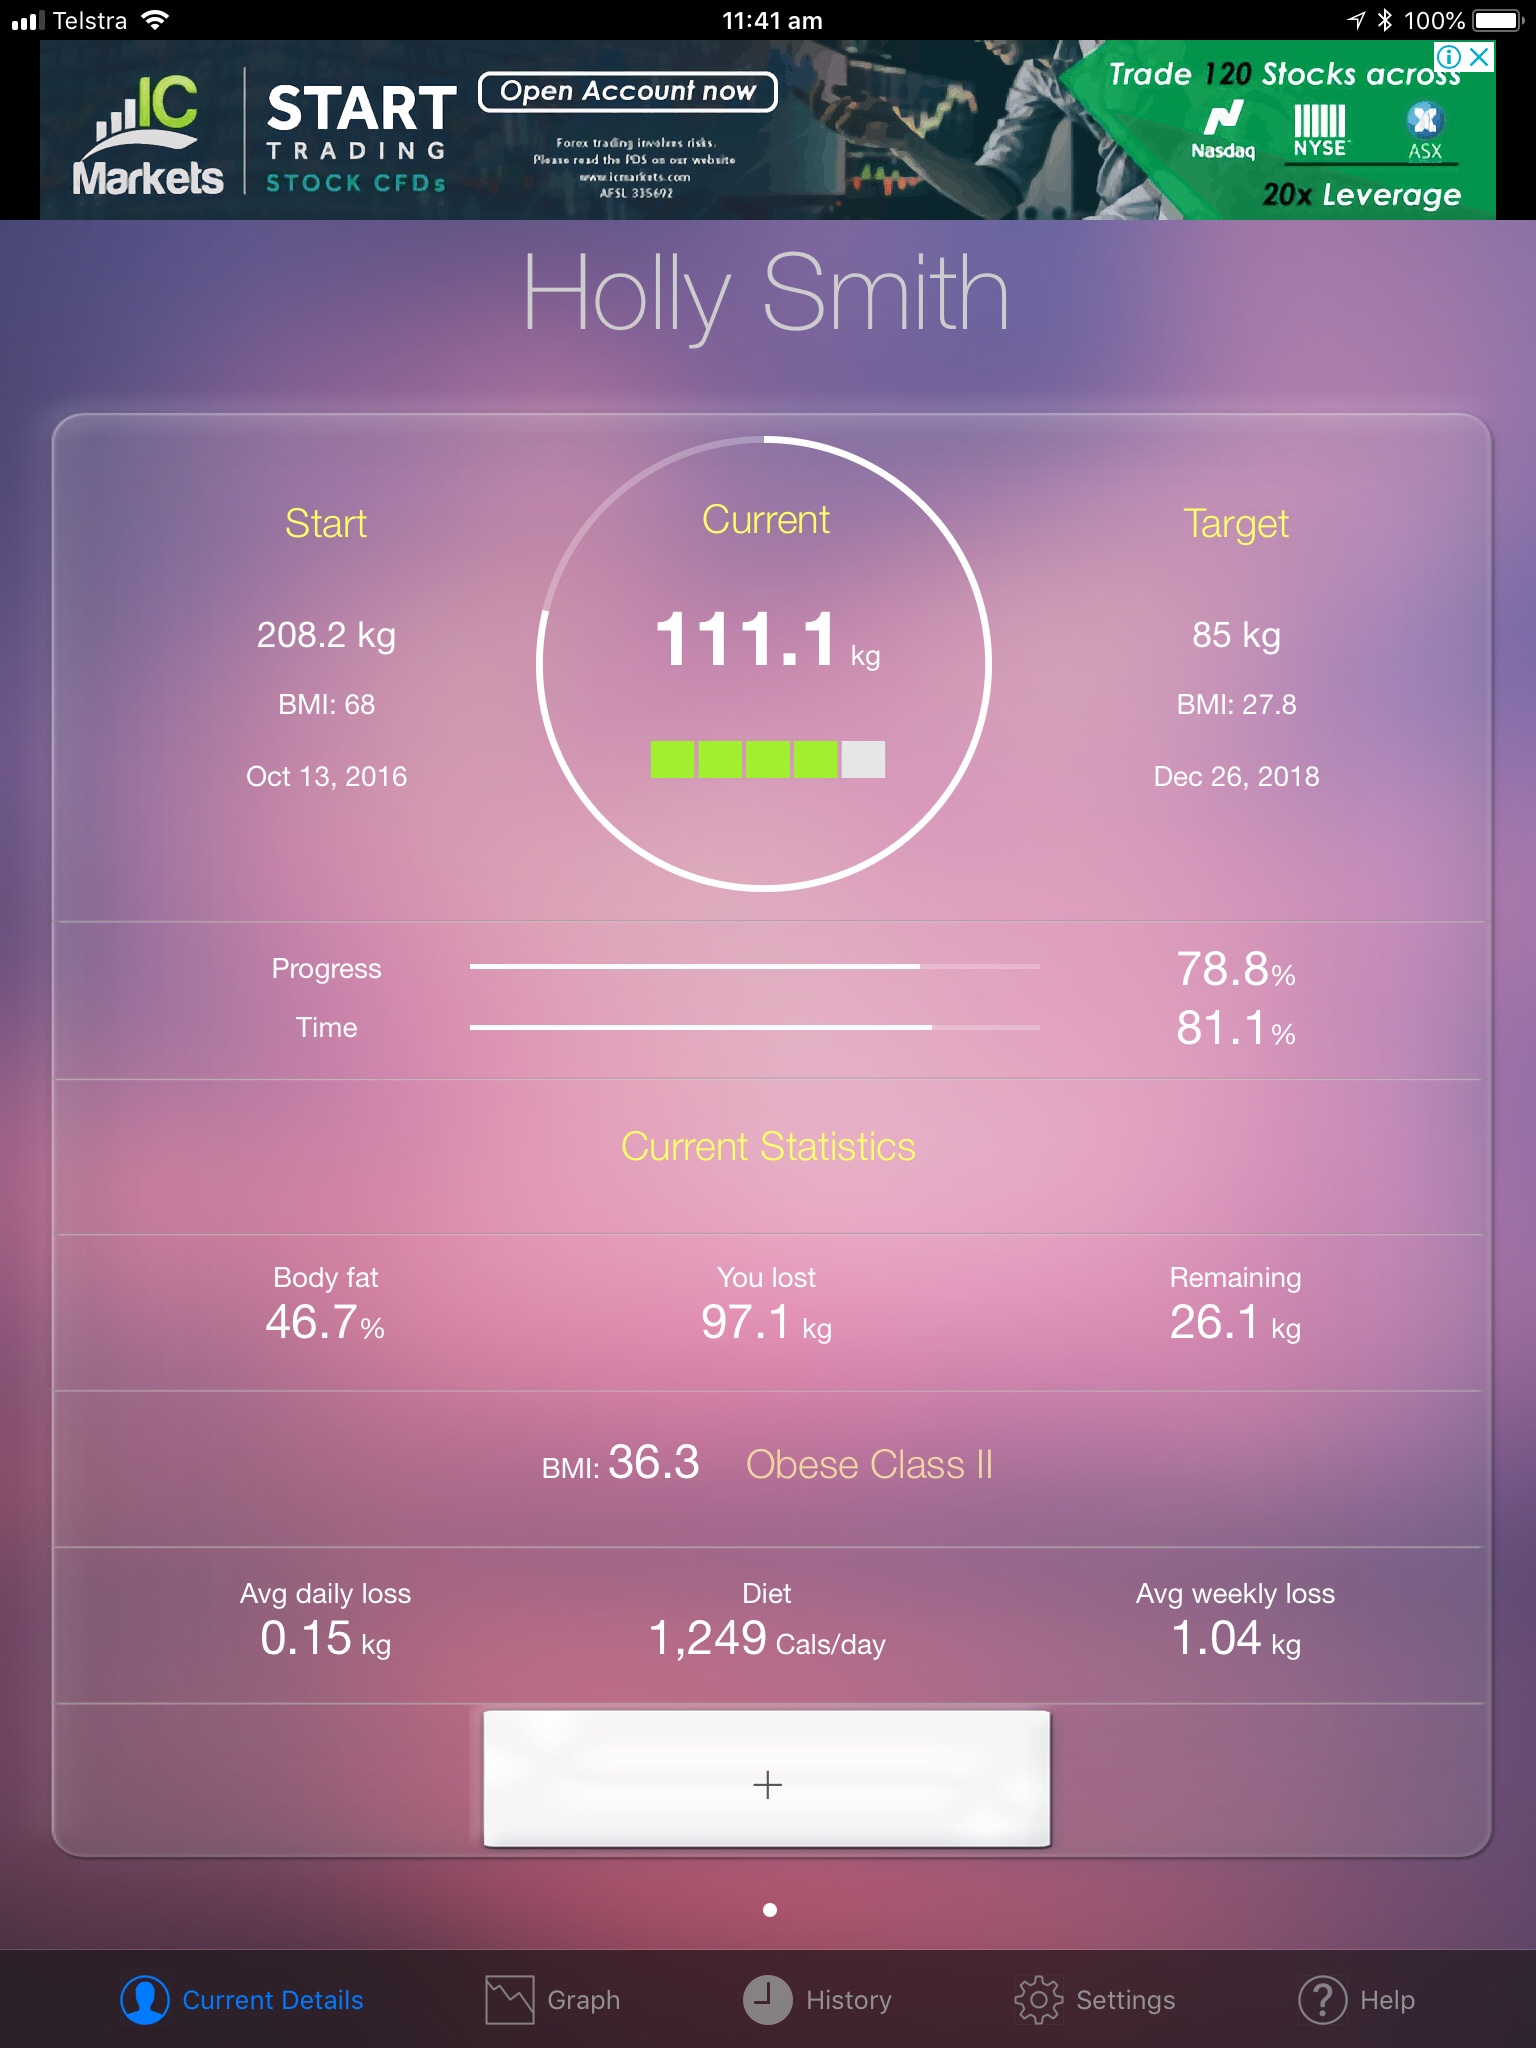
    I go the call up just before 3pm and in the process discovered not one but TWO non scale victories along the way!

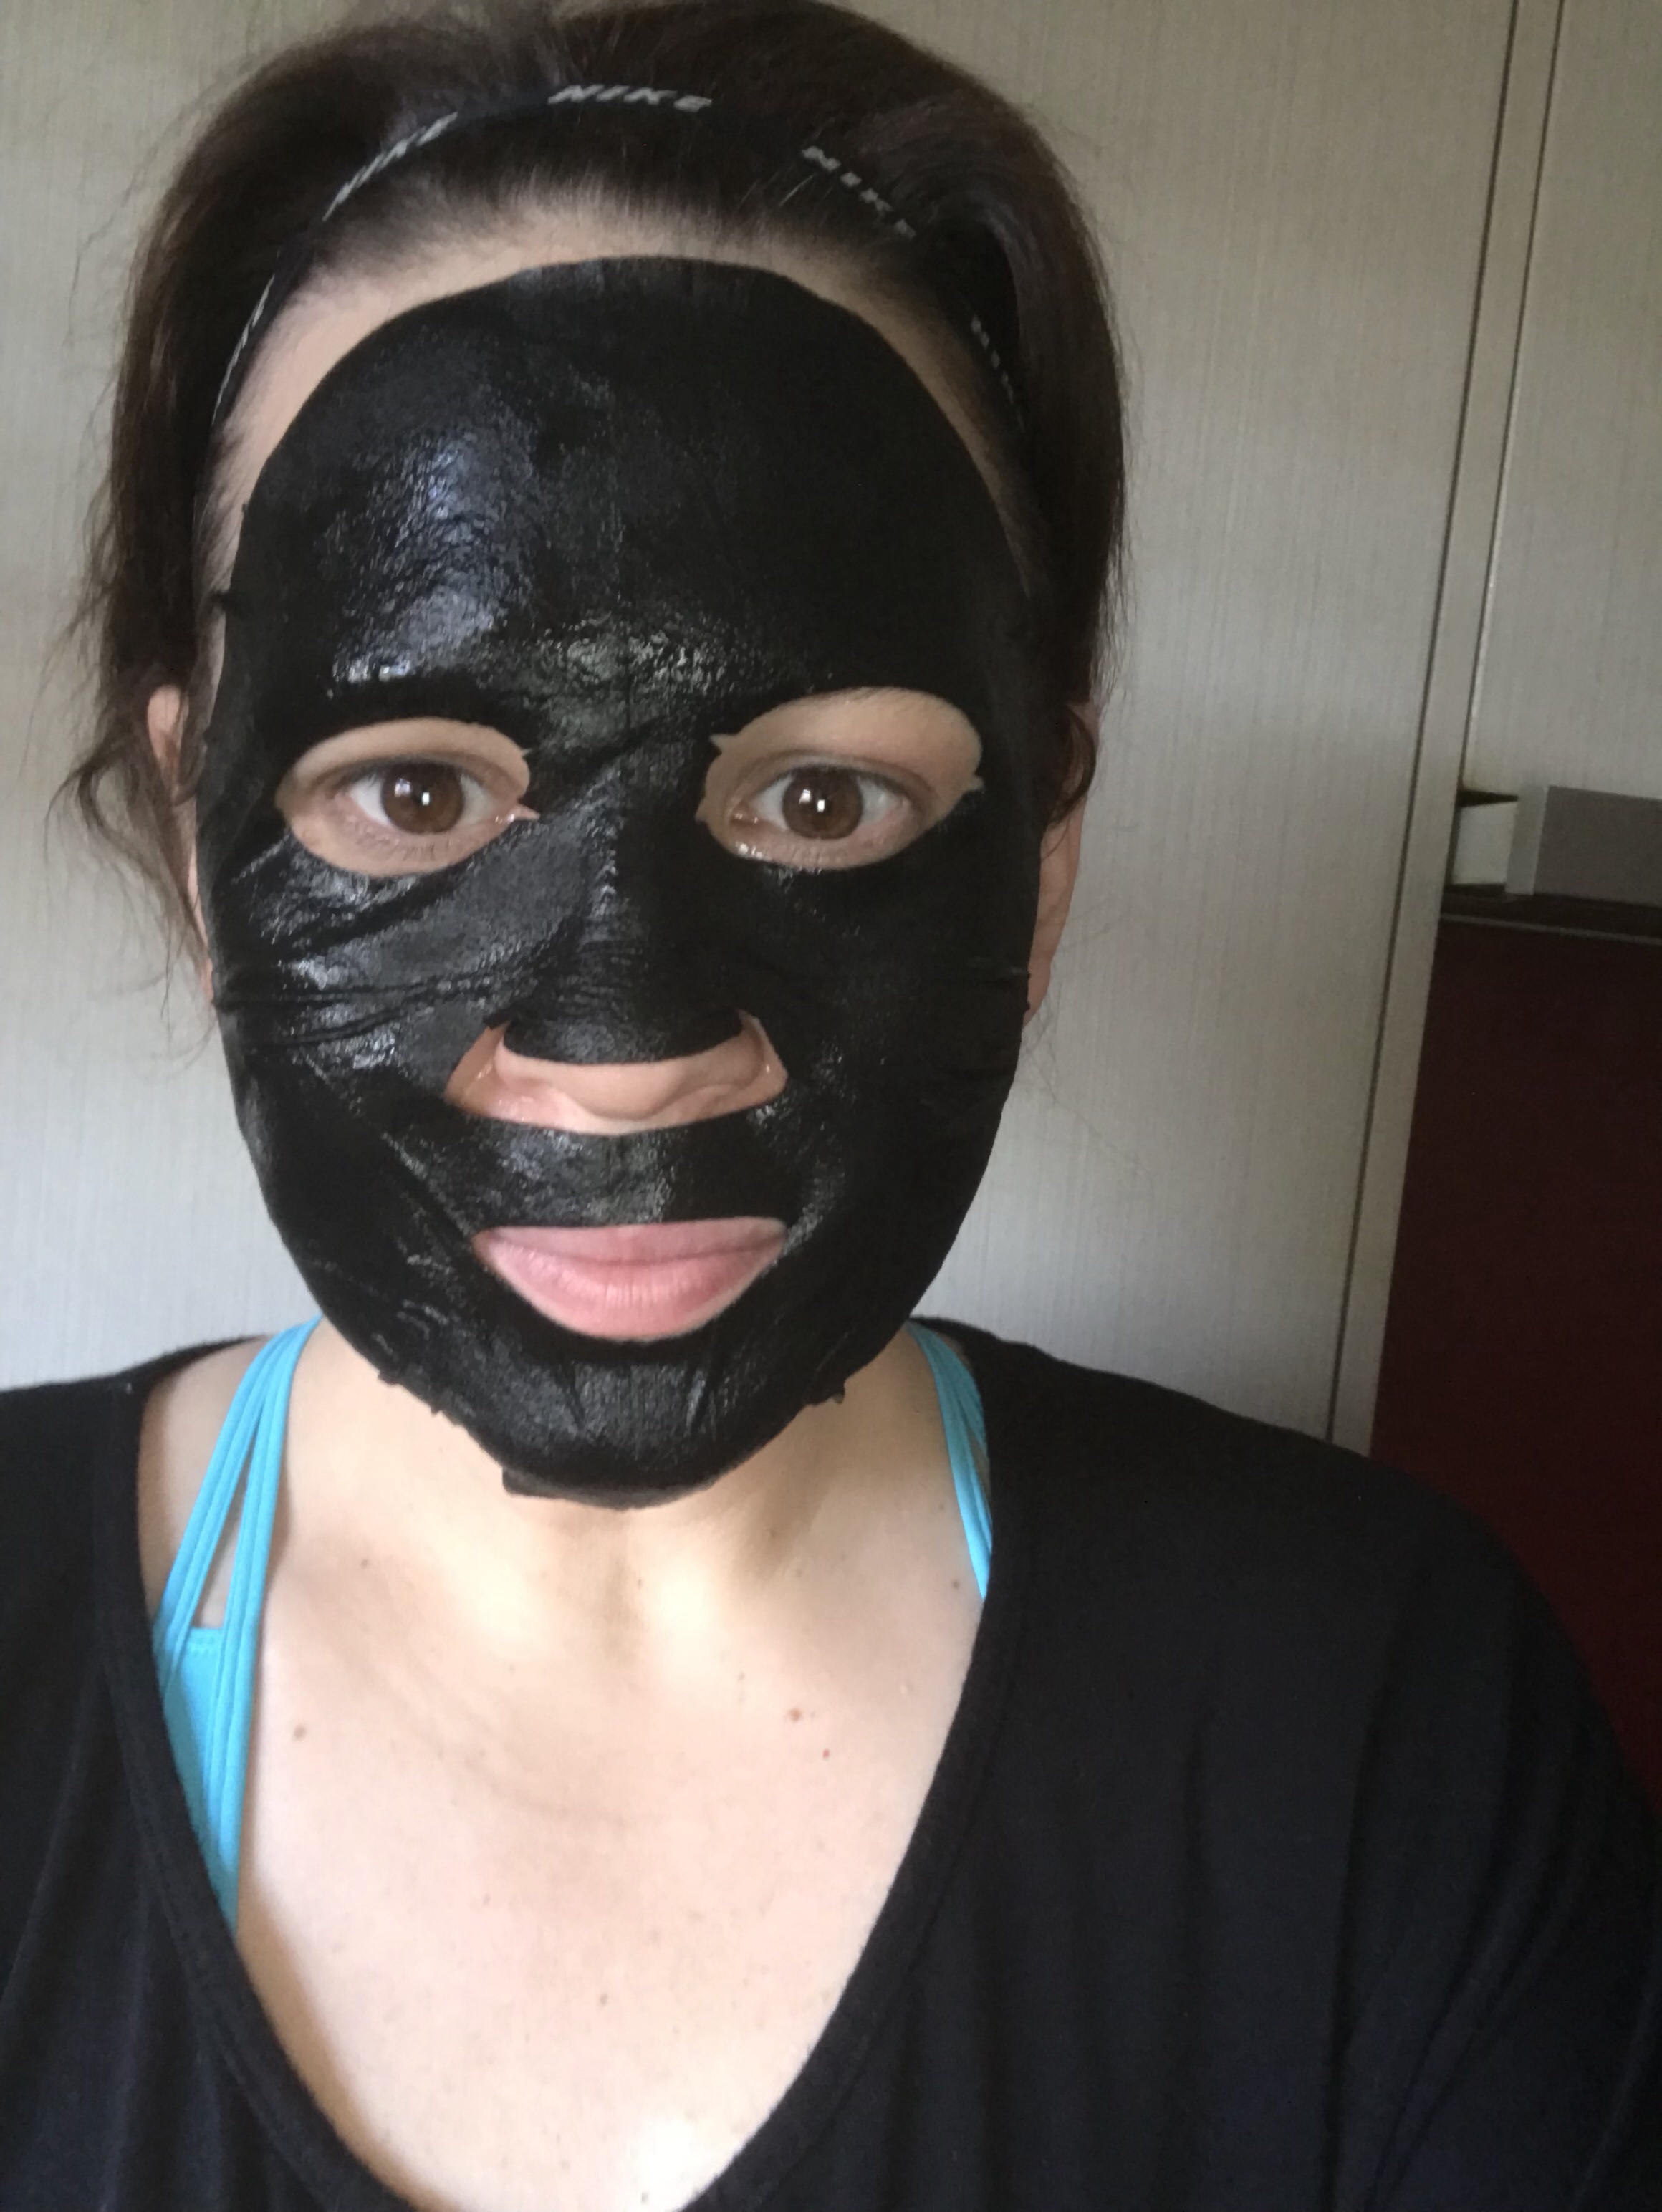
    A standard size hospital gown not only fit, did up with no cheeky bum revealed but was in fact baggy…..when I had my sleeve I needed a bariatric gown and even that didn’t close

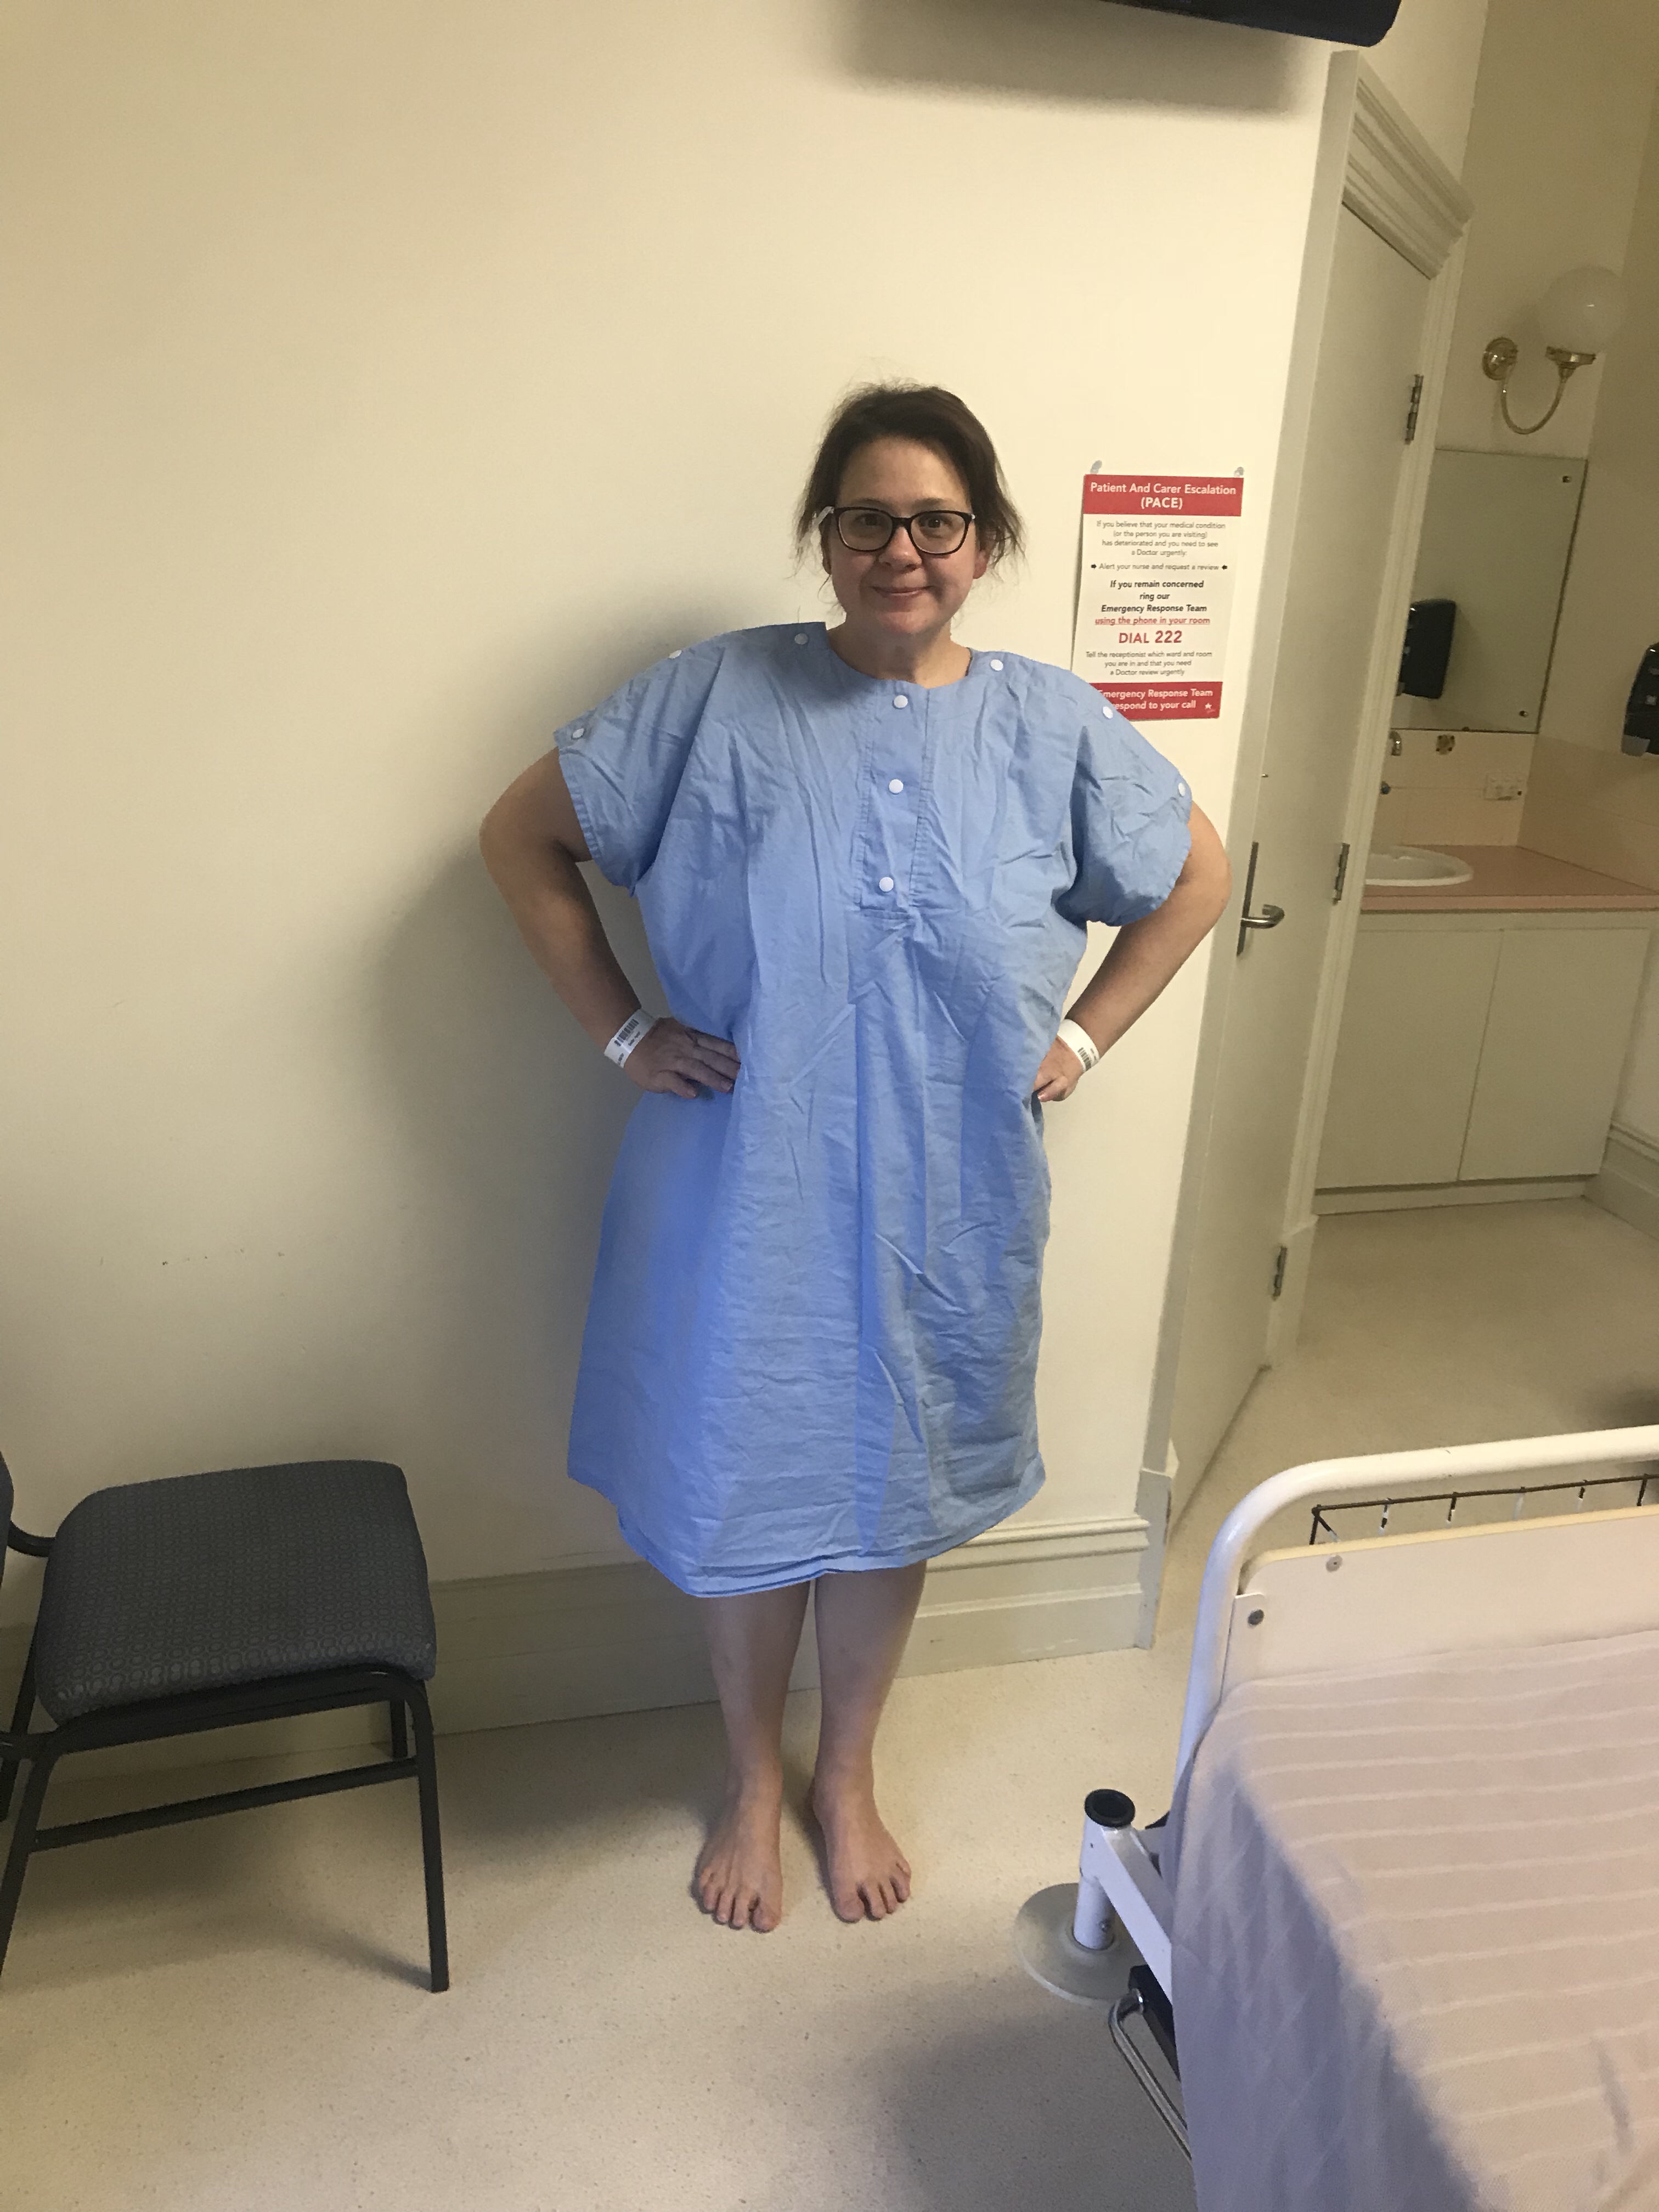
    And the second non-scale victory is that a standard size bloody pressure cuff fit around my arm. I have my entire adult life needed an XL cuff to get around my arm!

    So off I went to theatre where the fun all began, I got marked up and knocked out ready to bid Bertha one final goodbye. My last words to my amazing surgeon was I wanted a picture of Bertha “off body” and I wanted to know how much she weighed.

    So here it is….this is Bertha

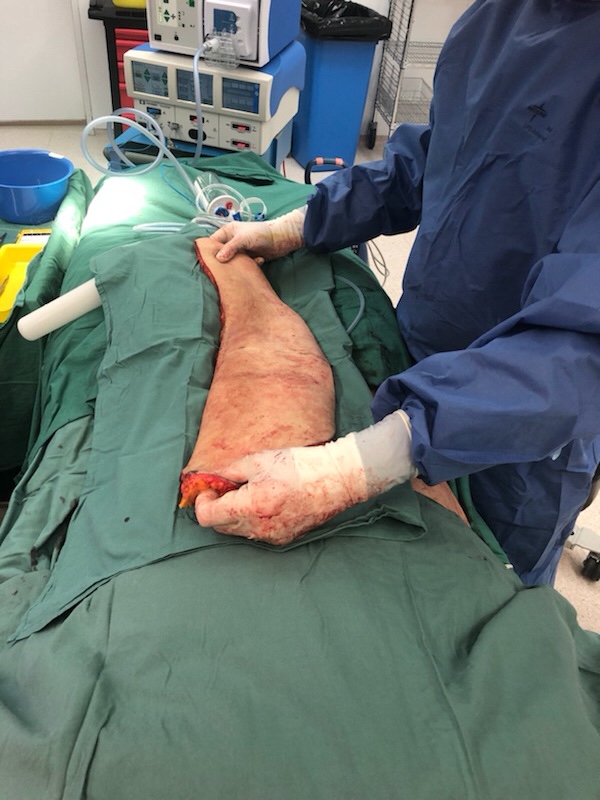
    Weighing in at slightly under 3.1kg….as Lachlan said. Mummy is getting a new belly and the old stinky sore belly is going in the bin.

    BYE BYE BERTHA…..I won’t miss you one little bit!!

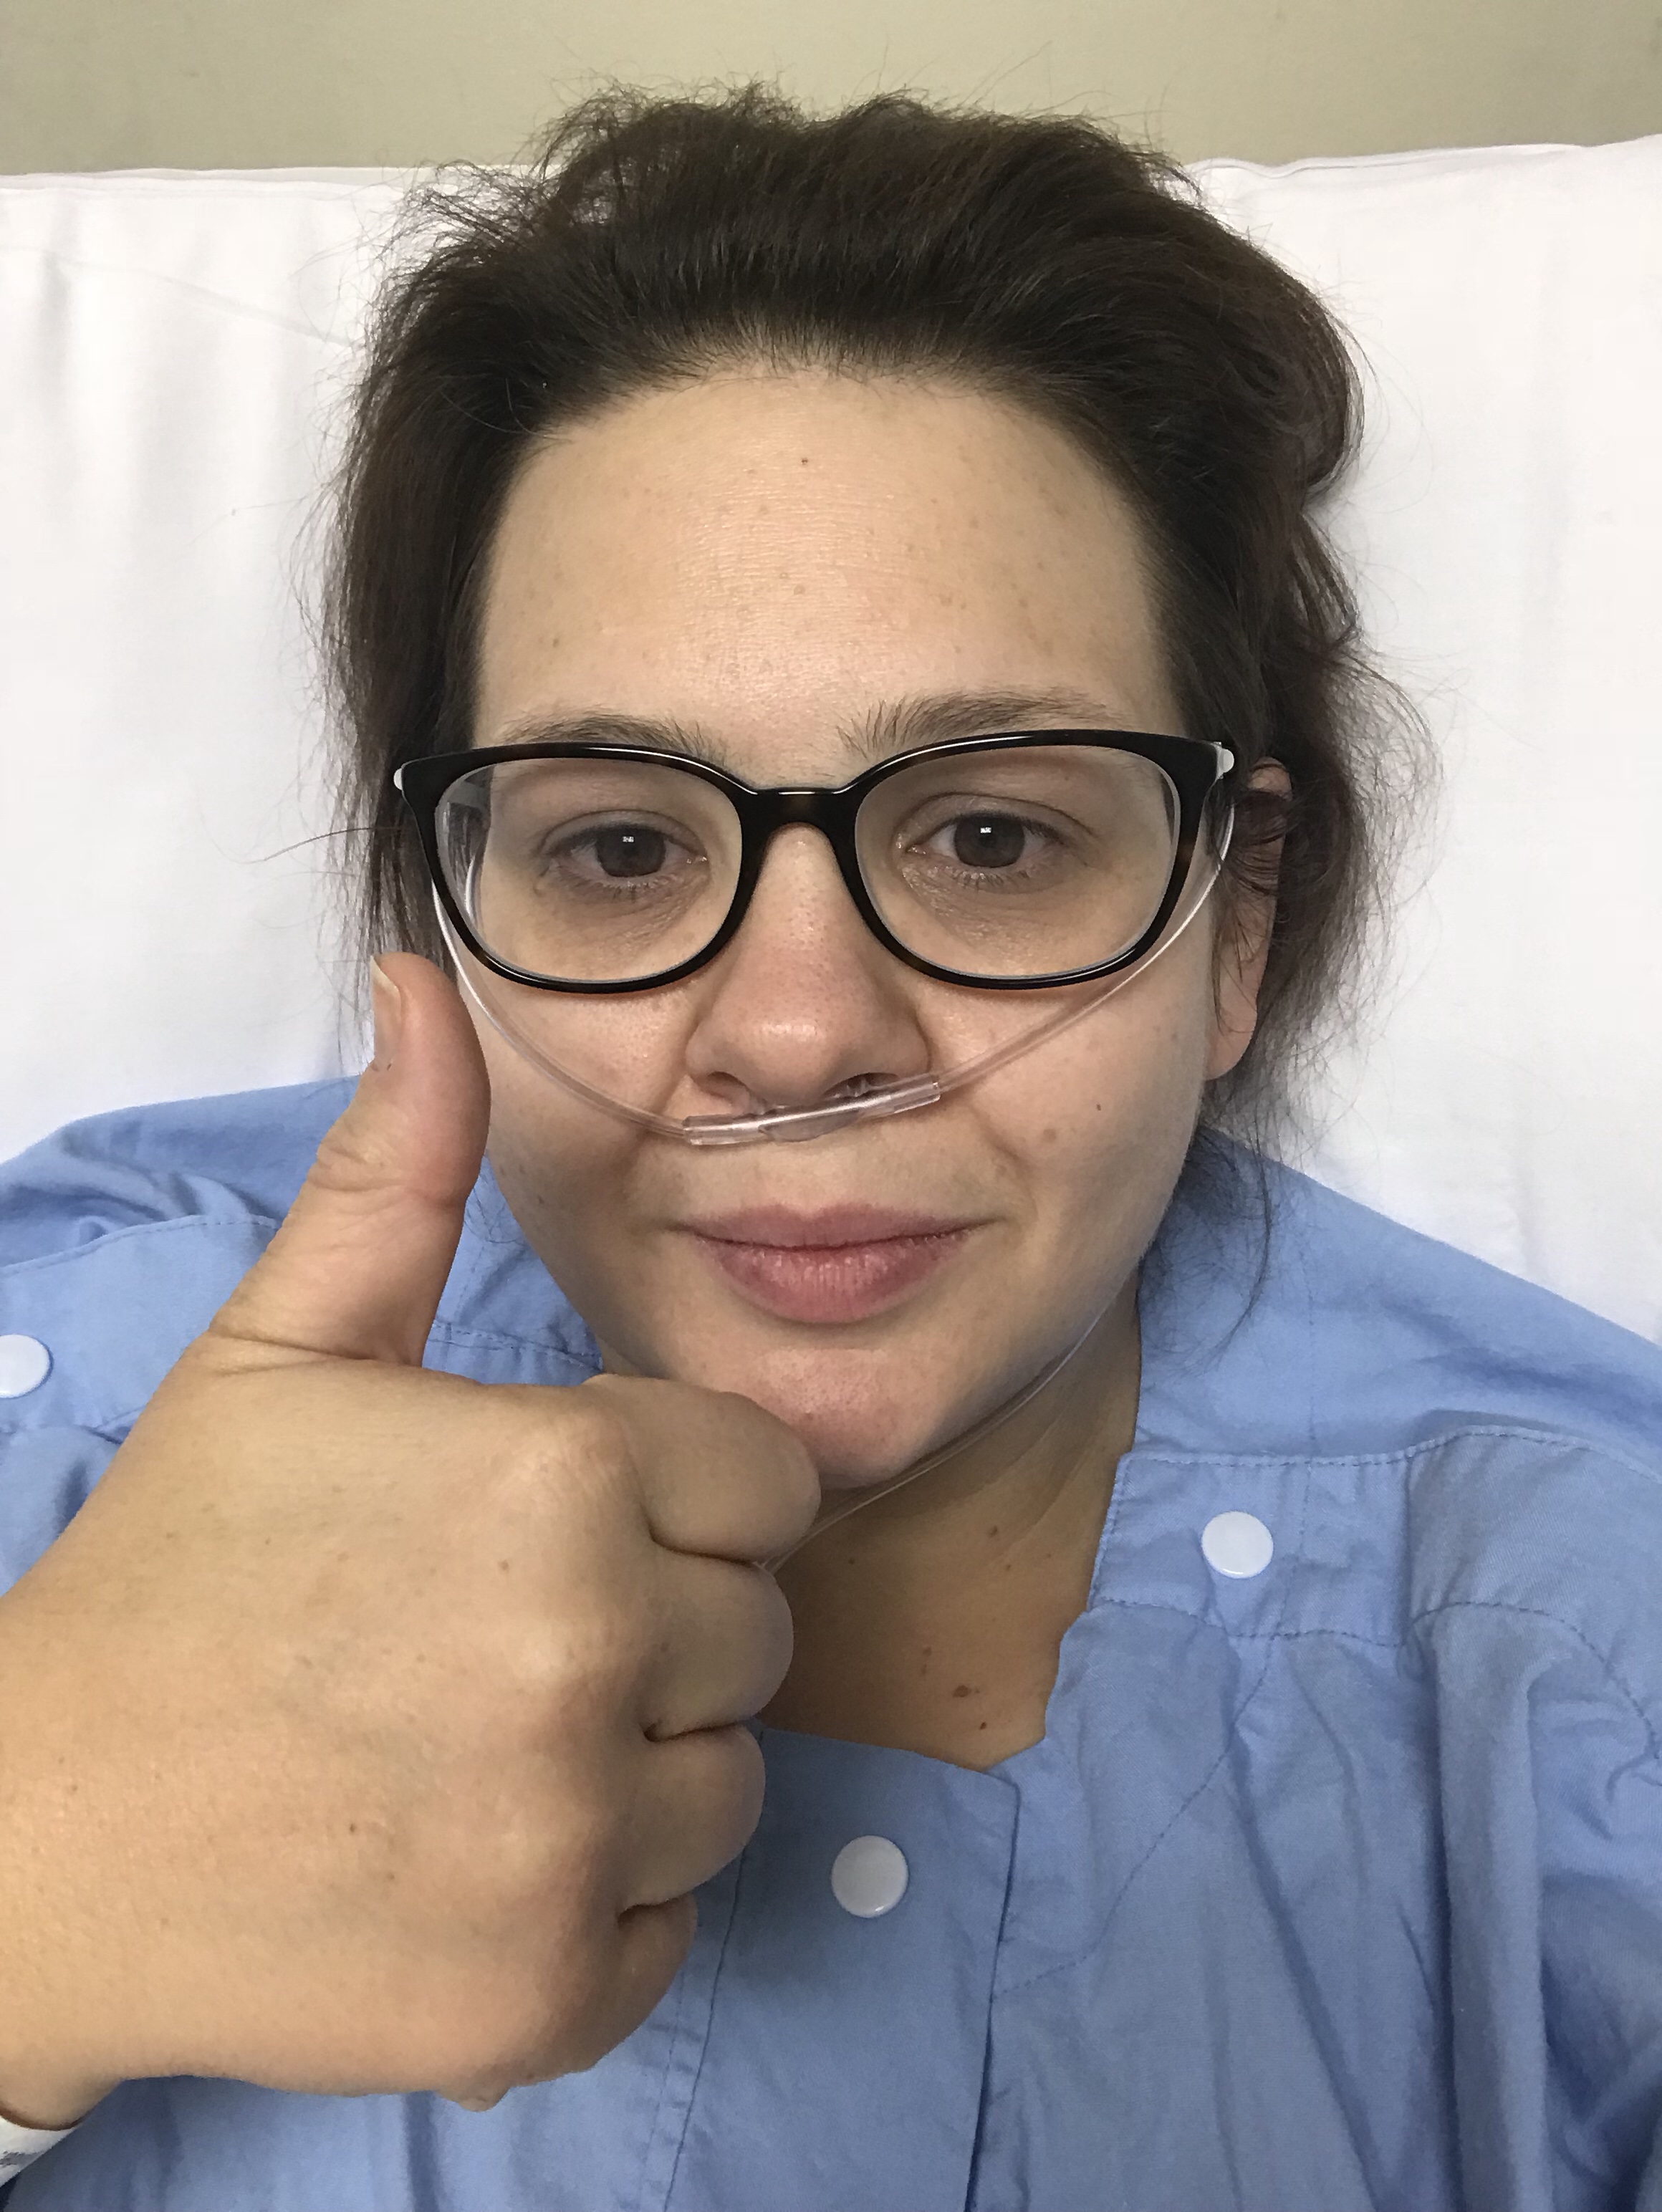
    I woke up in recovery I had the loveliest cheeky nurses looking after me who told me that all went well and then decided to give me the code word of “taco” that I had to remember. Once I had dropped the random code word test on me 5 times and all my obs were stable I was back on the ward within 30 minutes of leaving theatre.

    A quick bite to eat I had settled in for the night with half hourly obs for the first 4 hours on the ward then hourly obs for the next 4 hours. And in that time I had already commenced my mobilisation by walking to the toilet for a wee since I was lucky enough to dodge the need for a catheter in surgery. By 2am I was able to snuggle down and have a couple uninterrupted hours of sleep.

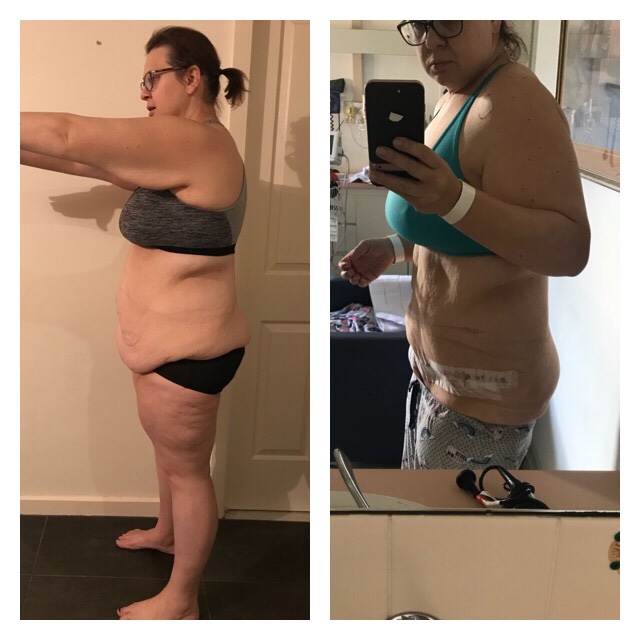
    Woke up in the morning feeling surprisingly good, much much better than I expected. Not excessive amounts of pain, just a weird ache and discomfort from the drain site. Those pesky drains where what was giving me grief. I had my first shower and when drying myself and my dressing off with the hair dryer I got you first sneaky peak of my new belly without Bertha! And I could do my first real post-Bertha comparison shot – it’s hard to believe these photos are less than 48 hours apart!

    My drains took a while to get going but once they got going they were running a little bit too enthusiastically to the point that they needed to stay in longer than anticipated. They were supposed to come out Day 2 but they just weren’t ready with too much discharge still being drained.

    Day 2: I had a bit of an incident with the right drain thanks to the drainage tube being blocked with a clot when I got up to go to the toilet all of the backlog of fluid actually drained out through the drain hole all over me, my bed, the floor and legs just say I was not the cleaners favourite patient that night! Once we got the drain replaced and the tube cleared we were back in business and it was draining again. Pain wise I was still comfortably being managed with a combination of endone and tramdol, while still not experiencing excessive amounts of pain it’s just a continual throb and ache along the incision but mainly where the drains are.

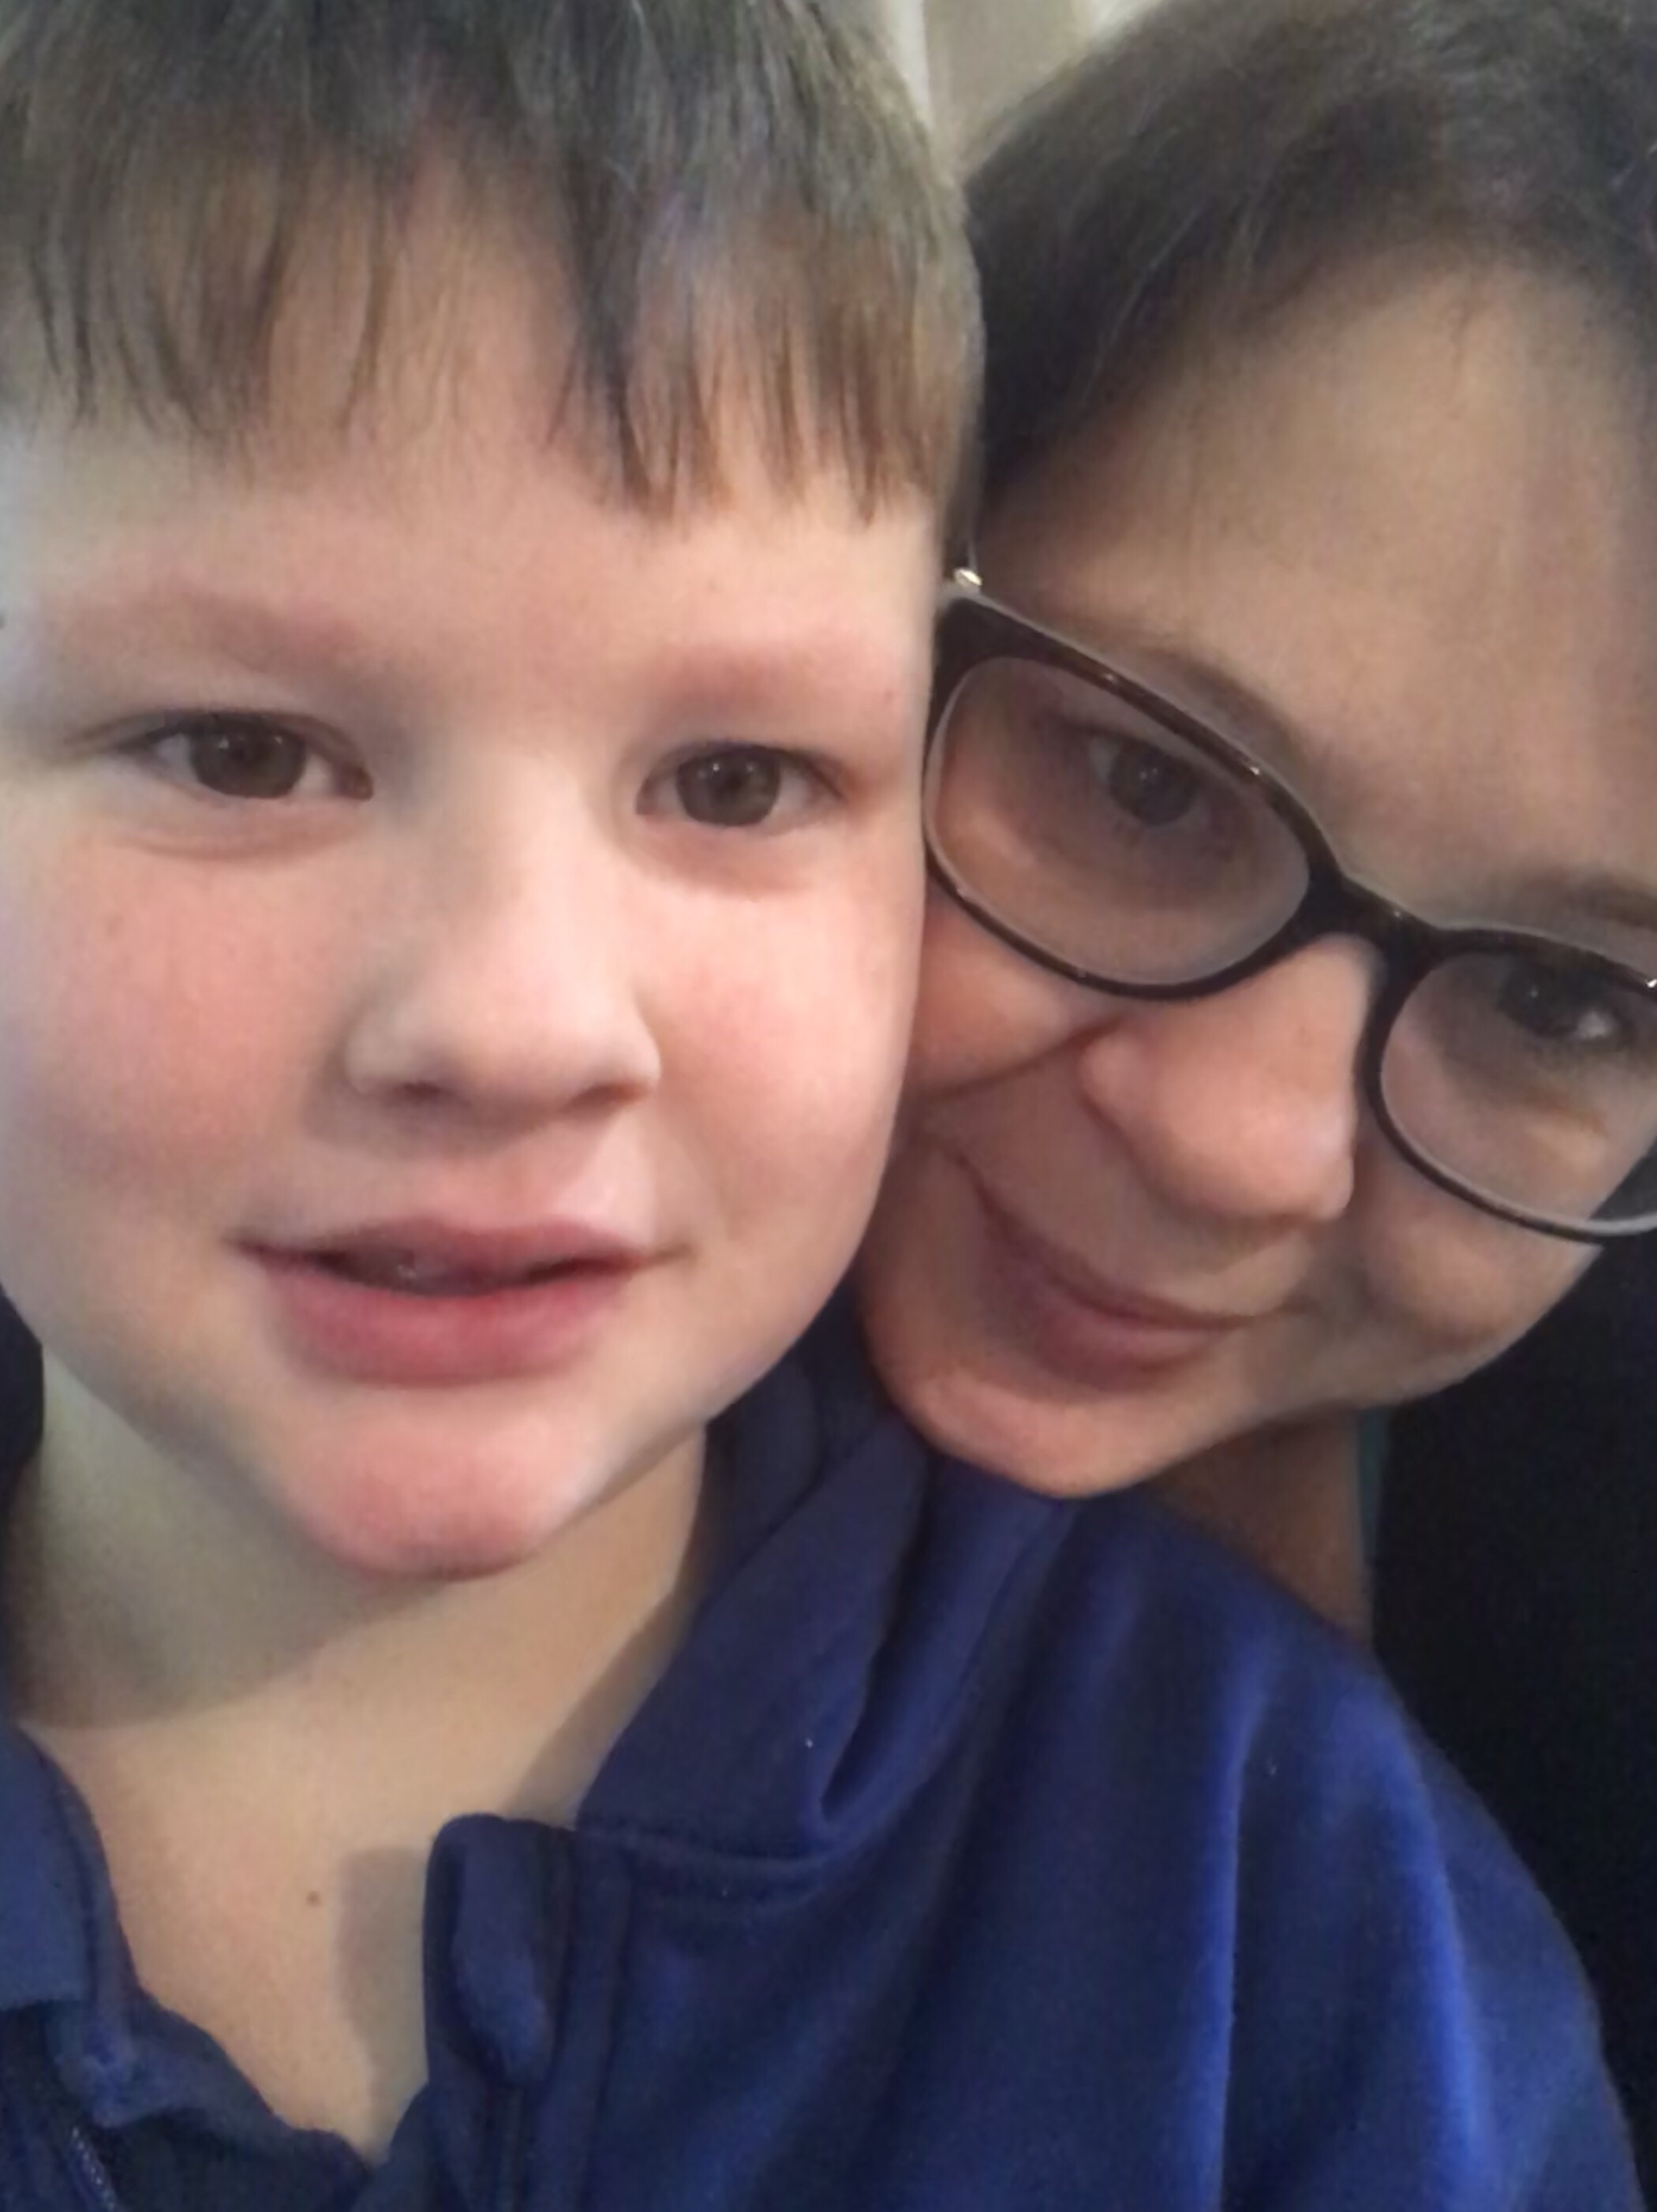
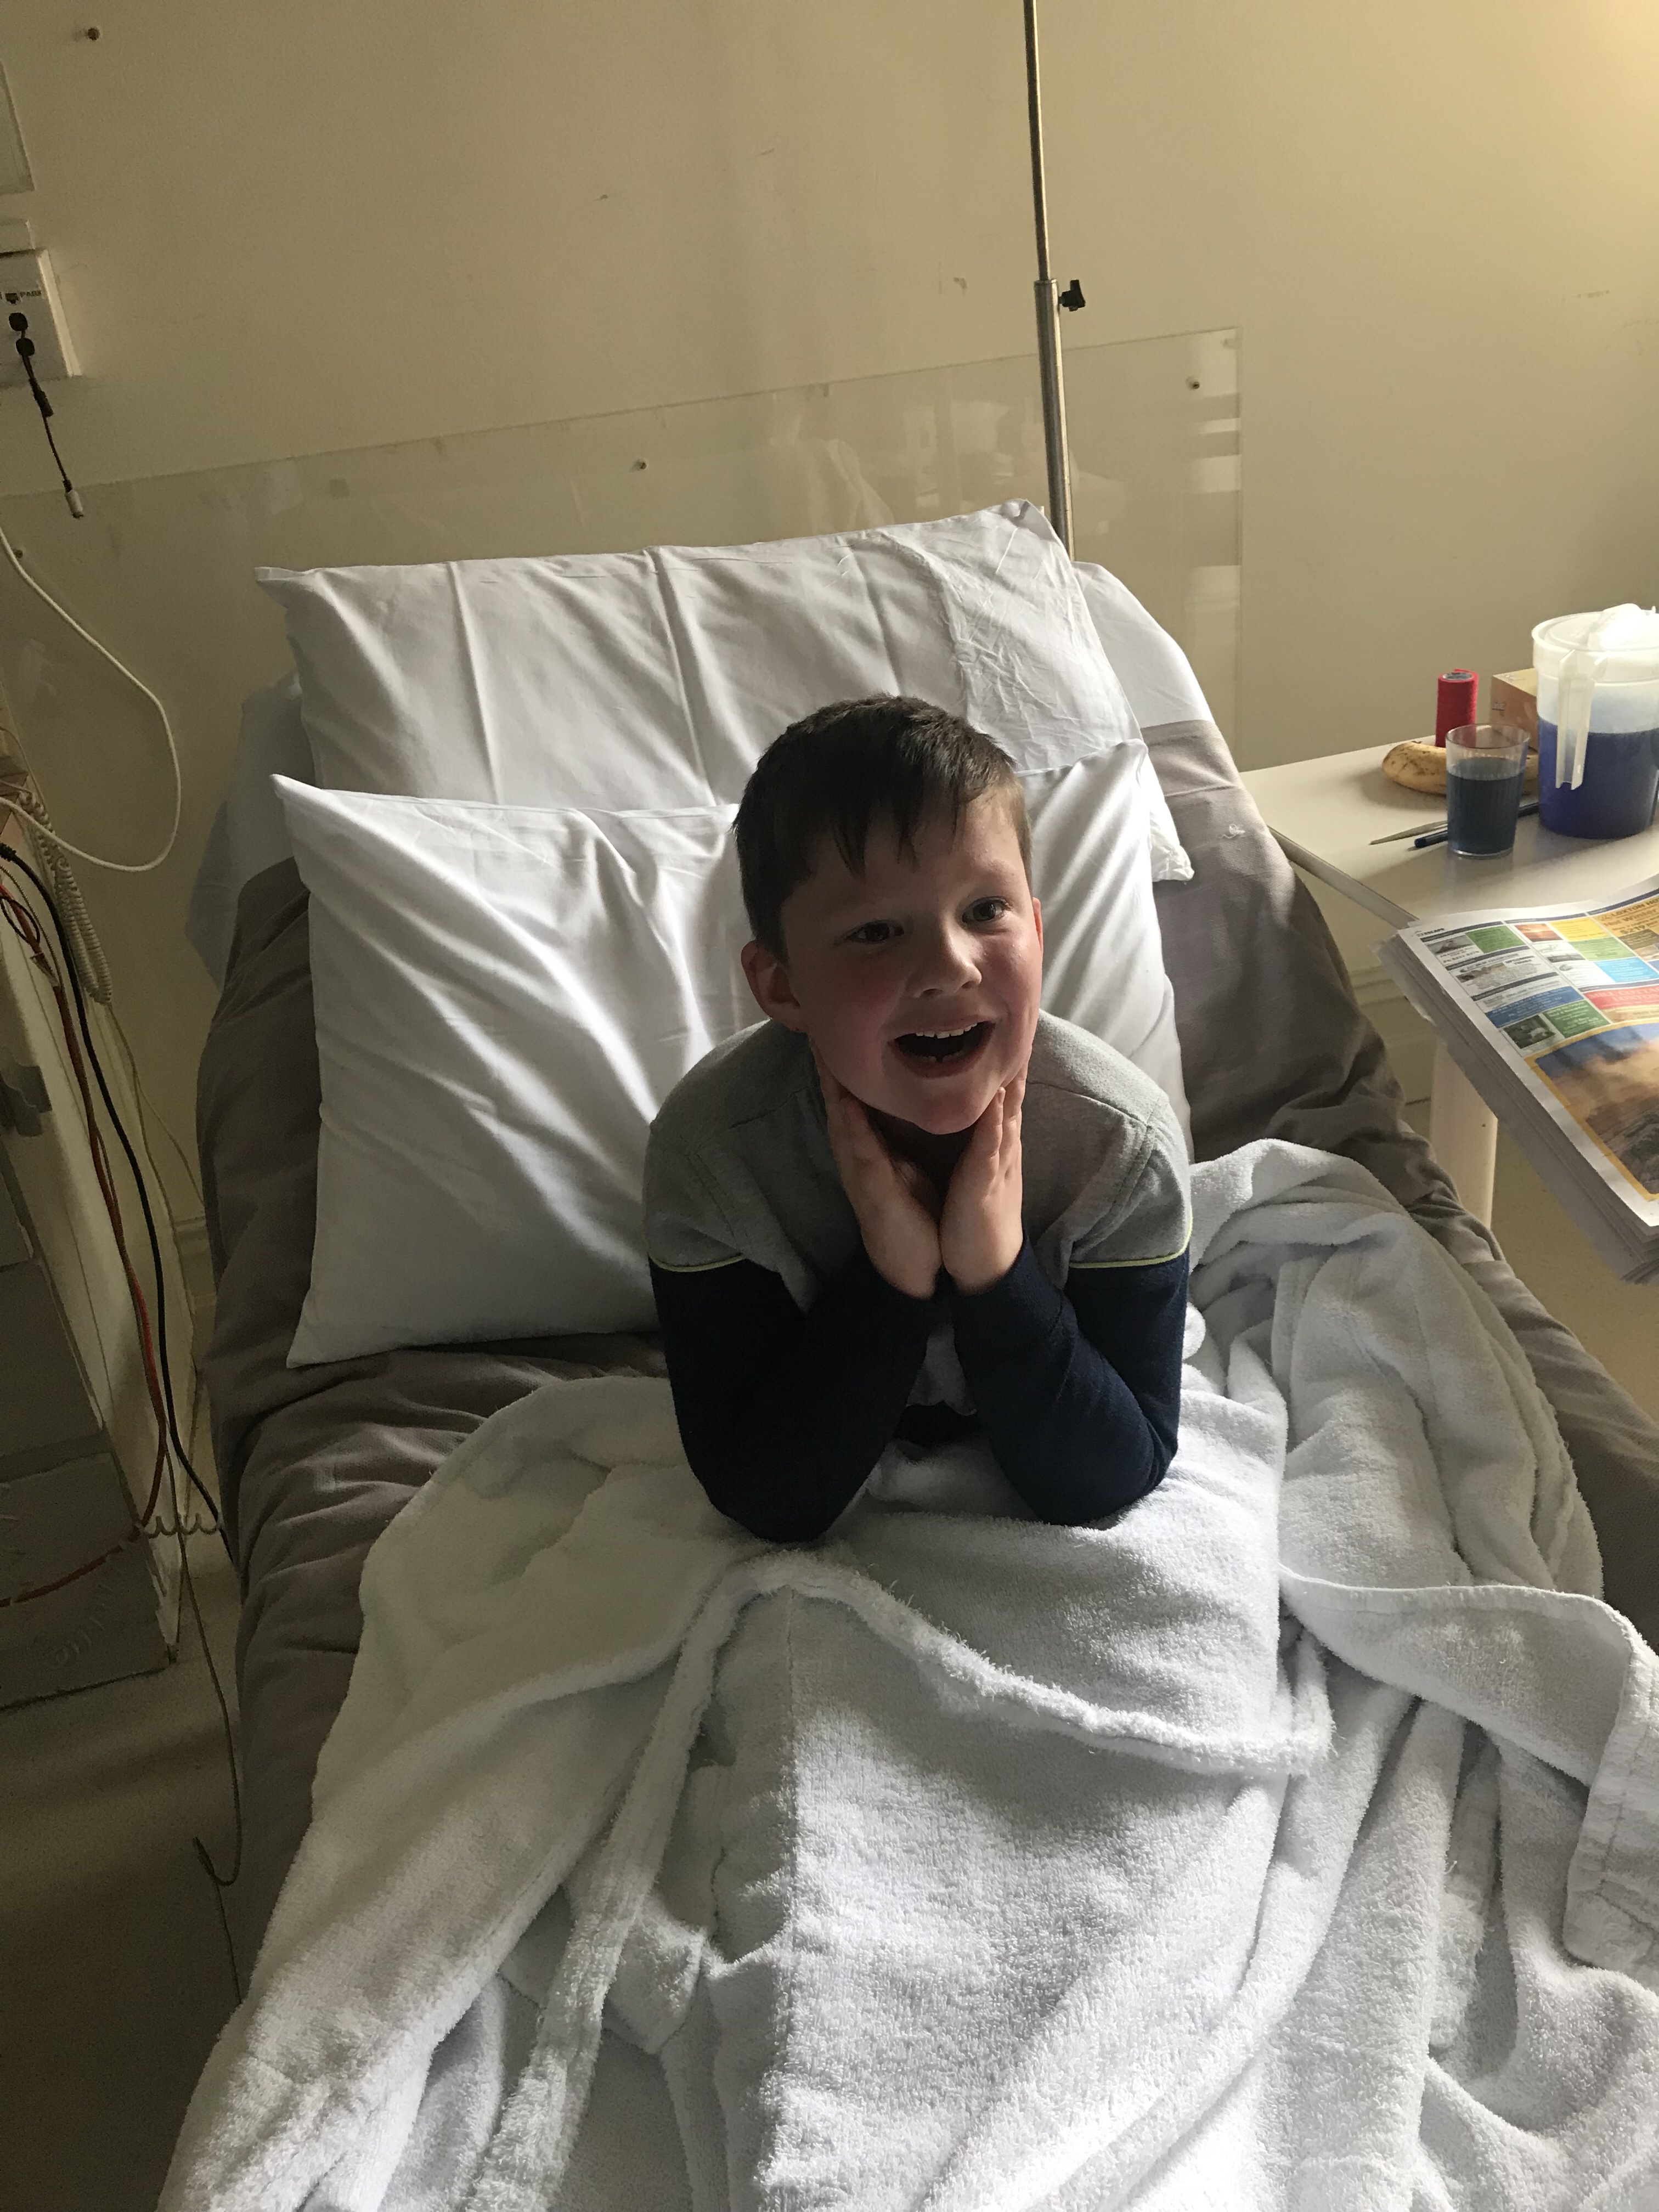
    And life was good as even though I got booted out of my own hospital bed I had my favourite visitor of all visitors come in to see me!

    Day 3: I was elated to have my left drain removed. Which when coming out we discovered I must have had a similar style blockage and when the tube was pulled out the “drain hole” became the a drain. Over the next 4 hours everytime I stood upright I had a gush of Fluid expel from the body. It got the point everytime I was about to stand up I called the nurse and had her on standby mode to prepare for onslaught of mess. She estimated I lost another 40-60ml of Fluid using this unconventional method of leaving the body. Yes, it wasn’t ideal. Yes, it was revolting….BUT I couldn’t give two hoots as I would much rather the fluid be out of my body making a mess on the floor than to collect internally to potentially cause any complications to my surgery.

    Once I finally stopped leaking I was able to have a clean up shower where I really had the first opportunity to stop and look at myself. And I am not gonna lie I was shocked with what I saw.

    I didn’t got in with any expectations of what I wanted to look like after my surgery for 2 reasons.

    Firstly, I didn’t want to set expectations so that I didn’t feel disappointed with the results.

    Secondly, I honestly didn’t know what to expect. I was acutely aware I wasn’t having a tummy tuck. I was having an apronectomy and this isn’t a common or widely talked about procedure. It’s a rare procedure offered as an interim fix to those who have lost extreme amounts of weight and are suffering severe secondary medical problems as a result of the excess skin. It’s offered to help me get to the point of being at goal weight and stable to be eligible for the standard tummy tuck procedure. I knew I wasn’t going to come out with a flat washboard contouring tummy and I was comfortable with that.

    So what was my first impressions of my results so far! Shock, delight, joy, pleasure, happy tears and disbelief that this is my body! Bertha is officially gone and I don’t miss her one little bit! And I can honestly never remember in my entire adult life my stomach ever looking so flat!

    Day 4: this was my rough day. People had warned me about the day 3 blues and for me (probably because I had a PM list) it hit day 4. Day 4 I hit the slump day. My pain was no better or worse than previous days. My mood however was less than desirable, I was simply put….over it! I felt fine and healthy enough to go home. I was sick of laying around in bed all day doing nothing. My little man was missing me terribly to the point he wanted me to leave hospital and start walking home. I was over the watching the numbers of the drains and begging them to stop draining so I could have them removed. I just was over it….I wanted out! Day 4 I survived!

    Day 5: this amazing man made me the happiest girl in the world!

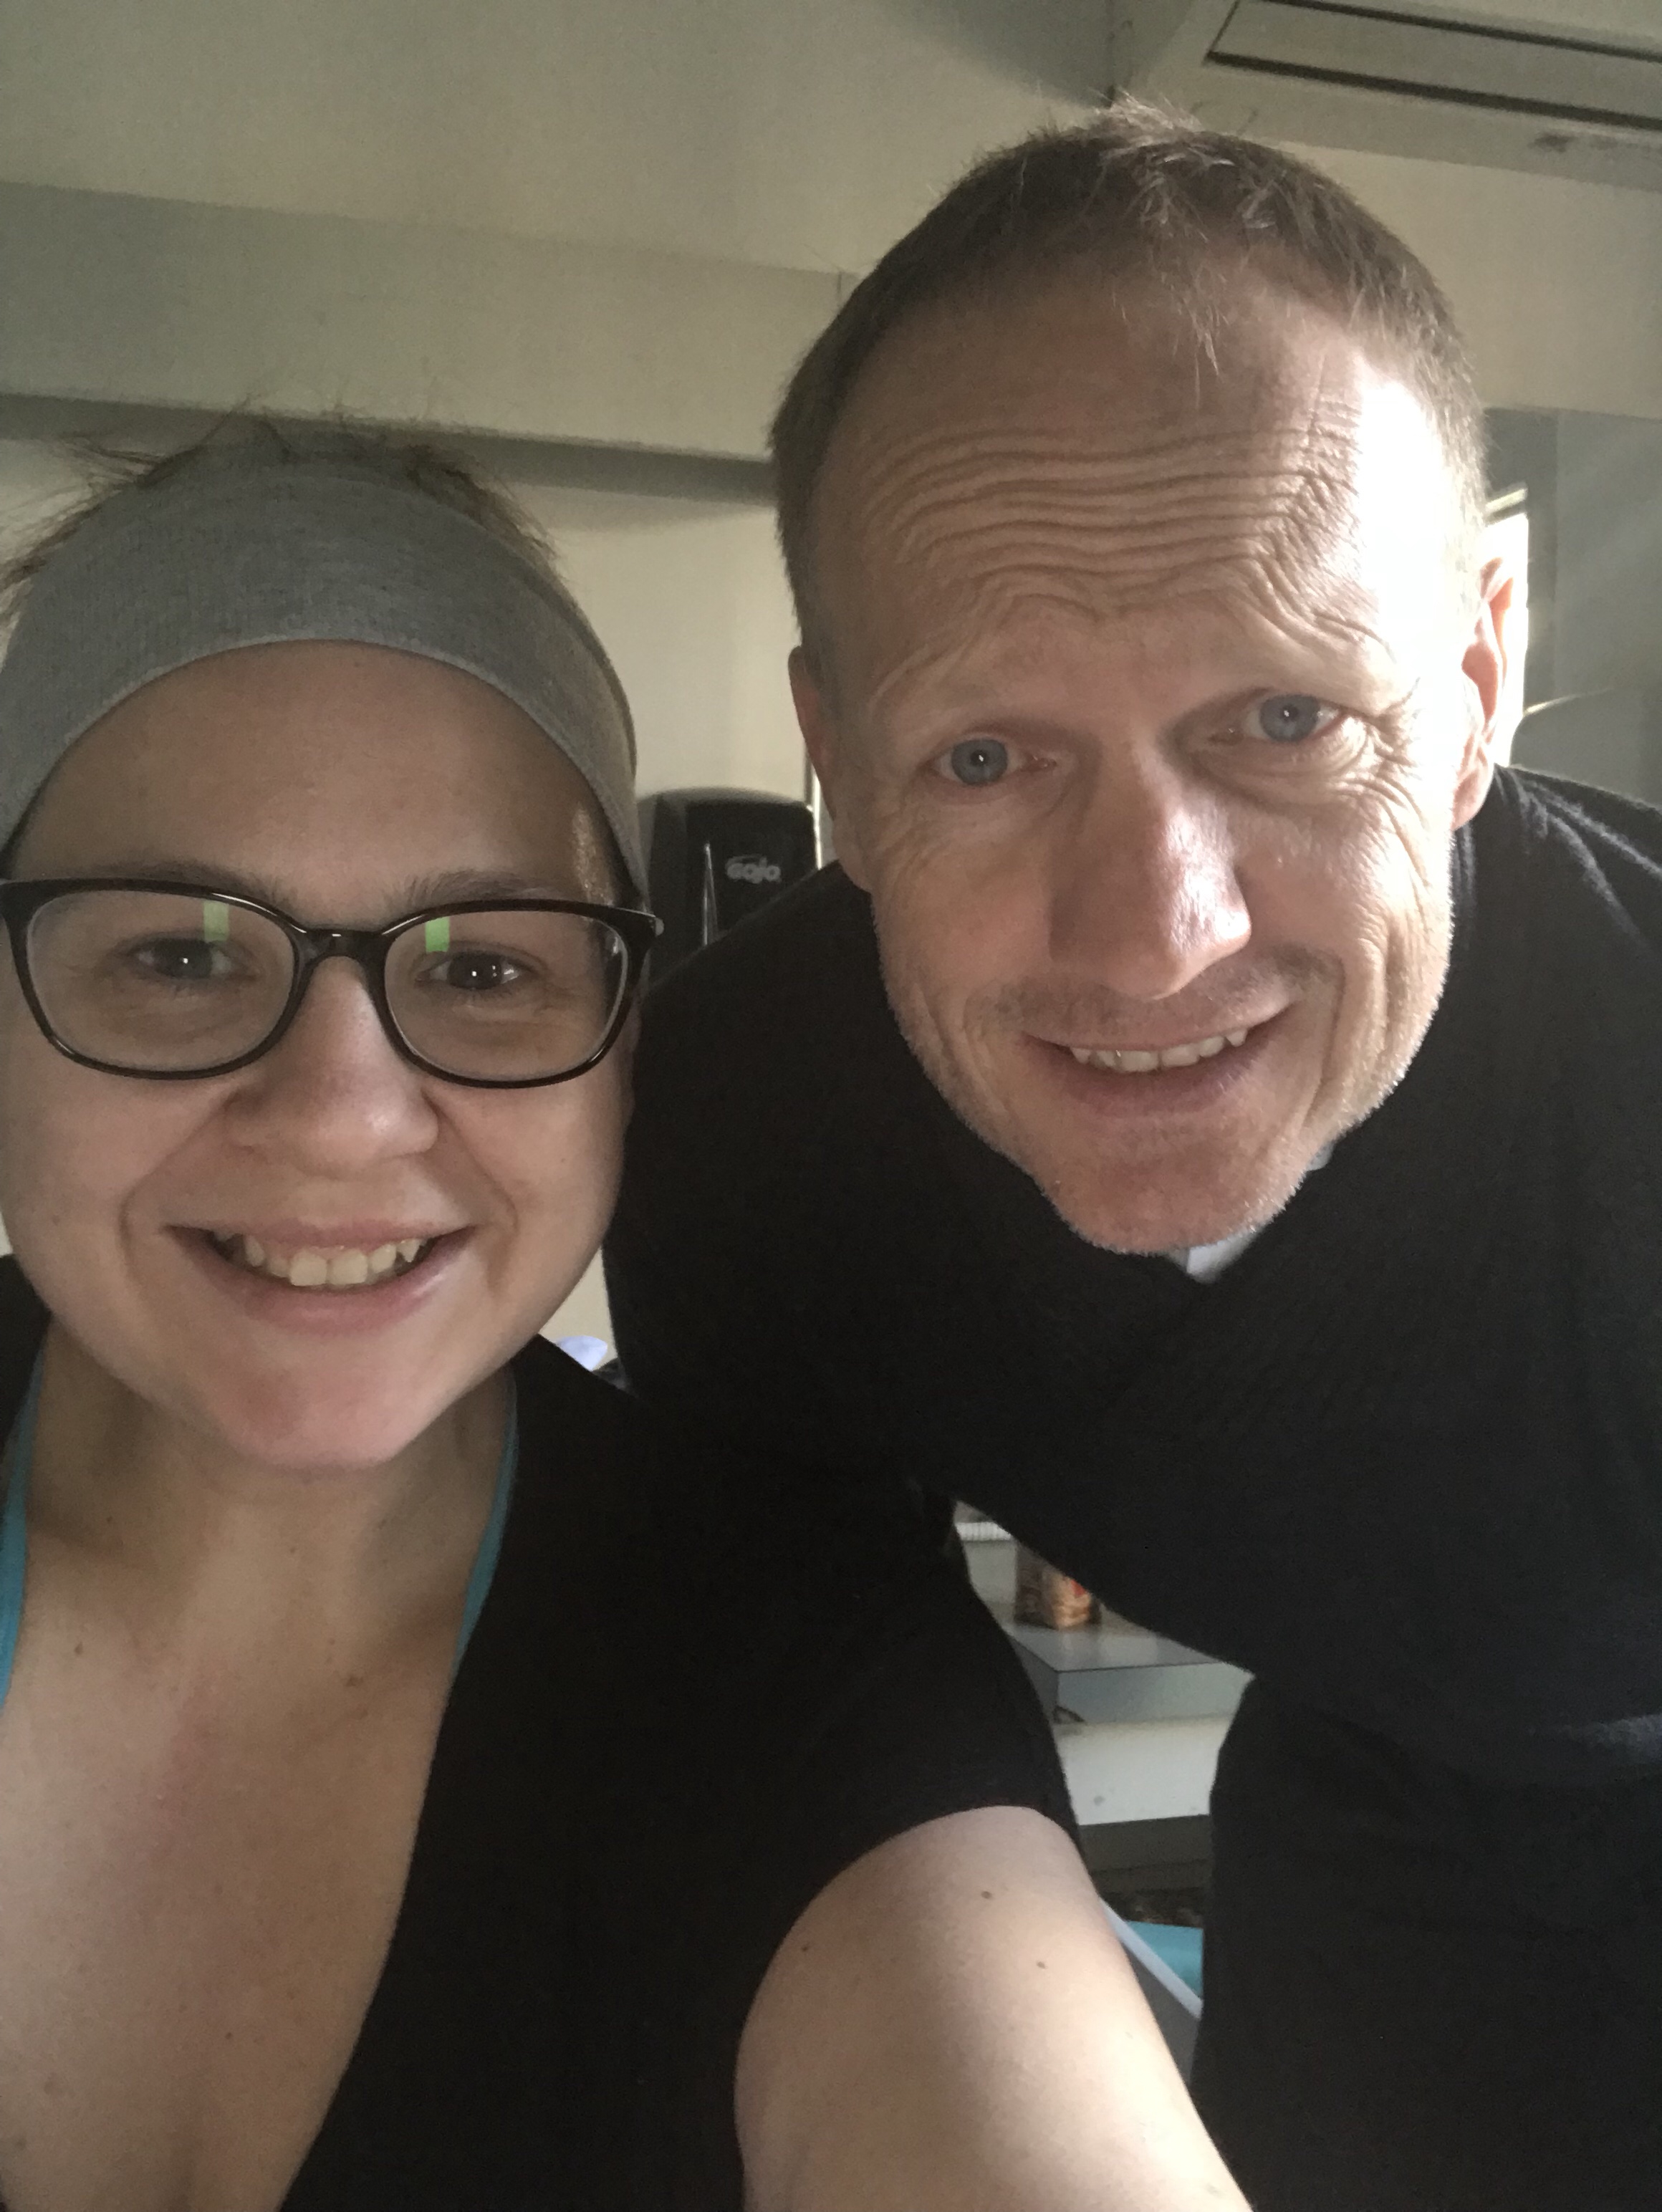
    This is my surgeon Dr Darren Molony from Adelaide Plastic Surgery. Not only is Darren one of Adelaide’s best surgeons who specialises is body contouring post extreme weight loss he is a kind and caring surgeon who has the best outcomes in mind for his patients. Every nurse I had made comments of how well I did with selecting my surgeon and that he is by far one of the best in his field! Thank you Dr Molony for being so bloody good at your job and THANK YOU THANK YOU THANK YOU for giving me the all clear to have the second drain removed and for me to go home!

    I am so lucky and grateful to have had all amazing supportive and kind caring nurses in my 5 days. While the facilities at the Memorial Hospital are a little dated this what not my priority. My priority was to receive safe, quality and respectful care and this is exactly what I received and I am so very thankful for all the staff for looking after me so incredibly well!

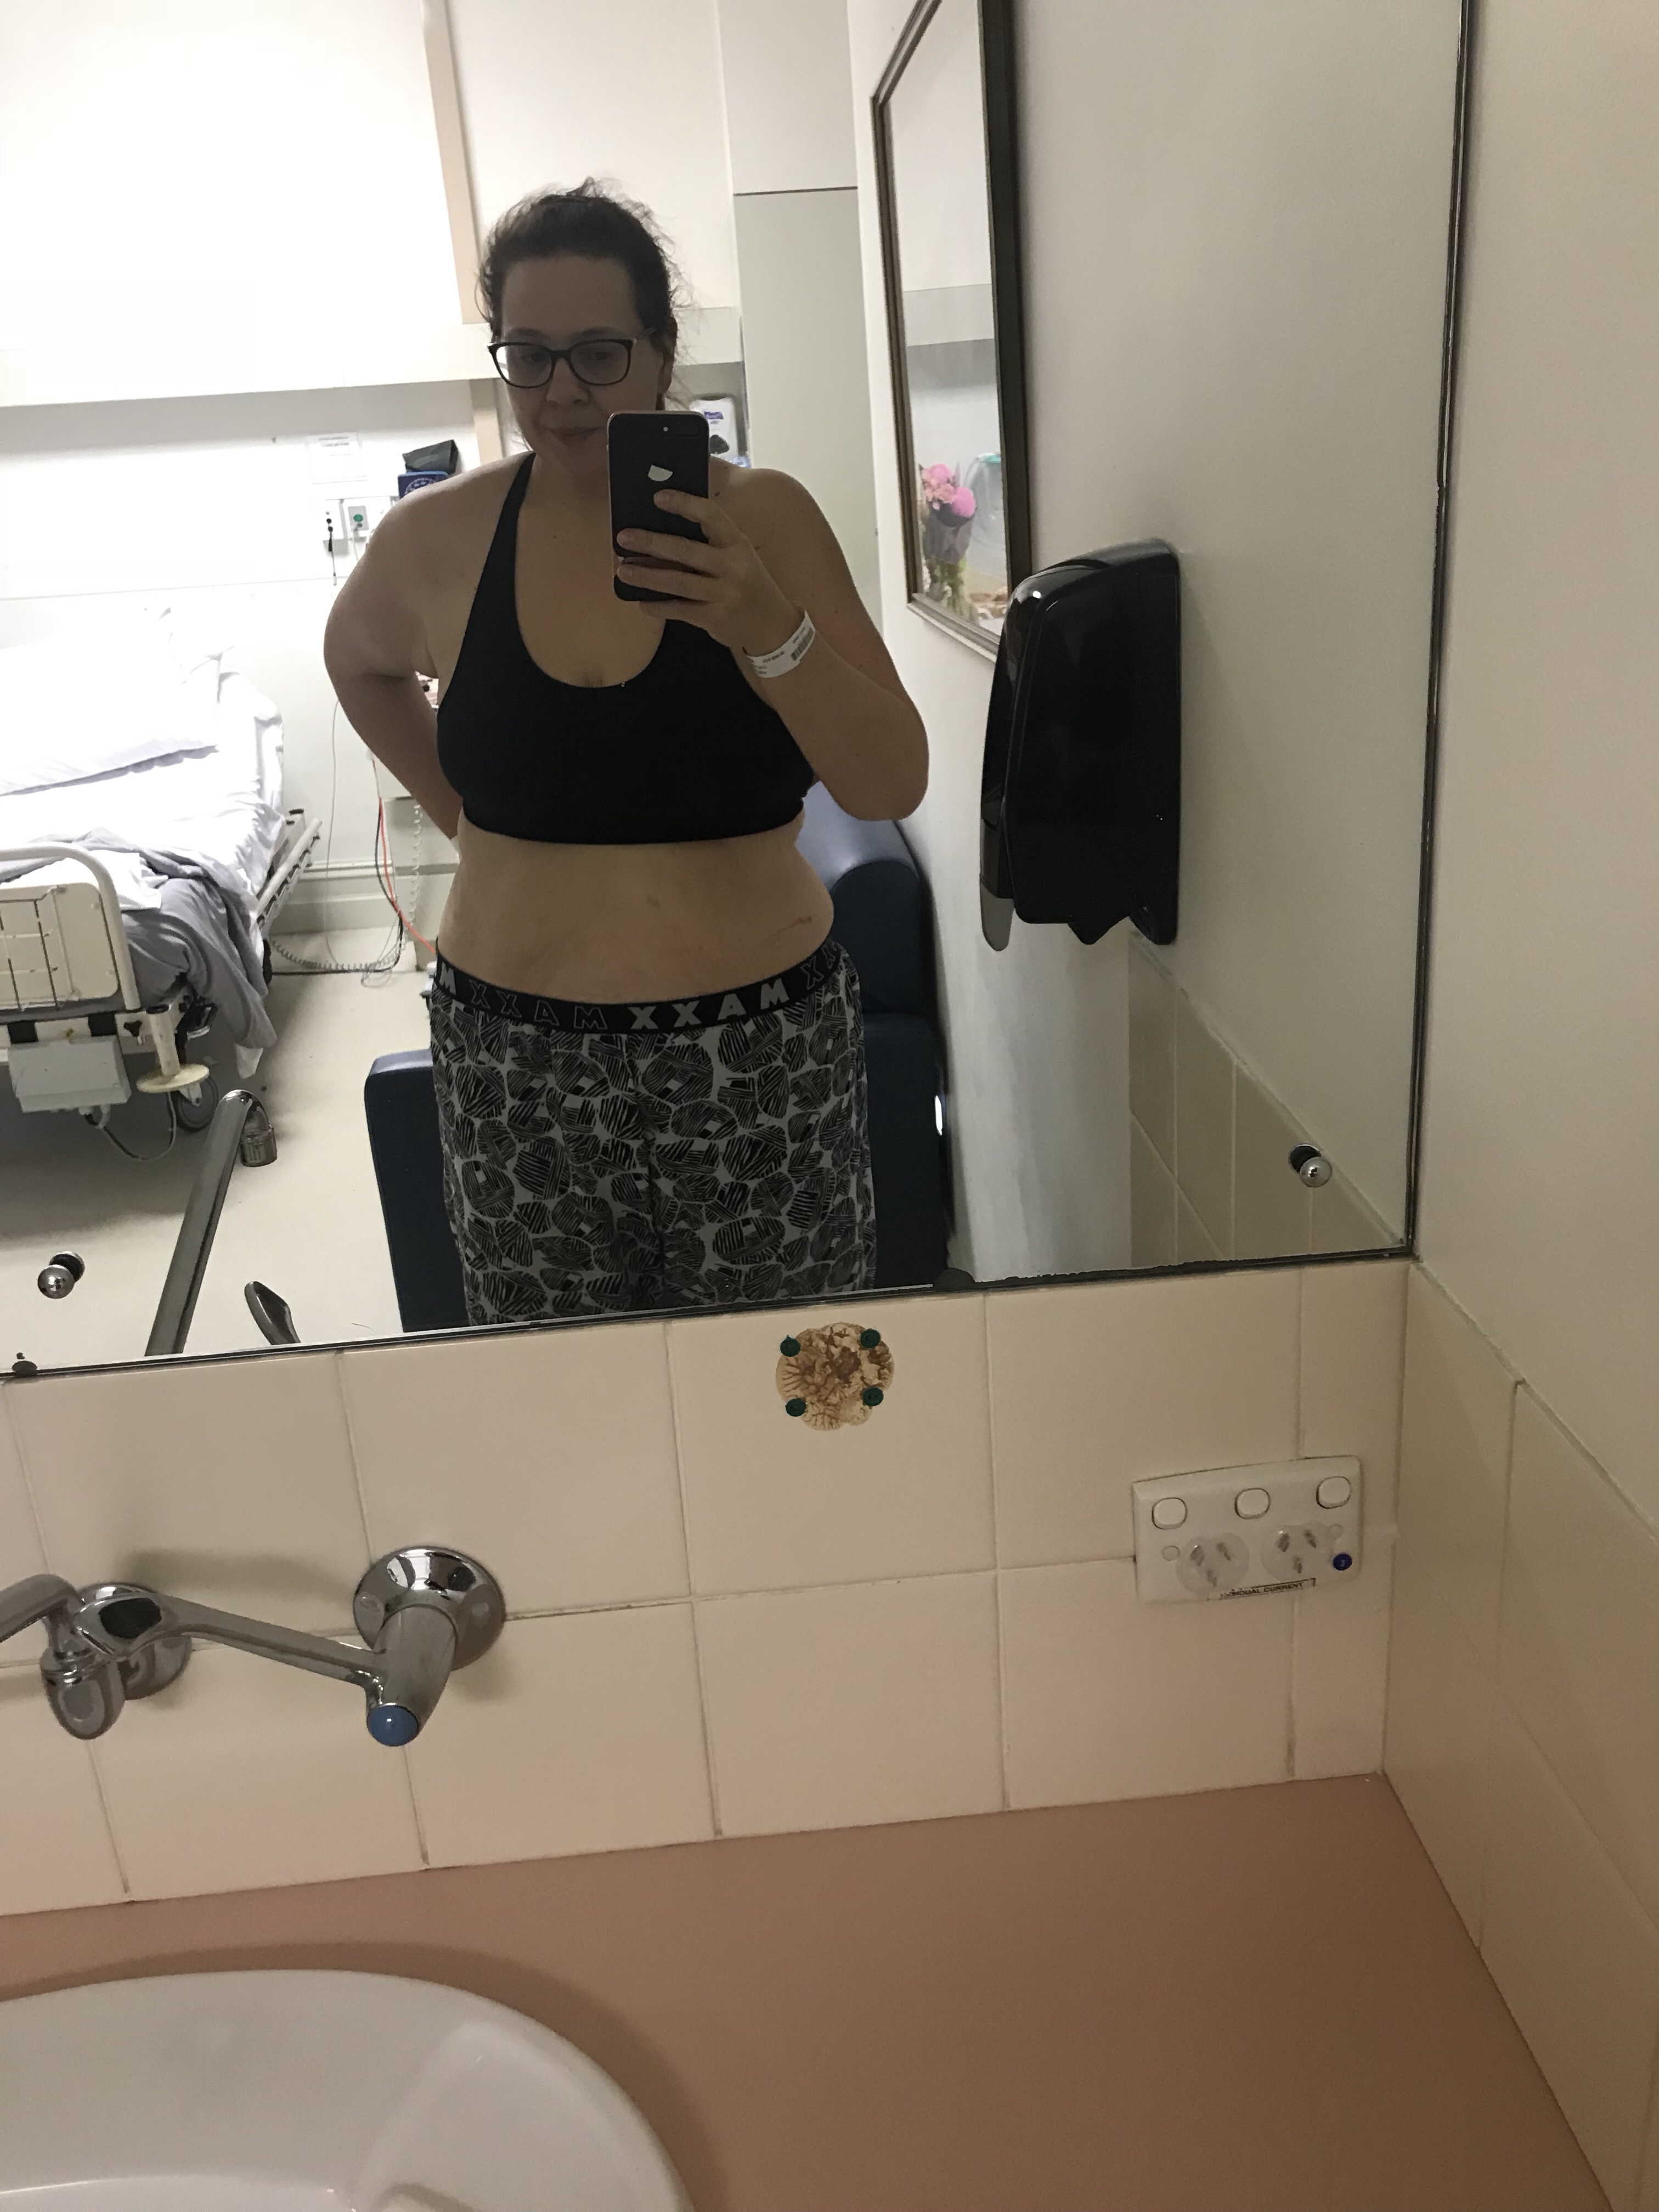
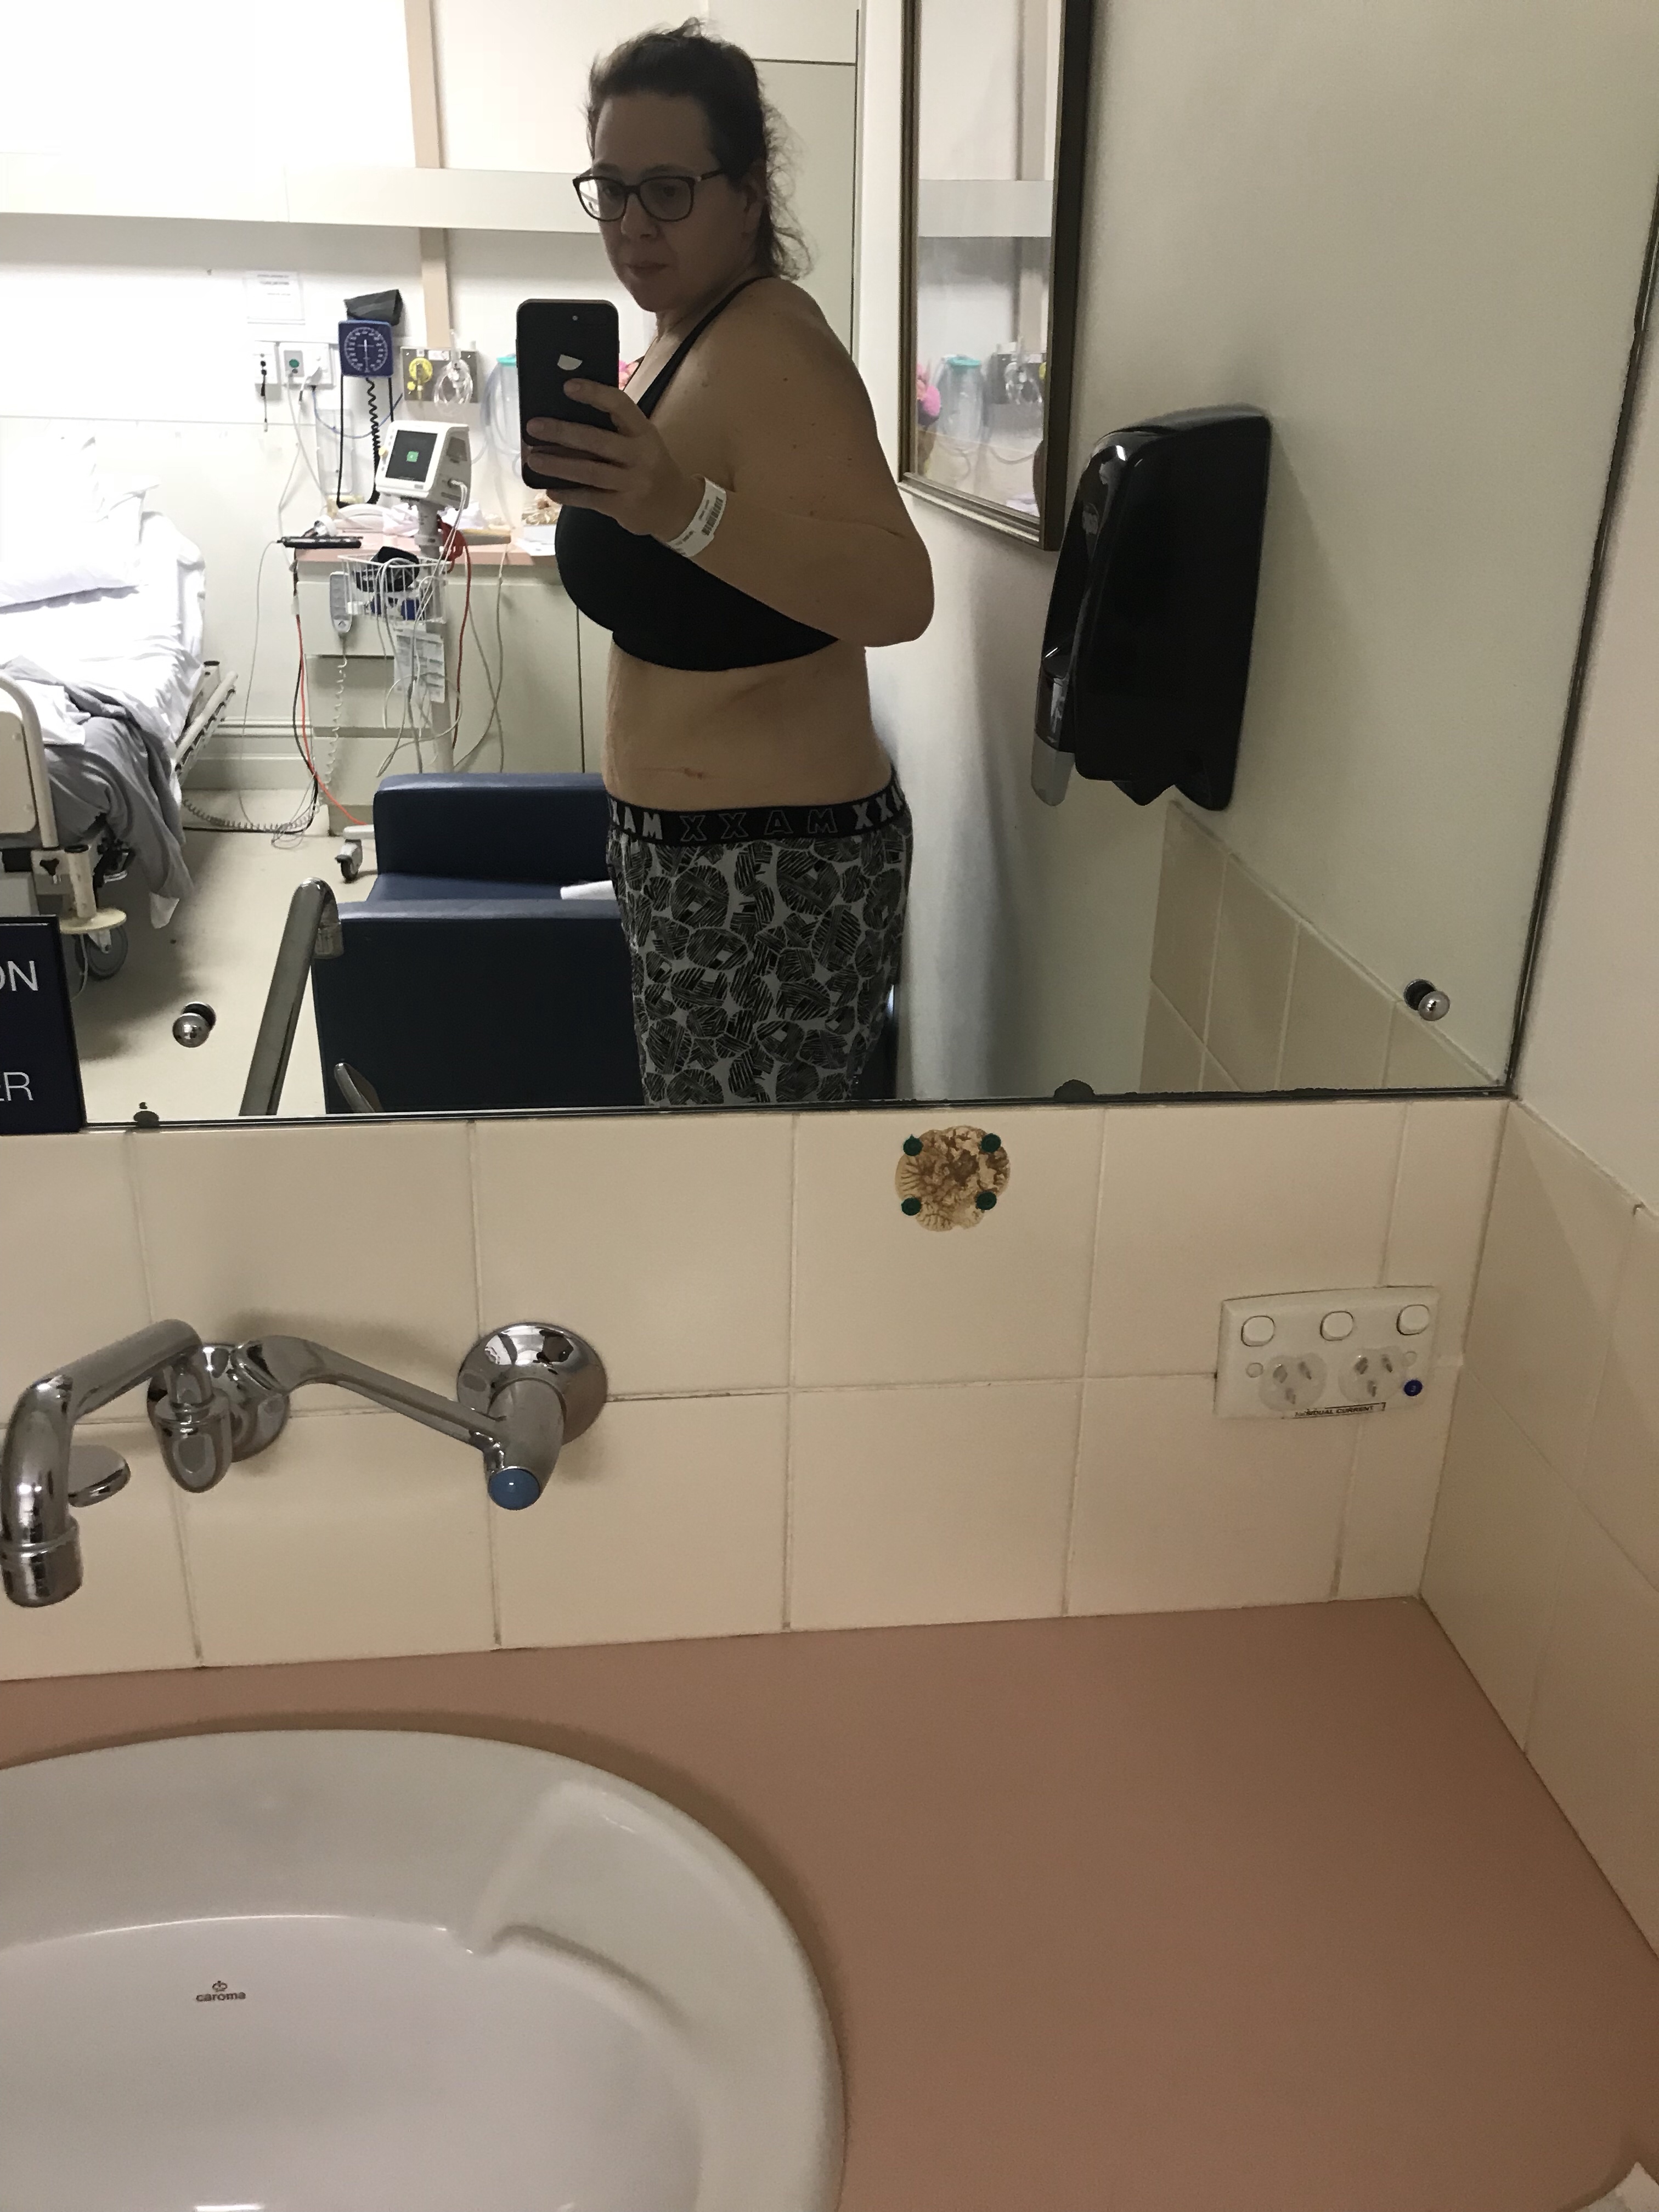
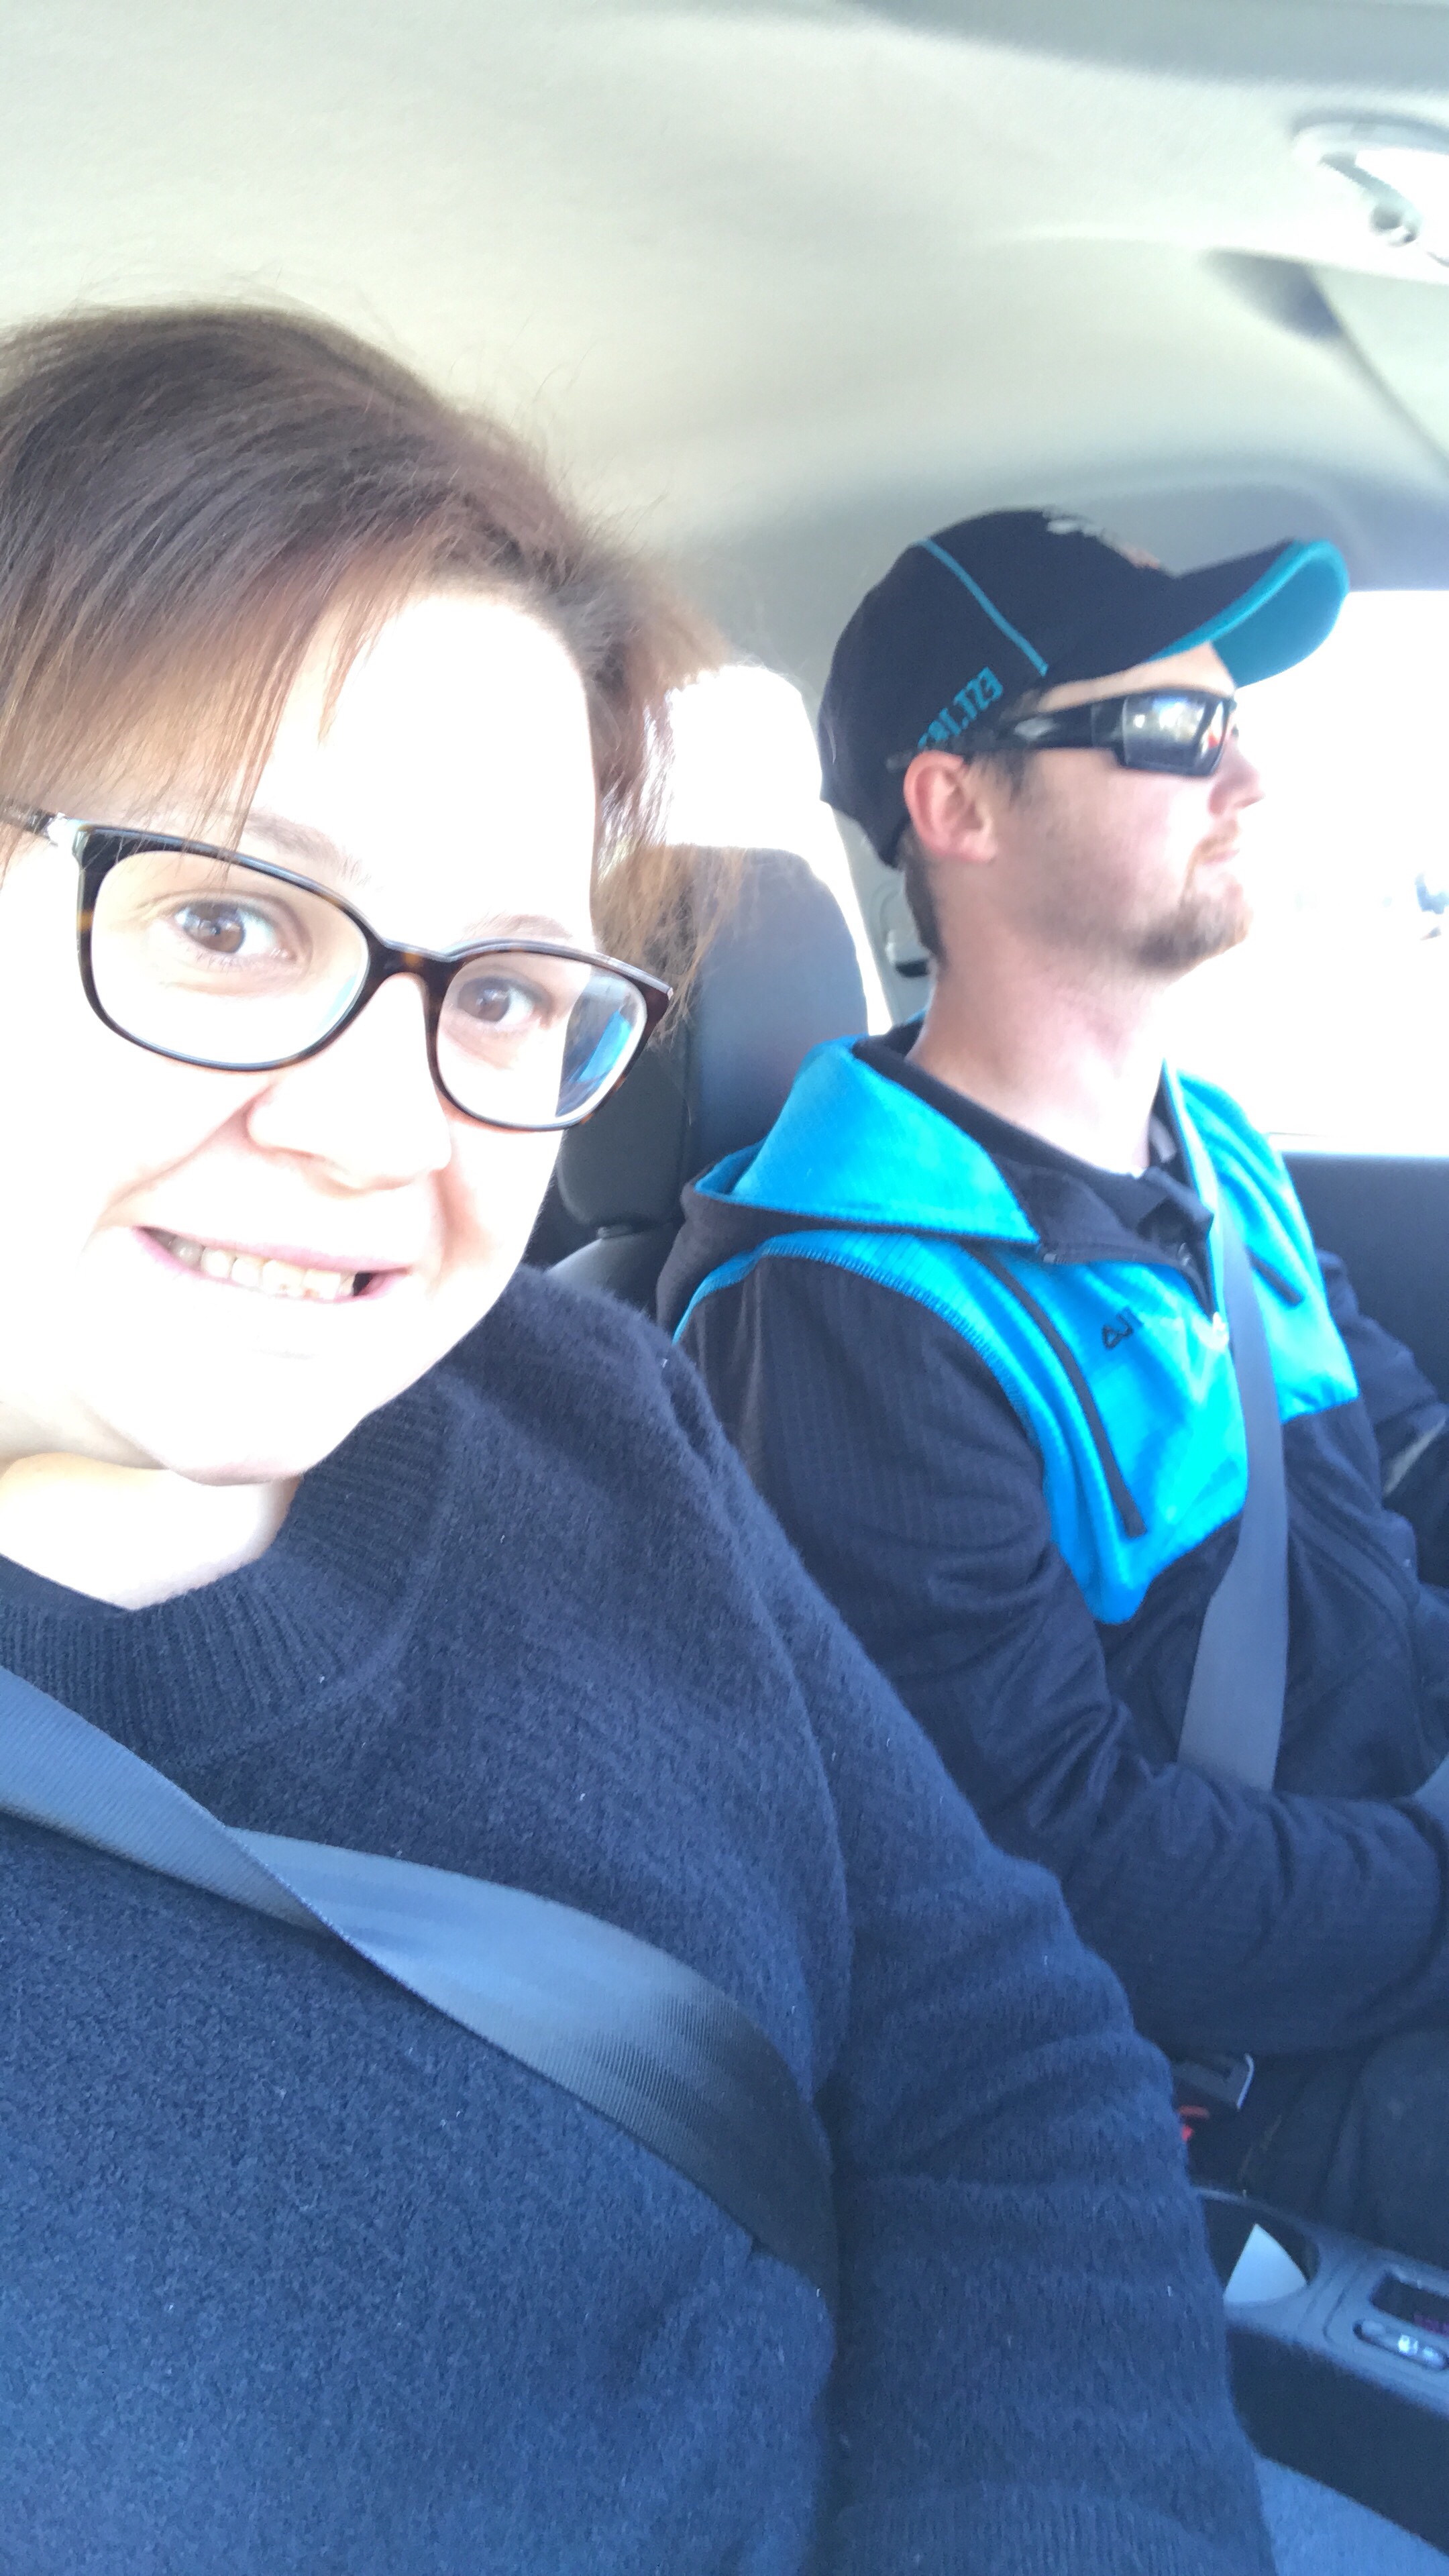
    Day 5: I get to put on normal clothes

    And my chariot awaits!! Jamie is taking me home for the next stage of my recovery.

    And Bertha…..well she gets left behind. In the bin. Where she belongs!!


    WHMP: 26 July 2018

    It’s D-day!!

    I can honestly say the last 31 days have been amazing, challenging and rewarding all at the same time. I have committed to maintaining a high focus and high intensity to get me in the best possible place and ready for my apronectomy.

    I committed to 3 meals and 3 snacks a day incorporating fresh veggies into my day. A minimum of 1.8L of fluids a day. Throughout each week I wanted to do high intensity exercise of over 800 calories burnt in a workout at least 4 times a week but also listening to my body and allow my body to rest when I needed it.

    I did it. Most days I hit my targets with food and fluids, some days I didn’t. I absolutely smashed my exercise goals out of the park. I made wise and informed food choices throughout this period but also at times made some questionable choices and I did this completely guilt free.

    After only a small loss after the first week I decided not to weigh in for the remainder of the period and I have weighed in this morning.

    So over the last 31 days I am excited to have lost 3.1kg taking my grand total to 97.1kg

    I will be heading off to the hospital in the next 20 minutes. The million dollar question is how am I feeling and to be honest I am not really sure. I feel nervous. I feel excited. I feel impatient. I feel confused. I feel stressed. I feel relieved. I feel happy. I feel hungry….these are just a few things I’m feeling but most importantly I FEEL READY!

    To kill time this morning, I have packed my bags.

    I took my little guy to school.

    I have done a face mask.

    I’ve finished all the laundry and cleaned the house from top to bottom.

    Yup….I am ready!

    The time has come to say bye bye once and for all to Bertha

    https://c4kkitchen.com.au/wp-content/uploads/2018/07/img_0211.mov


    Keto Chocolate Fudge Cake

    Keto Chocolate Fudge Cake
    Makes: 24 bariatric portions

    • Ingredients:
      -300g 90% dark chocolate
      – 1/2 cup heavy cream
      – 175g unsalted butter
      – 1 teaspoon instant coffee
      – 6 eggs
      – 1/4 cup stevia (or low calorie sweetener of your choice)
      – 1 teaspoon vanilla extract
      – 1/4 cup coconut flour
    • Method:
      – Preheat the oven to 160 degrees Celsius and prepare a springform 20cm round cake tin by greasing and lining the base with baking paper.
      – Place the dark chocolate, cream and butter in a sauce and over a very low heat continually stir until the chocolate has nearly completely melted.
      – Remove from the heat and continue to stir until the chocolate has completely melted, set aside to cool slightly.
      – In a small mixing bowl add in the remaining ingredients and whisk with a fork until well combined.
      – Use a spatula to combine the two mixture together until just combined.
      – Pour into the prepared cake tin and bake for 30 minutes or until the cake is set and cooked through, for a more fudgey cake reduce the cooking time by 5 minutes.
      – Allow to cool in the cake for 10-15 minutes before transferring to a wire rack to cool completely.

    Nutritional Value per bariatric portion:
    – Calories: 160
    – Total fat: 14.6g
    – Total carbohydrates: 3g
    – Sugar: 1.5g
    – Protein: 3.2g

    • Recipe Notes:
      – Store in an air tight container to be used within 5 days
      – This recipe is freezer friendly, to be consumed within 6 months.
      – Delicious served cold as a cake or slightly warmed with a dollop of cream or some fresh berries.


    NutNana Bar

    NutNana Bar

    Makes: 20

    Ingredients:

    • 2 large bananas
    • 2 pears
    • 1/2 cup unsweetened apple purée
    • 4 tablespoons coconut oil
    • 1/3 cup milk
    • 2 eggs
    • 3 scoops (90g) vanilla protein powder
    • 1 & 1/2 cups rolled oats
    • 1 cup chopped mixed nuts
    • 2 tablespoons chia seeds
    • 1 & 1/2 teaspoons nutmeg

    Method:

    • Preheat the oven to 180 degrees Celsius and line a slice tray with baking paper and spray with cooking tray
    • Peel the bananas and roughly dice into even sized pieces.
    • Core and grate the pears.
    • Add in the eggs, coconut oil, milk and apple purée and mix until well combined
    • Add in the remaining ingredients and mix until just combined
    • Pour into the prepared slice tin evenly pressing down
    • Bake for 30-35 minutes until golden and a cake skewer comes out clear
    • Allow to cool in the slice tin for 20 minutes before transferring to a wire rack to cool completely
    • Slice into even sized pieces with a bread knife

    Nutritional Value per portion:

    • Calories: 139
    • Total fats: 7.3g
    • Total carbohydrates: 12.6g
    • Sugars: 4.1g
    • Protein: 7.2g

    Recipe Notes:

    • Store in an airtight container in the fridge for a maximum of 5 days

    • This recipe is freezer friendly to be consumed within 6 months

    • Protein powder used in the recipe is Protein Supplies Australia WPI Fast Release protein powders

    • You can buy online from www.proteinsuppliesaustralia.com.au

    • Use the Discount code holly10 at checkout to get a 10% discount

    Disclaimer: C4K Kitchen does not hold any responsibility for the consumer using this recipe including the storage guidelines and time frames recommended in the recipe notes. The consumer holds all responsibilities to ensure that food hygiene and safety standards are adhered to.